


While Jupyter Notebooks allow us to move pretty fast and are well known for their exceptional interactivity, iteration speed can slow down when trying to scale our experiments, as this often requires setting up cloud infrastructure.
When data scientists are training locally on small datasets, they have to deal with dependency installation, parameterization, and provisioning infrastructure. Once they want to train the model for production on a full load dataset, the complexity increases, and a new configuration must be considered.
The traditional approach of manually configuring infrastructure to run successful experiments becomes a time-consuming task and complicates managing the entire compute environment.
To answer these needs, we present our new Ploomber Cloud GUI, a web application for running notebooks in the cloud: simply drop a notebook and run it. This GUI is built on top of Ploomber Cloud API and lets you choose a notebook, edit parameters, and run them without any installation or extra code. You can even request more resources, such as the number of CPUs, memory, and GPU. A simple dashboard provides quick access to the status, logs, and results after running the notebook.
First, sign up here!
For this example, we will use a notebook that predicts penguins species and a .csv dataset.
Now, let’s upload this notebook by clicking “create pipeline” and choosing the upload option. Upload the notebook and click Next: Parameters and Dependencies (bottom-right button):
Then edit pipeline name, validate packages and select the parameters. Your notebook might contain parameters. For instance, you can train the same model with different hyperparameter values. If that’s the case, you can put all the values you
want to try and Ploomber will execute all experiments in parallel. Once ready, click Next: Map Paths to move on:
Ploomber automatically detects which files are being used by your notebook. Since these files can be either inputs or outputs, you have to specify what they are.
After the execution is complete, output files will be available for download. When ready, click Next: Review:
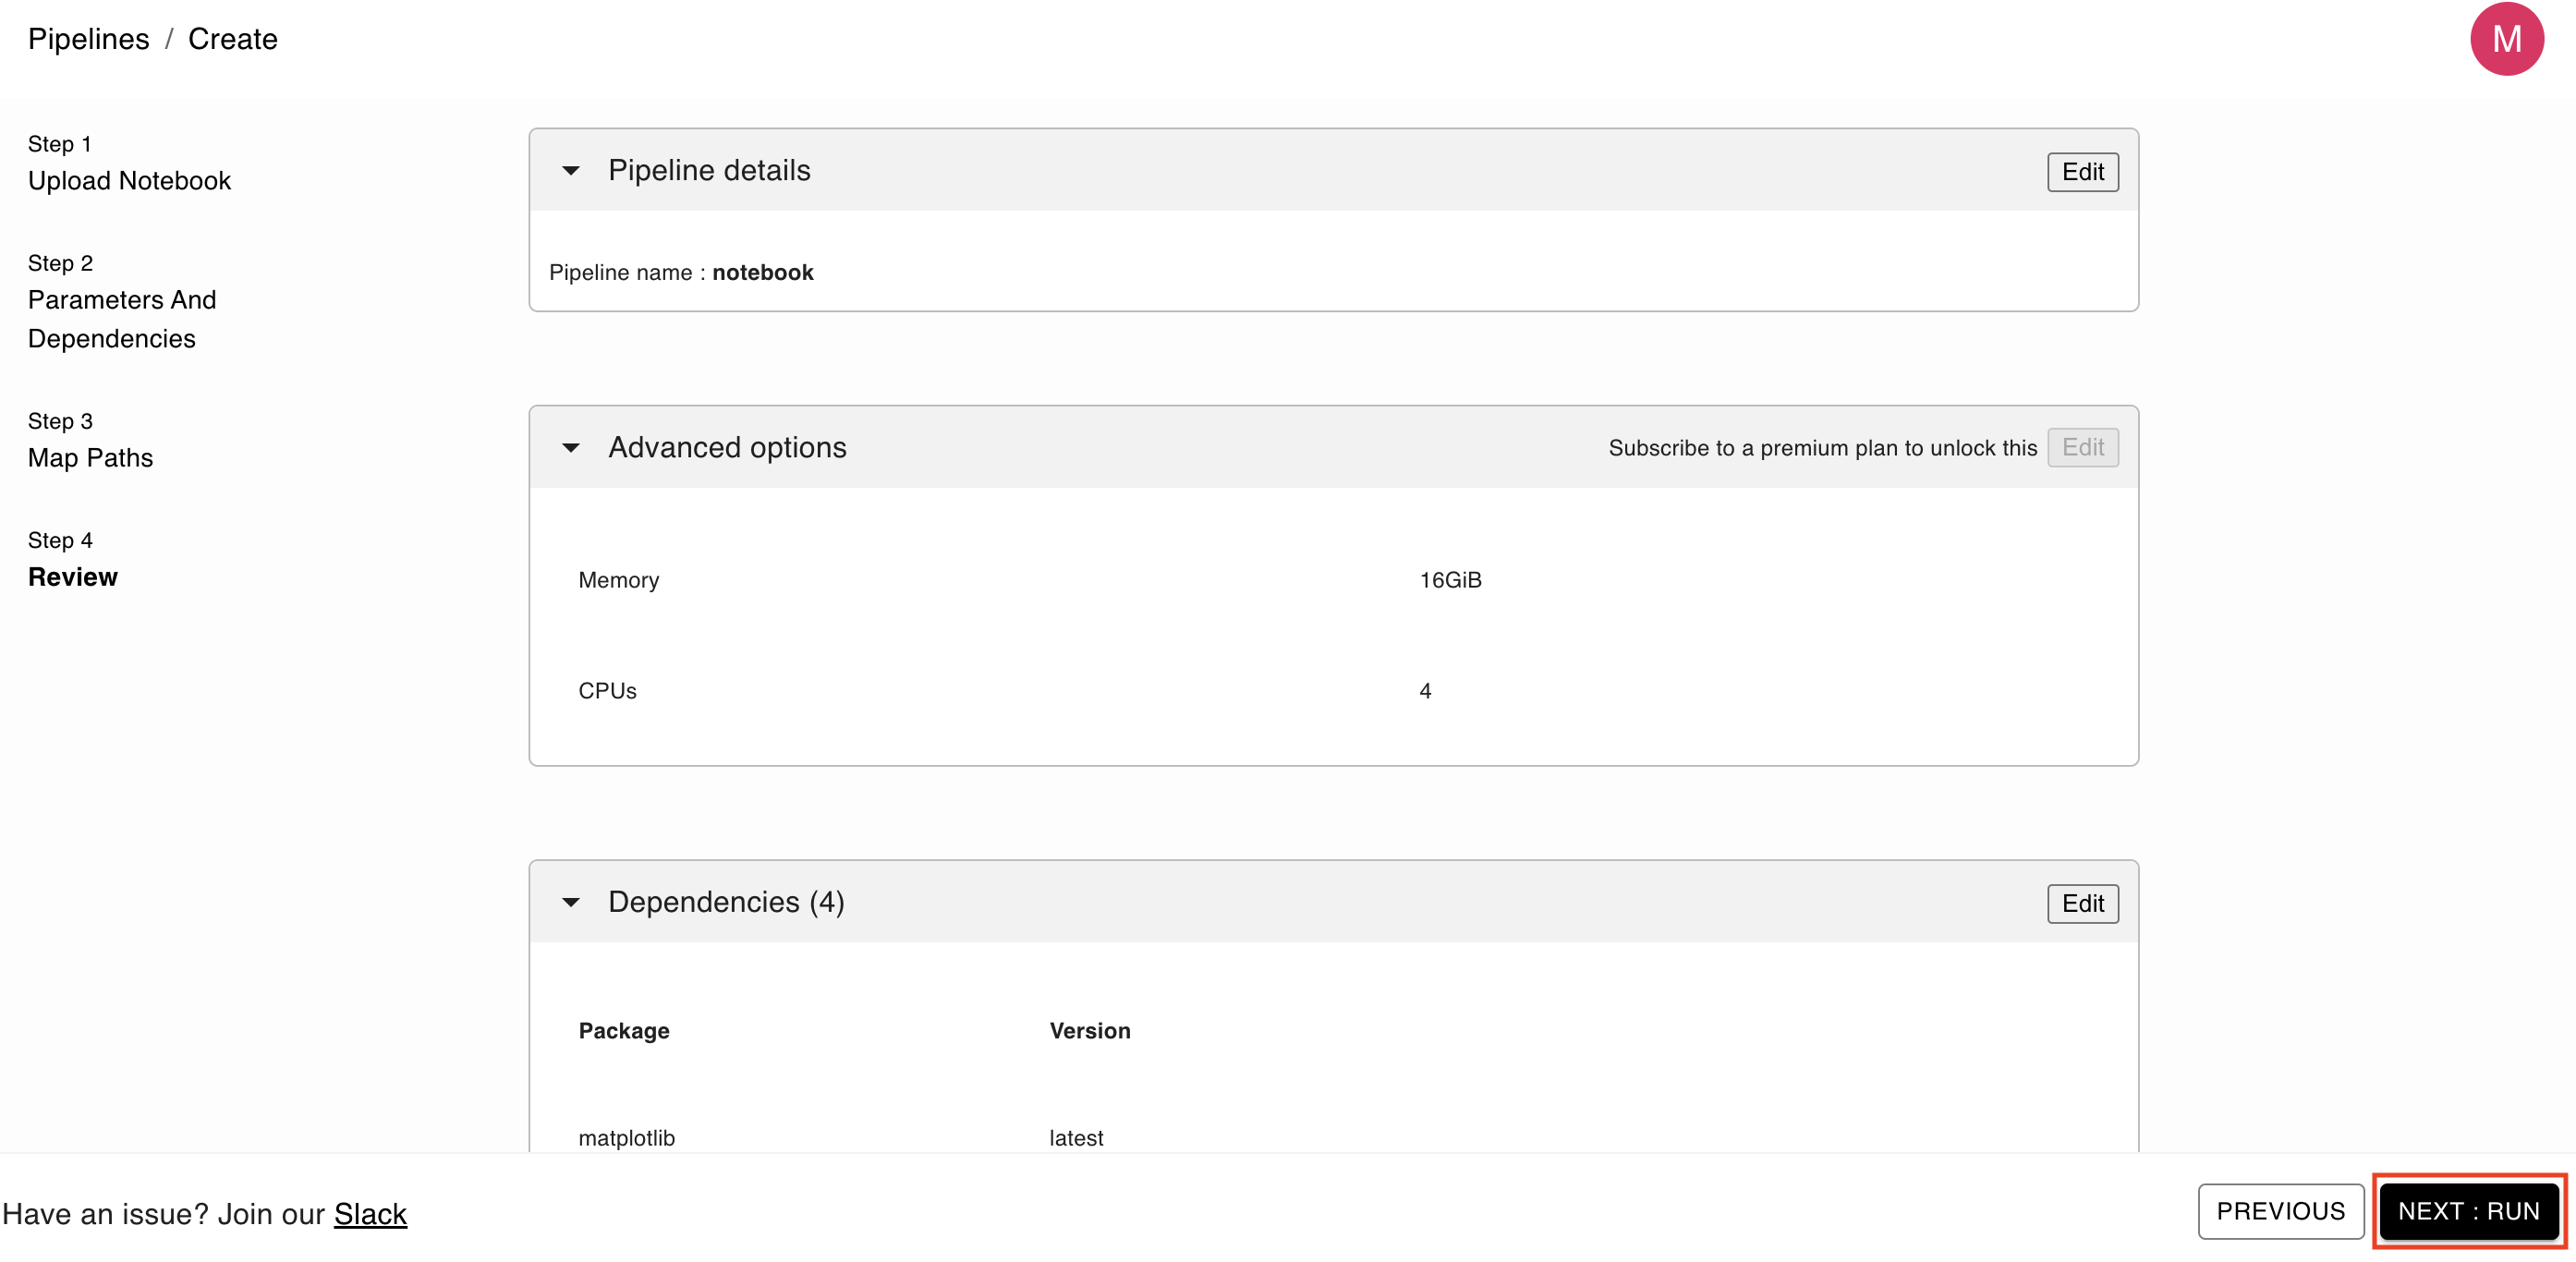
The last section is the review section where you can view all the different sections of your notebook configurations. In this page, you can change the memory and cpu allocated to the notebook you’re running (in case you need more compute resources or GPUs). If everything looks fine, complete the process by clicking Next: Run:
After executing the pipeline you’ll be redirected to a pipeline page where you can see its status, watch the logs from the run and download the results. It may take a few minutes for the execution to complete and your results to be prepared:
Once it’s ready, you can download the output files and continue working with it locally, like you normally would. You can also save the outputs into a notebook, which makes it easier to debug, in case anything breaks.
This section will cover a few frequently asked questions we thought about, if you have a question and it doesn’t appear here, please let us know:
Q: Is there a time limit of storage for users to download their results (for instance if they’re using the free tier)?
A: At the moment, the results are stored forever, so users, premium or free-tier, can get the results locally.
Q: Do I need to refresh after a while to see my logs/outputs?
A: No, the page is refreshing automatically, as soon as the logs and output are available, you will be able to see them on your GUI.
Q: Does everybody always see the sample pipelines at the front page (pipelines page, with status: finished, finished) from the first step?
A: Each user will see their own pipelines in the pipelines page, these are unique and reflect your previous executions.
Q: Are we able to remove/delete runs from history?
A: At the moment no, the logs are automatically cleaned after a week and the results are stored indefinitely. If there’s a need to delete historical runs, please reach out to us on the community Slack channel.
Q: Where can I see my tier?
A: There is a plan to expand the GUI and have a billing section. All users start on our free-tier plan. If you have a doubt/concern please contact us.
This tool can scale automatically without any infrastructure configurations - no more spinning up clusters! Our users can now run tasks with large datasets and very robust models (for instance for deep learning or NLP) on CPUs or GPUs.
No matter what size dataset you will use for training or what kind of model you are building, we are excited to share this first release and invite you to run your own notebook on the cloud!
Please share your feedback with us on GitHub or Slack
To learn more, check out the documentation.
Seamless deployment for data scientists and developers. Ploomber handles infrastructure so you focus on building. Secure and scalable—from personal projects to enterprise apps. Support for Streamlit, Dash, Docker, and AI-powered applications. Because life's too short for deployment headaches.

