


Dash is a great low-code framework for building data apps in Python. It provides simple and efficient tools to rapidly build data-focused web applications and dashboards. One feature it doesn’t provide natively is authentication, which is important if you’ve deployed an application and only want to provide access to specific individuals. In this article, we’ll go over a few methods of adding an authentication layer to your Dash app.
Adding authentication to your Dash app is very simple with Ploomber Cloud. To start, you need to create an account and follow the instructions to deploy a Dash app.
Create a zip file with the following files:
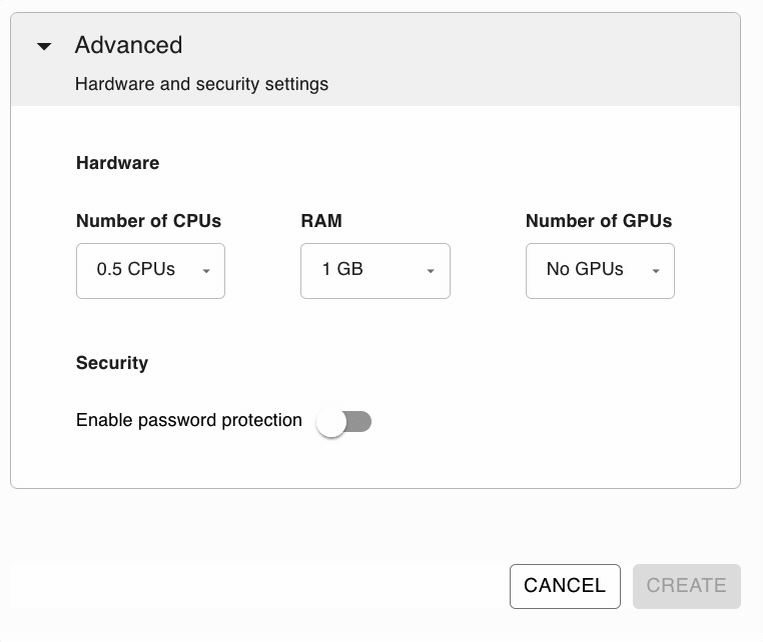
app.pyrequirements.txtNow open Ploomber Cloud, create a new application, and add your zip file. Under the deployment options, under Advanced -> Security, click Enable password protection. Then, set any username and password you like, and click Deploy! Be sure to note down the username and password you entered in case you can’t remember it later.
Note: Password protection is currently only available for Pro users, but you can start a 10 day free trial here.
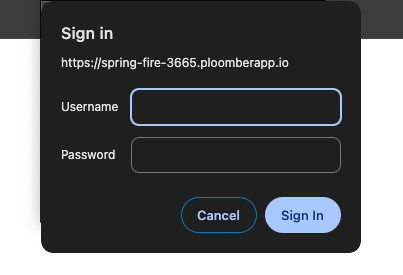
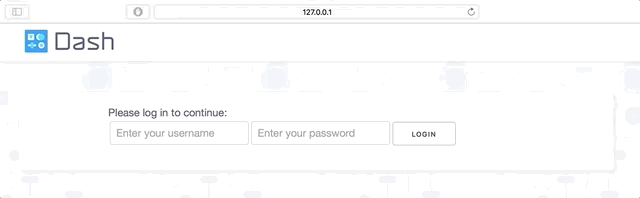
Once your app is deployed, navigate to the page where you’ll need to enter your username and password to access the app. In Chrome, it looks like this:
There you have it! You’ve added authentication to your app in minutes with no extra code needed.
Note that Ploomber Cloud’s password protection works for a single set of credentials. However, if you need a more sophisticated way of securing your application you can check out Auth0. Auth0 is a platform that allows developers to implement secure login processes and control access to applications.
Here are some advantages of using auth0:
Ploomber Cloud enables you to easily secure your Dash applications using auth0.
Let’s look at a sample application in which we read the HTTP header X-Auth-Name from the current session.
@app.callback(Output("greeting", "children"), Input("dummy", "children"))
def display_user(_):
    user = request.headers.get('X-Auth-Name', 'Anonymous')
    return f"Welcome {user}!"
We also define a logout link:
html.Div(id="logout-link", children=[
        dcc.Markdown(id="logout-msg"),
        dcc.Link("Logout", href="/logout")
To deploy this application on Ploomber Cloud, you first need to install the CLI:
pip install ploomber-cloud
Then, you can run the below command to download the sample application that demonstrates auth0 integration:
ploomber-cloud examples dash/app-with-auth0
cd into the app-with-auth0 directory and initialize the project. This should create a ploomber-cloud.json file with the project id information.
ploomber-cloud init
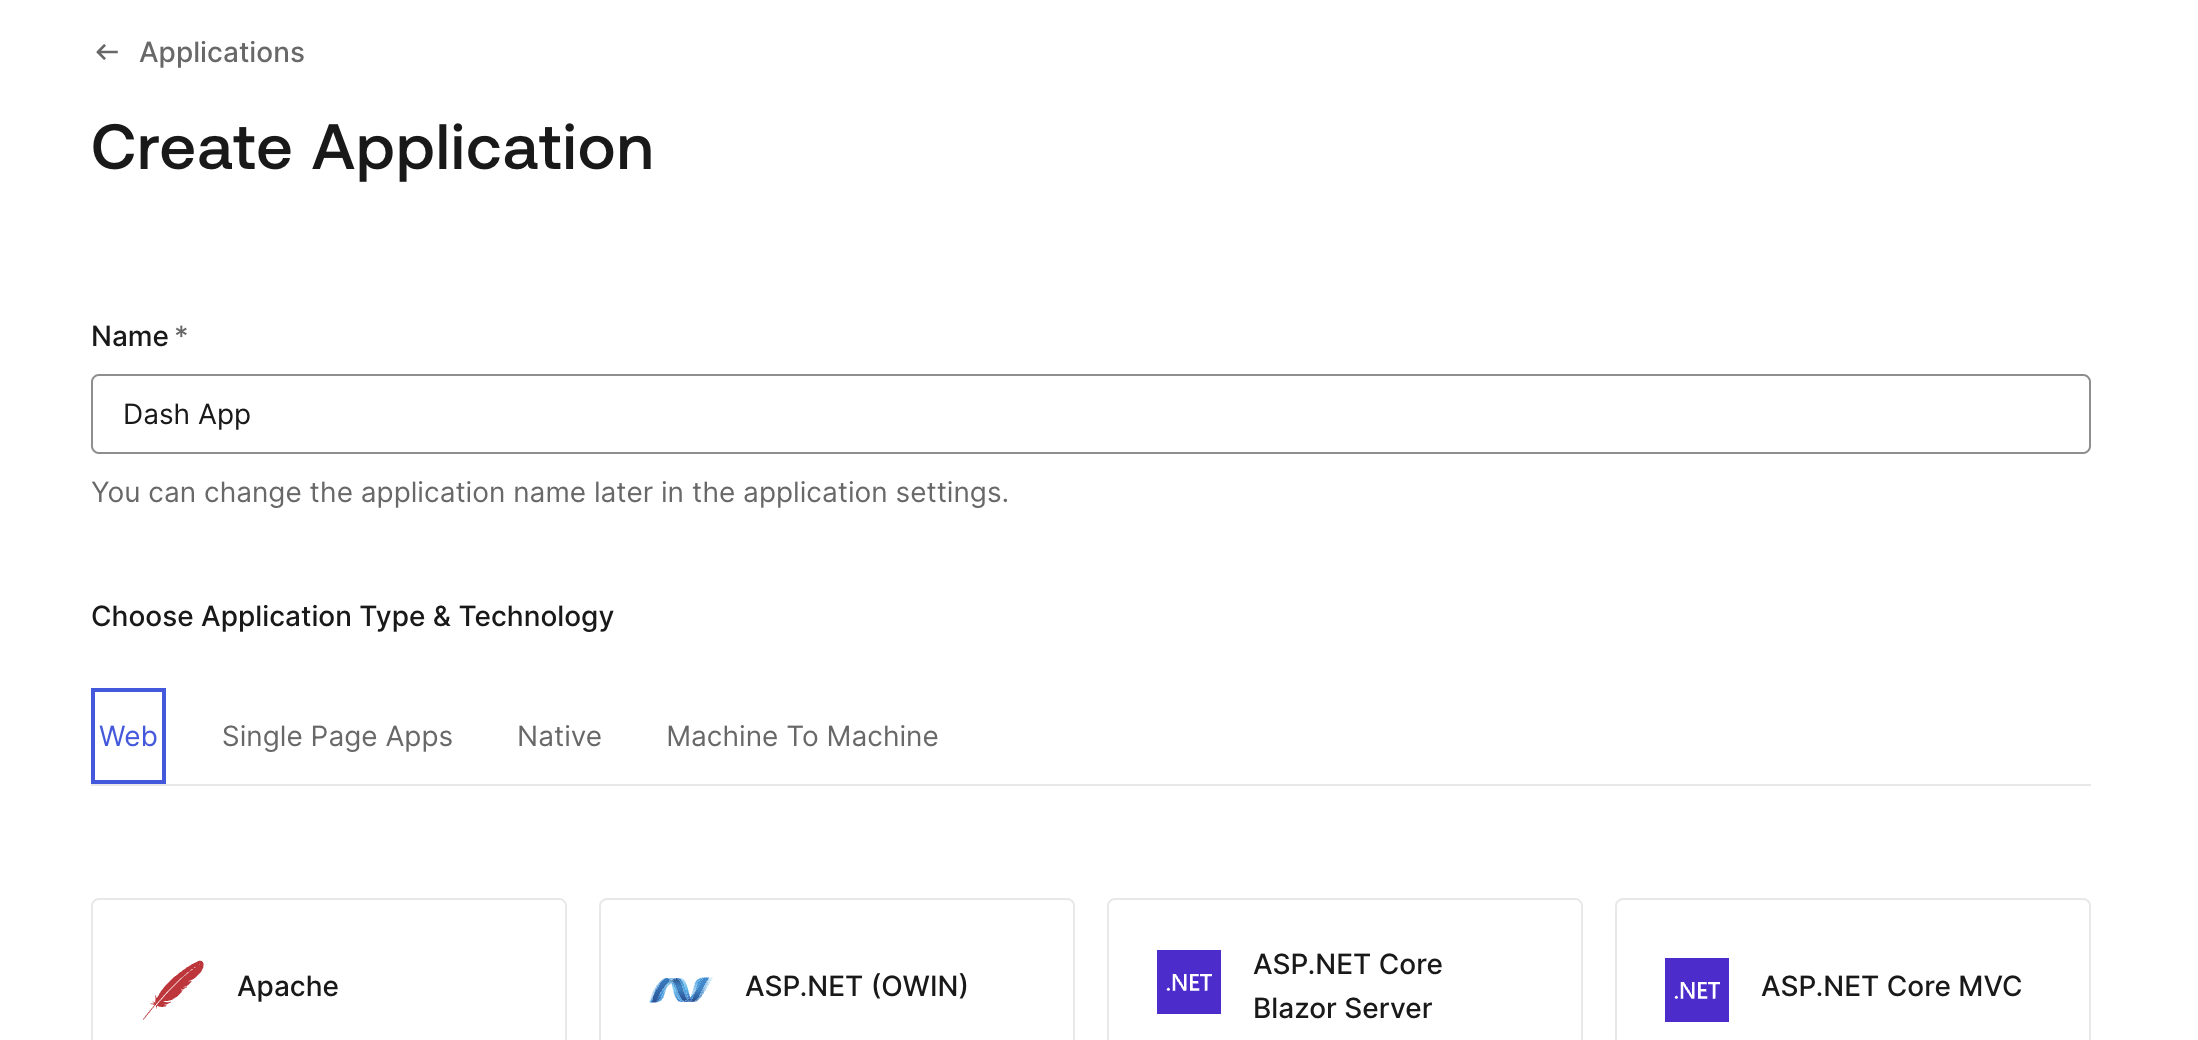
To set up auth0 authentication for the project we need to create a new application in the Auth0 account:
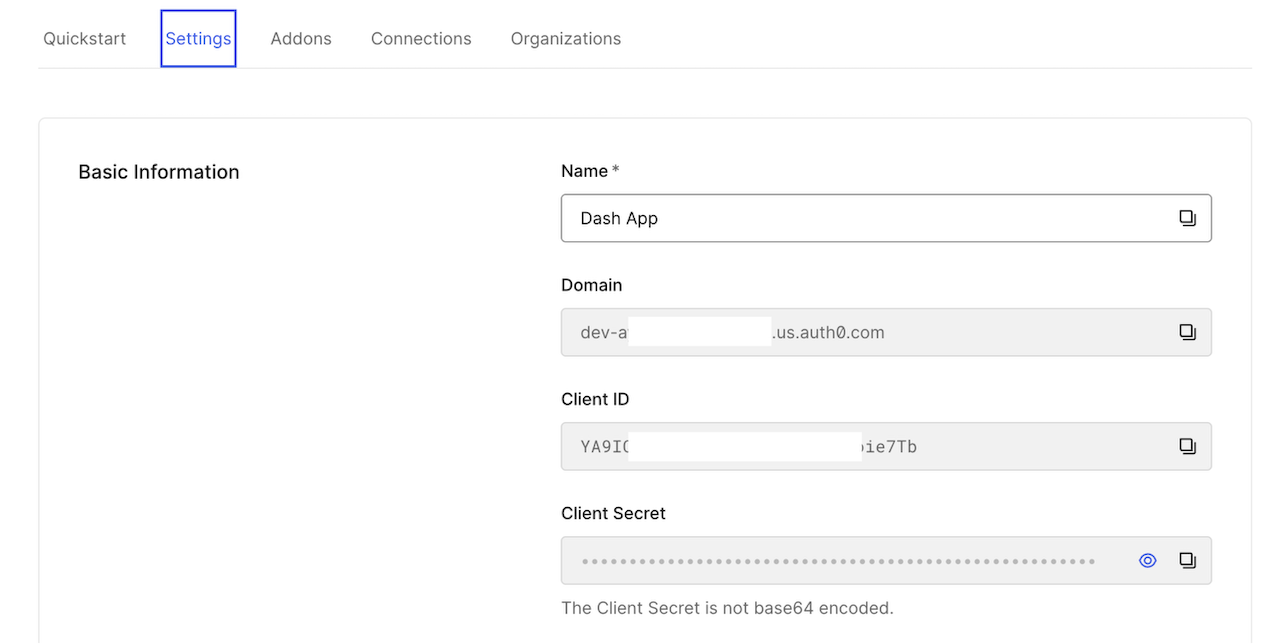
Once done, note down the values of Client ID, Client Secret and Domain in the application Settings page.
Next, run ploomber-cloud templates auth0 in the project root folder. You need to set Client ID, Client Secret and Domain as the AUTH_CLIENT_ID, AUTH_CLIENT_SECRET and AUTH_ISSUER_BASE_URL respectively:
% ploomber-cloud templates auth0
Enter the value for AUTH_CLIENT_ID: YA9I**********************ie7TB
Enter the value for AUTH_CLIENT_SECRET: IdiW3KmjVR7SUjk********************************7WbyLC0zCcvE9XCj
Enter the value for AUTH_ISSUER_BASE_URL: dev-****************.us.auth0.com
Successfully configured auth0. To deploy, run 'ploomber-cloud deploy'
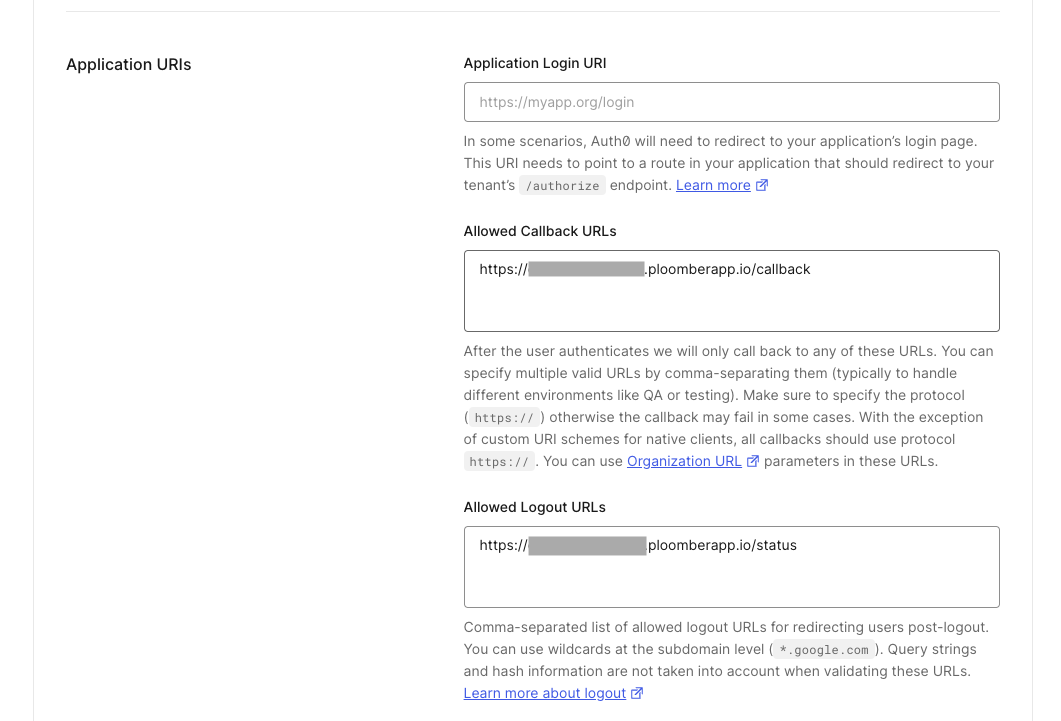
Once the auth0 setup is done you should find a .env file with the credentials entered in the previous step. To deploy the project run ploomber-cloud deploy. The application ID will be of the format https://application-name-1999.ploomber.app. Copy this URL and set callback URLs as follows:
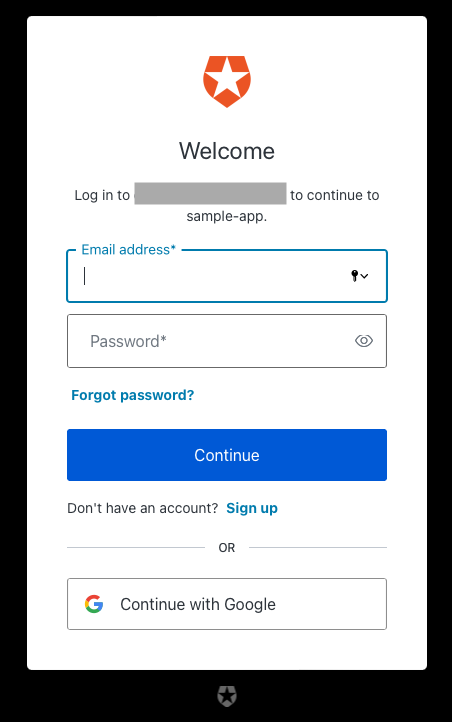
Once the application deployment is complete you can click on the VIEW APPLICATION button and you should see the login page:
To learn more about auth0 integration check out the documentation.
Dash-auth is the standard package for Dash authentication and is developed by the original Dash creators, Plotly. With a few additions to your code, it can provide HTTP Basic Auth to your application.
Start by installing the package:
pip install dash==2.16.1
pip install dash-auth==2.0.0
Now, simply add this snippet to your code for basic authentication:
from dash import Dash
from dash_auth import BasicAuth

app = Dash(__name__)
USER_PWD = {
    "username": "password",
    "user2": "useSomethingMoreSecurePlease",
}
BasicAuth(app, USER_PWD)
This example stores the usernames and passwords in a simple dictionary, which you can imagine wouldn’t be ideal for security.
Since you have to manage the passwords yourself, the best option might be storing the hashed passwords in a database and utilizing an authentication function to hash the password and then verify it is present in the database:
from dash import Dash
from dash_auth import BasicAuth

def authorization_function(username, password):
    # Hash the password here
    # and check if it's in the database
    # if so, return True.
    return True


app = Dash(__name__)
BasicAuth(app, auth_func = authorization_function)
That’s a basic walkthrough. The package also provides features like public routes and user groups, feel free to check them out on your own! Here’s a final summary of the pros and cons of dash-auth:
Pros:
Cons:
Dash enterprise auth is an authentication and authorization layer built-in to Plotly’s commercial product, Dash Enterprise. If your company happens to use Dash enterprise, then you can take advantage of its authentication offerings. Per the documentation:
This authentication middleware connects to your organization’s identity provider, allows your end users to log in with SSO, verifies if the user has permission to view the app, and then passes along user information like their username or group.
To use it, make sure you already have an application deployed on Dash Enterprise. Then add dash-enterprise-libraries (Dash Enterprise >= 5.2) or dash-enterprise-auth (Dash Enterprise < 5.2) to your requirements.txt file.
The package provides a few features. It allows you to get information about your app viewer with the get_username and get_user_data methods. You can add a logout button with the create_logout_button method. Here’s an example app using these methods:
from dash import Dash, dcc, html, Input, Output, callback
import dash_enterprise_auth as auth

external_stylesheets = ['https://codepen.io/chriddyp/pen/bWLwgP.css']

app = Dash(__name__, external_stylesheets=external_stylesheets)

server = app.server  # Expose the server variable for deployments

# Standard Dash app code below
app.layout = html.Div(className='container', children=[

    html.Div([
        html.H2('Sample App', id='header-title', className='ten columns'),
        html.Div(auth.create_logout_button(), className='two columns', style={'marginTop': 30})
    ]),
    html.Div(id='dummy-input', style={'display': 'none'}),

    html.Div([
        html.Div(
            className='four columns',
            children=[
                dcc.Dropdown(['LA', 'NYC', 'MTL'], 'LA', id='dropdown')
        ]),
        html.Div(
            className='eight columns',
            children=[
                dcc.Graph(id='graph')
            ])
    ])
])

@callback(Output('header-title','children'), Input('dummy-input', 'children'))
def update_title(_):

    # print user data to the logs
    print(auth.get_user_data())

    # update header with username
    return 'Hello {}'.format(auth.get_username())

@callback(Output('graph', 'figure'),
              Input('dropdown', 'value'))
def update_graph(value):
    return {
        'data': [{
            'x': [1, 2, 3, 4, 5, 6],
            'y': [3, 1, 2, 3, 5, 6]
        }],
        'layout': {
            'title': value,
            'margin': {
                'l': 60,
                'r': 10,
                't': 40,
                'b': 60
            }
        }
    }

if __name__ == '__main__':
    app.run(debug=True)
For more info on Dash Enterprise, see the docs. As usual, a summary of the pros and cons:
Pros:
Cons:
Dash-flask-login, created by Rafael Miquelino, is an example Flask authentication layer on top of your Dash application.
Note: This repo is no longer maintained so some parts may be outdated.
Pay special attention to these files:
app.py: the main application codeserver.py: user managementviews/: login/logout pages which are routed to from app.pyadd_remove_users.ipynb: walkthrough of adding and removing usersThe README.md doesn’t provide succinct instructions to incorporate these modules into your code, so it will take some tinkering to duplicate this example in your own app. However, if you’re already comfortable with Flask and looking for a more extensive authentication system, this could be a great example to base your application structure on.
Pros:
Cons:
That’s it! In this article we compared methods of adding authentication to your Dash app:
dash-auth and dash-enterprise-auth are both great options created by the original Dash developers, but require adding code to your application. dash-flask-login provides an extensive example with incorporates Flask. Ploomber Cloud, however, secures and deploys your app in one step, with no additional code required. The username and password allow you to share your app to the right people (and only the right people) with minimal hassle.
Seamless deployment for data scientists and developers. Ploomber handles infrastructure so you focus on building. Secure and scalable—from personal projects to enterprise apps. Support for Streamlit, Dash, Docker, and AI-powered applications. Because life's too short for deployment headaches.

