Introduction
FastHTML is a new web framework for building scalable web applications in pure Python. It is designed to be powerful, fast, and lightweight to enhance the Python web building experience. FastHTML intends to abstract away many complex frontend development concepts, while still offering a high level of control over the design of the web application.
With FastHTML joining the diverse Python web application development toolbox, it may be difficult to choose what framework to learn and use, especially if you are just starting out. Is FastHTML worth learning over Flask or Django? If we’re looking to make a data-centric app, is FastHTML a competitive option over frameworks like Streamlit and Plotly/Dash?
In this blog post, we’ll attempt to answer the question above by comparing Streamlit, one of the most popular open-source Python frameworks for developing data web applications to FastHTML. We will be comparing and evaluating Streamlit and FastHTML on various factors such as ease of use, extensibility (how customizable is it?), performance, and community & development activity. We will keep in mind that Streamlit is for data-centric web apps whereas FastHTML is a end-to-end framework for web development. Streamlit has been around for a while whereas FastHTML was released very recently.
We hope to provide some pros and cons of each framework and give you a good idea of which framework you should use for your needs. Our TLDR recommendation is that if you are looking to build a highly customizable web application (not inherently data-related) with a Python backend, FastHTML is worth the investment to learn. If you are looking to build a prototype or data visualization tool for data science and machine learning purposes, Streamlit would be a much better option.
Ease of Use
The first criteria that we will be evaluating is how easy each framework is to set up and use. To do this, we will be working through the getting started tutorials available here:
We will be summarizing the main steps to make an application and the core components of each framework. Feel free to follow along!
FastHTML
We can install FastHTML by running pip install python-fasthtml in our command line.
After installing FastHTML, we can make a minimalistic app shown below. This creates a webpage that just displays Hello World!. Assuming the code is in a file called app.py, you can run the app by executing python app.py, which runs the app on http://localhost:5001 by default.
from fasthtml.common import *

app,rt = fast_app()

@rt('/')
def get():
  return Div(P('Hello World!'))

serve()
On the getting started page, there is a YouTube video that explains how FastHTML works at a high level and walks through the creation of a basic todo list app. The video talks about various web development concepts such as HTTP requests, using developer tools, and routing endpoints.
The getting started page also links to an advanced FastHTML app on their GitHub repository that walks through the creation of an idiomatic FastHTML app. There is an abundance of helpful inline comments that explains each component of the app. To understand how each component works, we recommend that you check out the foundations page.
We will walk through the FastHTML by Example page that describes some more FastHTML basics, tricks, and patterns with building FastHTML apps. To avoid users having to learn HTML, CSS and JS, FastHTML utilizes tools such as fastcore.xml to construct HTML elements, Pico CSS to make the base styles more elegant, and HTMX to abstract frontend concepts.
Here is a summary of the various sections of the FastHTML By Example document:
- Constructing HTML
Uses fastcore.xml to construct HTML. This means that we use methods such as Div() and P() in our Python script to make the corresponding HTML elements.
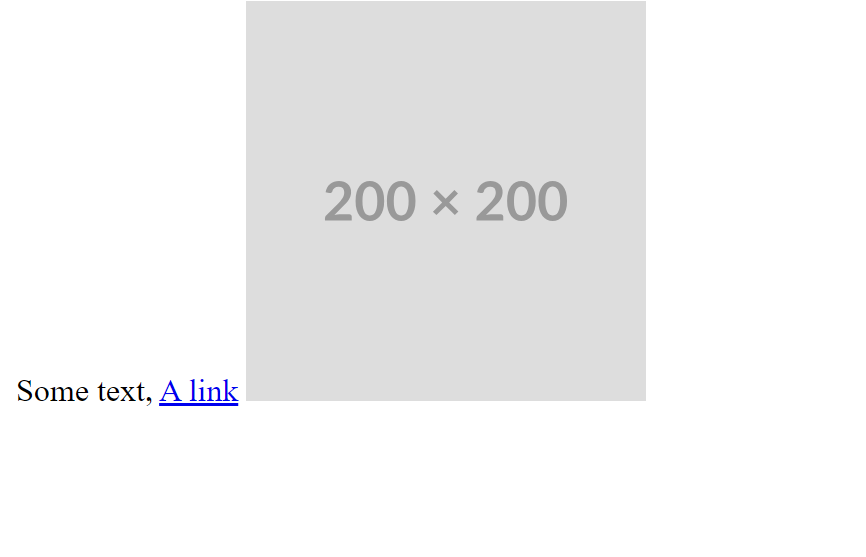
Div()creates a<div>element, which is a generic container used to group and structure content in HTML. It’s often used for layout purposes and to apply styles to a section of a webpage.P()creates a<p>element, which represents a paragraph of text in HTML. The following is FastHTML code and the HTML document produced by the FastHTML script.
from fasthtml.common import *
app = FastHTML()

@app.get("/")
def home():
    page = Html(
        Head(Title('Some page')),
        Body(Div('Some text, ', A('A link', href='https://example.com'), Img(src="https://placehold.co/200"), cls='myclass')))
    return page

serve()
<!doctype html></!doctype>

<html>
  <head>
    <title>Some page</title>
  </head>
  <body>
    <div class="myclass">
Some text,
      <a href="https://example.com">A link</a>
      <img src="https://placehold.co/200">
    </div>
  </body>
</html>
When running the app, the rendered page is exactly as what we’d expect.
- Defining Routes
Routes are an important part of FastHTML as it changes the behavior of the webpage depending on the HTTP request it receives and allows defining new endpoints/pages to be accessed in the web application. To do this, we use the @app.route decorator before any function we define. Recall that functions are how FastHTML knows what to execute and render at each endpoint. You can also use routes to pass data. For example, the following code uses routes to modify what is displayed based on the HTTP request and to define a new endpoint.
from fasthtml.common import *

app = FastHTML

@app.route("/", methods='get')
def home():
    return H1('Hello, World')

@app.route("/", methods=['post', 'put'])
def post_or_put():
    return "got a POST or PUT request"

@app.get("/greet/{nm}")
def greet(nm:str):
    return f"Good day to you, {nm}!"
serve()
- Styling Basics
To add custom CSS styling to your webpage, we can create a style element and add it to the header of our FastHTML document. The tutorial gives the following example:
from fasthtml.common import *
# App with custom styling to override the pico defaults
css = Style(':root { --pico-font-size: 100%; --pico-font-family: Pacifico, cursive;}')
app = FastHTML(hdrs=(picolink, css))

@app.route("/")
def get():
    return Title("Hello World"), Main(H1('Hello, World'), cls="container")

serve()
As you can see in the image below, we have modified the default CSS styling.

For reference, here is the original webpage without custom styling.

- HTMX
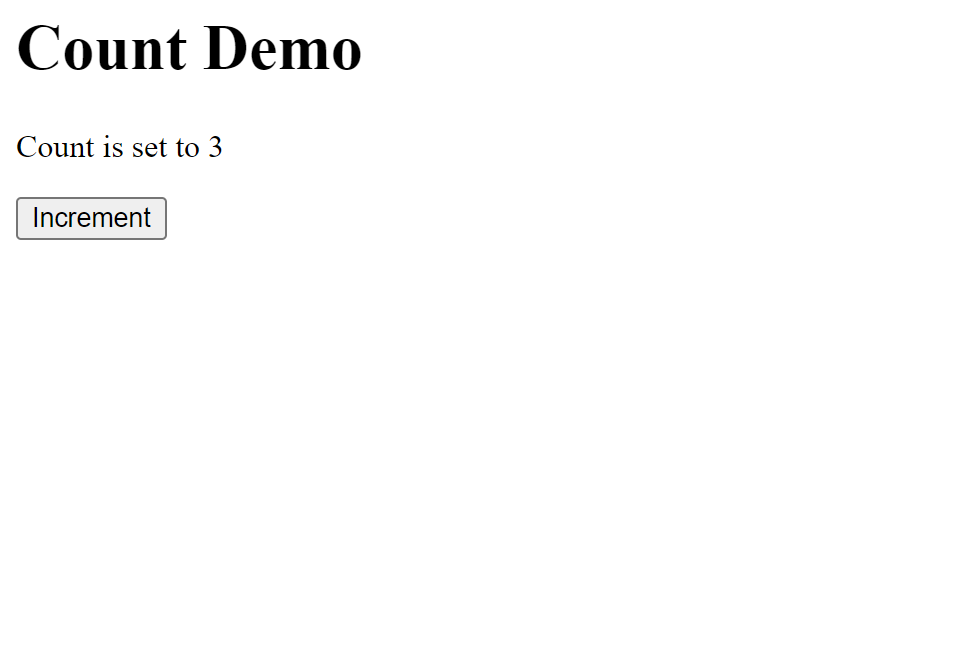
HTMX extends HTML’s capabilities by allowing more elements to trigger HTTP requests. It adds custom attributes to HTML tags, enabling any element to interact with the server, not just forms and links. This approach creates more dynamic web pages without complex JavaScript. The tutorial demonstrates this concept with a counter button example, showing how HTMX combines routing and custom attributes for interactive elements.
app = FastHTML()

count = 0

@app.get("/")
def home():
    return Title("Count Demo"), Main(
        H1("Count Demo"),
        P(f"Count is set to {count}", id="count"),
        Button("Increment", hx_post="/increment", hx_target="#count", hx_swap="innerHTML")
    )

@app.post("/increment")
def increment():
    print("incrementing")
    global count
    count += 1
    return f"Count is set to {count}"
serve()
After completing these tutorials, users would have a good overview of what FastHTML offers and be able to create web applications for their purposes. As you probably noticed, FastHTML is a very versatile tool that offers the full web development experience entirely in Python. However, to use FastHTML effectively, users must be prepared to look at HTMX, Pico CSS, and other documentation in addition to FastHTML. To get proficient at FastHTML, users should expect to spend several hours learning the framework. For more information on FastHTML, Check out this links for more information on FastHTML’s design philosophy.
Streamlit
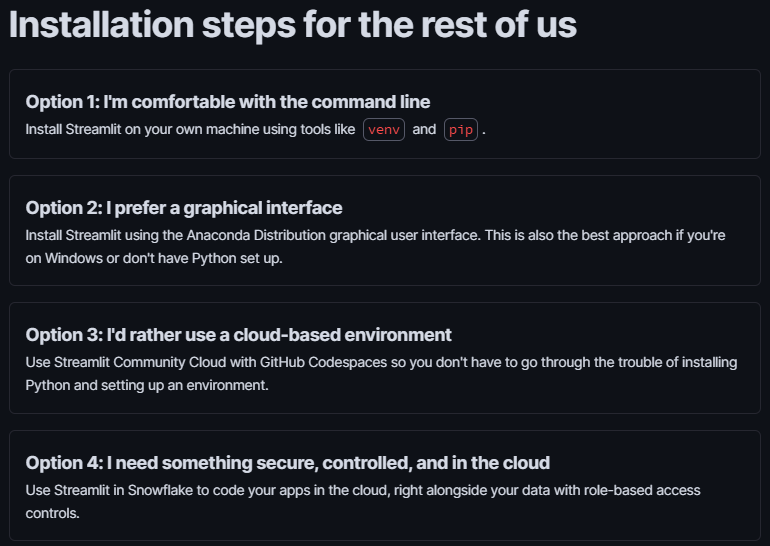
Similarly to FastHTML, we can install Streamlit by executing pip install streamlit. On the installation page, Streamlit offers four other options for installation depending on your needs. Option 1 uses the command line to install Streamlit on a virtual environment, option 2 uses the Anaconda Distribution graphic user interface (GUI), option 3 offers a cloud-based environment with Streamlit Community Cloud and GitHub Codespaces, and option 4 shows how to use Streamlit in Snowflake.
After the installation process, we start learning the fundamentals of Streamlit which include basic concepts, advanced concepts, and additional features. The basic concepts page introduces the Streamlit development flow, writing elements, creating basic plots and widgets, and how to customize your layout. To run a Streamlit app, we can execute streamlit run your_script.py [-- script args]. Streamlit has an option where any change in your_script.py reruns the script and webpage automatically. Also, any time a user interacts with a widget, the entire Python script is reran.
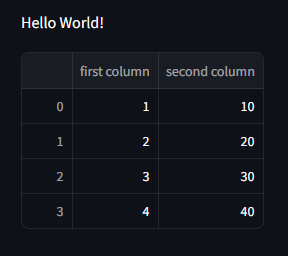
Streamlit supports “magic commands” which means that if there is a variable or literal value on its own line, Streamlit automatically displays in on the page. However, you can also use st.write or specialized functions such as st.table or st.line_chart to create elements on your webpage. Below is an example where we display a string and table.
import streamlit as st
import pandas as pd

st.write("Hello World!")

df = pd.DataFrame({
  'first column': [1, 2, 3, 4],
  'second column': [10, 20, 30, 40]
})

df
The app looks like this:
Widgets in Streamlit are treated like variables. For example, to make a selector widget, you can use varname = st.selectbox(). And to add the widgets to a sidebar, you can add .sidebar like in the following: st.sidebar.selectbox().
Next, there is a page on advanced Streamlit concepts such as caching, session states, and connections. Adding a @st.cache_data decorator to a function tells Streamlit to check if there is a previously saved result in the cache. So if the function has a long runtime, the app wouldn’t need to rerun this function with every user interaction, such as clicking a button. Session states are used when multiple users use the app concurrently and you want to make sure they see the same or different data. The st.connection method is used to establish a connection with a relational database such as PostgreSQL or SQLite.
After completing the fundamentals sections, we are directed to a summary page that gives a great overview of what we’ve learned so far. The next step in the tutorial involves creating a data app using the Uber Pickups dataset. We won’t describe the code in detail but it walks through the end to end process of fetching data, creating plots, and adding interactive widgets.
Streamlit is extremely easy to use and set up. In just a few minutes we can get an app up and running. Streamlit abstracts away many web development concepts, which make it a great tool for those who do not have web development experience. Lastly, Streamlit is great for interacting with data as it is compatible with various data visualization tools.
Summary
FastHTML has quite a steep learning curve, especially if you don’t have any frontend development experience. You have to get familiar with constructing HTML elements, HTMX/routing, and CSS if you want to add additional customization. If you do not have experience, it is a tool that you have to invest quite a lot of time into to learn before you can really build something with it. However, if you are familiar with web development and want to use a Python backend, FastHTML should be quite intuitive and definitely worth looking into. The only caveat is that the syntax, although intuitive, may require some time to get used to if you are already used to the HTML boilerplate.
Streamlit is much easier to use, as it abstracts away most frontend development concepts. As Streamlit pages have a default layout style, all the user needs to do is add the elements they want to display to the main page or sidebar. This is a very simple process as users can essentially place the elements in the Python script and have them show up in order on the web page. Users can expect to build an end-to-end data application in just a few hours. Streamlit is primarily a data visualization tool so it comes with a variety of methods for plotting, widgets, and displaying data. For people looking to build complex web pages in Python, you should learn FastHTML or some other Python framework.
Extensibility
Customizability is one of the most important factors when deciding what web framework to use. According to FastHTML, “FastHTML provides full access to HTTP, HTML, JS, and CSS, bringing the foundations of the web to you. There’s no limits to what you can build.” And this claim is quite accurate, essentially everything we can do with HTML/CSS/JS, we can do using FastHTML. We can insert custom CSS and even integrate JavaScript scripts into our web page, allowing us to customize and construct web elements as we would traditionally with HTML/CSS/JS. This means that we can create custom web layouts using flexbox, interactive components that accept user input, and even connect to APIs.
Streamlit offers a variety of customization options despite its focus on simplicity. You can design flexible layouts with methods such as st.columns() and st.container(), apply custom themes, and create a variety of widgets. For more advanced features, Streamlit allows for custom components through its st.components.v1 API, enabling custom elements. It also supports customizable data visualizations with libraries like Plotly, Altair, and Matplotlib. While Streamlit doesn’t provide the same level of control as FastHTML, it balances ease of use with enough flexibility to build rich, interactive applications tailored to your needs.
When contrasting FastHTML and Streamlit, it is clear that FastHTML is more customizable. This is expected as Streamlit is more focused on simplicity and abstraction while FastHTML gives developers flexibility to manipulate elements at any level. Despite this, there are many ways that users can customize Streamlit apps and make it more personalized. One feature that Streamlit has that FastHTML does not currently have, is a community cloud platform where users are able to upload and share their apps. Nevertheless, if you want endless customizability, FastHTML is the way to go.
Community & Development Activity
In this section, we will be comparing various factors relating to community and development activity. A large active community will ensure that, as a user, we will be able to find solutions to any problem that arises when using the framework. We also want the frameworks to be updated and constantly fixing bugs and adding new features to enhance user experience. Here, we have compiled a list of statistics/facts relating to each framework’s activity. Remember that FastHTML is a very new framework, whereas Streamlit has been around for a few years, so these will strongly favor Streamlit.
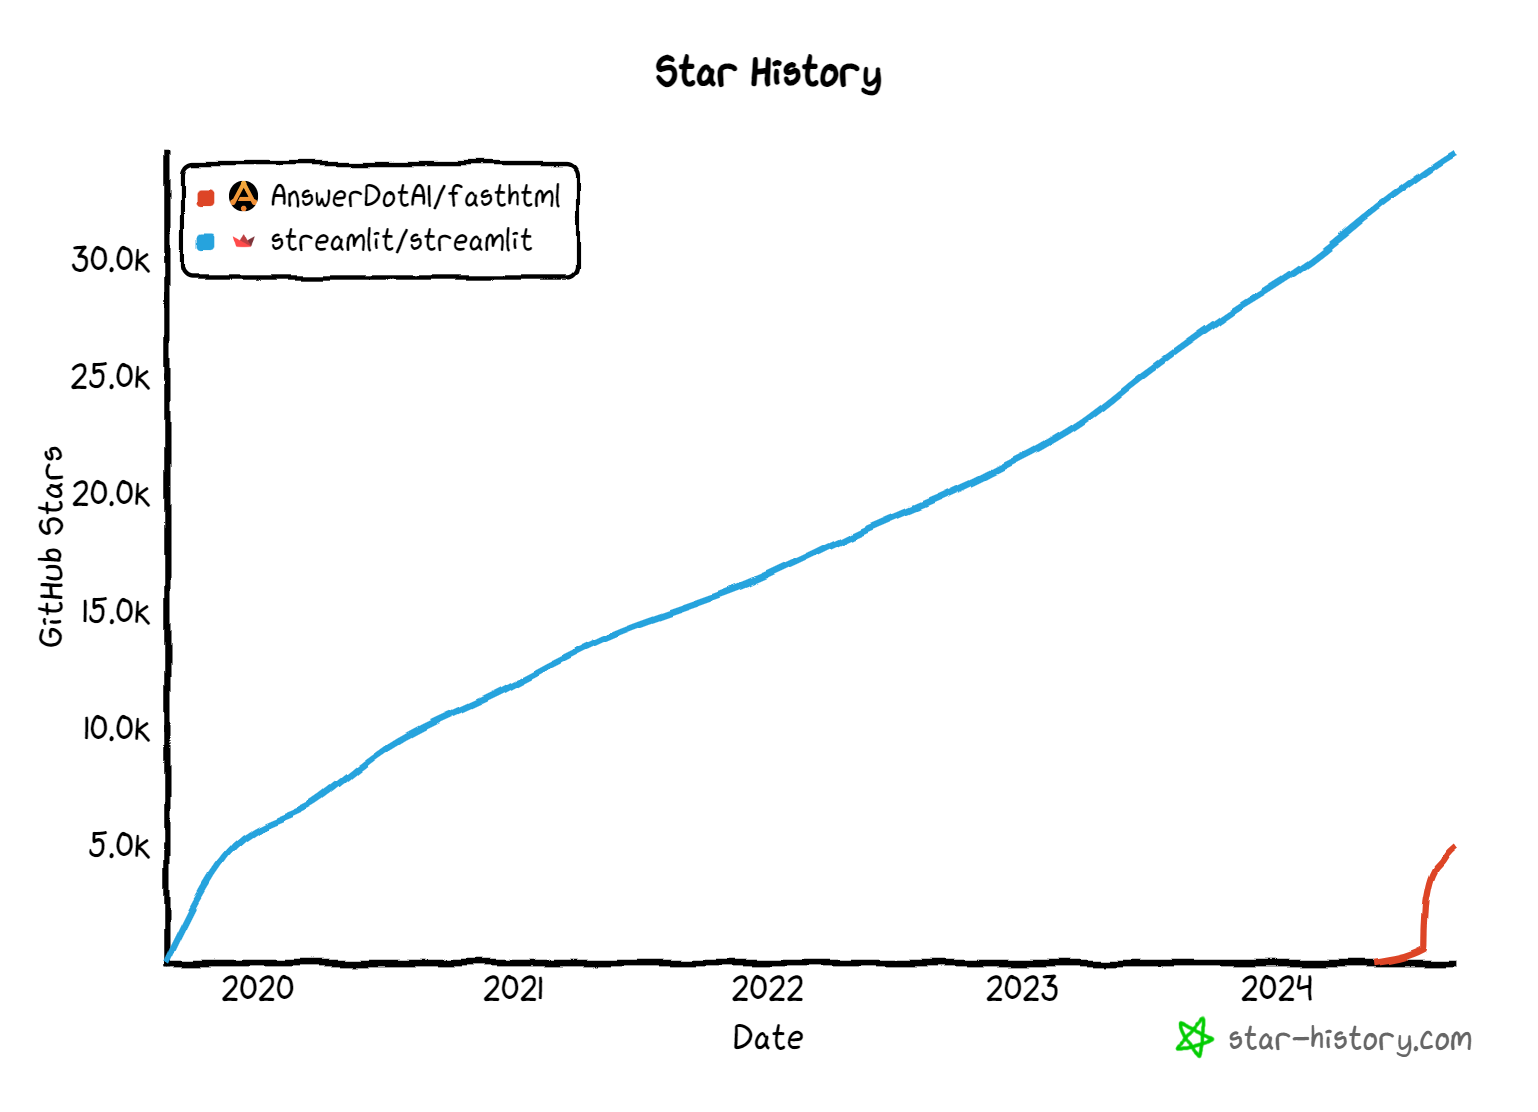
- Streamlit has over 34k stars on Github whereas FastHTML has ~5k. Here is a graph of the star trends.
- On Github, FastHTML is used in 295 dependent repos while Streamlit is used in 490k.
- FastHTML has 12603 members on their discord server. Streamlit does not have an official Discord server but instead an official forum with over 26000 users.
- In the month from August 1st to September 1st 2024, Streamlit has had 86 commits to their main repository whereas FastHTML has had 222 commits. Streamlit has 6595 total and FastHTML has 684 total.
Unsurprisingly, we observe that Streamlit has a significantly larger dedicated userbase. The two frameworks offer different methods of communication, with Streamlit having a dedicated forum and FastHTML having a public Discord server. For FastHTML users, having direct access to the Discord server means that they can get direct help with any issues or problems they are trying to figure out. On the other hand, it is unclear how active the Streamlit forum is, meaning that it may take some time before anyone replies to a user’s post. Since Streamlit is already so developed, users will likely be able to find answers to most of the problems or questions they run into. For FastHTML, this is likely not the case yet, but as more people start using this framework, it will naturally gain more support.
Performance
In this section, we will compare the resource consumption between the two frameworks. To do this, we will create a hello world app in FastHTML and Streamlit. We will deploy both apps to a Docker container and compare the differences in resource utilization using Docker’s resource monitoring feature.
Below are the apps we will be running for our comparison. Each contain an application with a button, that when pressed, generates text that says “Hello World!”.
Hello World in Streamlit:
import streamlit as st

clicked = st.button("Click Me!")

if clicked:
    st.write("Hello World!")
Hello World in FastHTML:
from fasthtml.common import *

app, rt = fast_app()

@rt('/')
def get():
    return Button('Click Me!', hx_get="/change")

@rt('/change')
def get():
    return P('Hello World!')

serve()
After containerizing both apps, we printed out the resource usage used by the apps. The docker stats command provides an easy way to do so. The first app in the list is the Streamlit app while the second is the FastHTML app. We see that the Streamlit app used 0.08% of the CPU while the FastHTML app used 0.31%. The Streamlit app used 35.8 MB of memory, while the FastHTML app used 65.4 MB. From this basic example, we can see that the FastHTML app consumes a bit more CPU resources and RAM than the Streamlit app. Further testing will need to be done to see how resource consumption differs across the two frameworks as the webpage scales.

Conclusions
FastHTML is a very promising framework for building web applications in pure Python. Its foundation in tools such as HTMX and fastcore.xml allows users to write concise code without the need for HTML/CSS/JS. So how did it stack up against Streamlit, a well established Python framework for building web applications for data purposes? In this blog post, we learned some of the basics associated with creating FastHTML and Streamlit applications and compared various metrics for each framework. From our investigation, we found that FastHTML is not a tool for beginners. You should be aware of, or plan to learn various web development concepts before jumping into FastHTML. If you want to learn web development and want to use FastHTML, you may still want to learn about the basics of HTML/CSS/JS, as that will be useful in any development setting. On the other hand, Streamlit is very beginner friendly as it has a very intuitive syntax and development process. Our final recommendation is that for most data applications, you should use Streamlit over FastHTML. For long term scalable projects where you want to use a Python backend, FastHTML could be a good option.
Appendix: Deploy Using Ploomber Cloud
No matter what framework you choose, Ploomber Cloud offers an easy way for you to deploy your web application. In this section, we will show you how to deploy any Streamlit or FastHTML app so you can share it to other people.
Streamlit
- Create a zipped folder with the necessary files
This includes:
app.pywhich contains your Streamlit applicationrequirements.txtwhich contains all Python packages used in your app.
All the code for building the app should be present in app.py and every Python library used in app.py should be in requirements.txt.
- Create a Ploomber Cloud account if you have not done so.
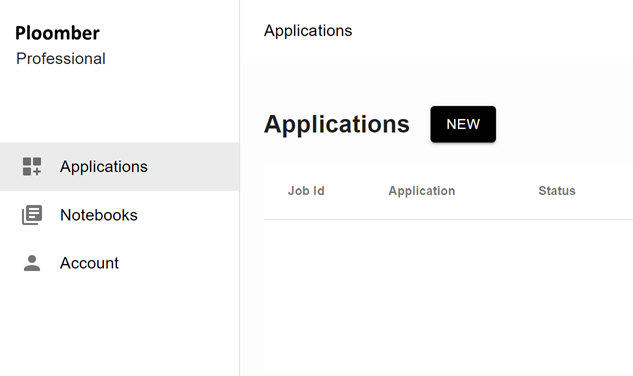
After logging into your account, you should be redirected to the Ploomber Cloud user interface. Optionally, you can also use the Ploomber Cloud command line interface (CLI) to deploy the app if you prefer.
- Deploy your application from the GUI
Click on New. If you are a pro user, you can give the application a custom name under the Overview section.
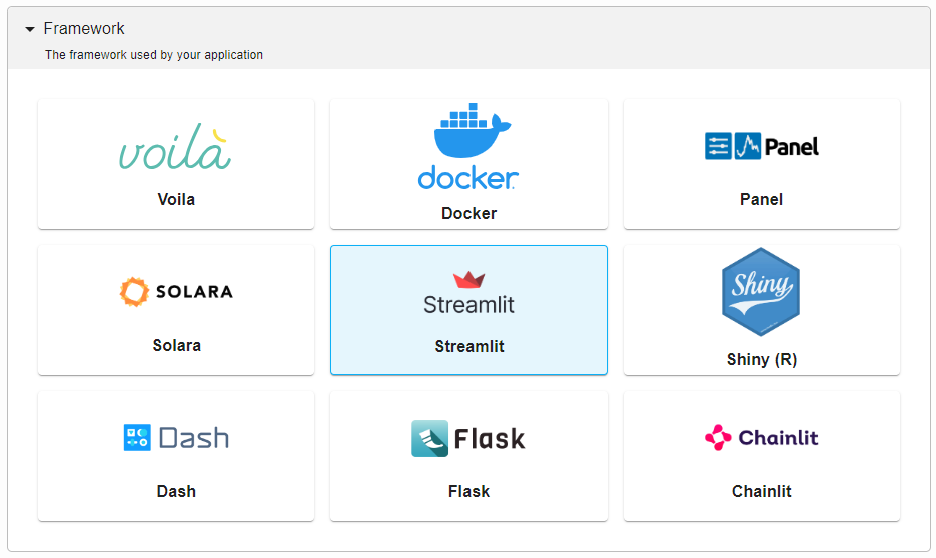
Next, scroll down to the Framework section and select Streamlit.
Navigate to the Source code section and upload your zipped folder.
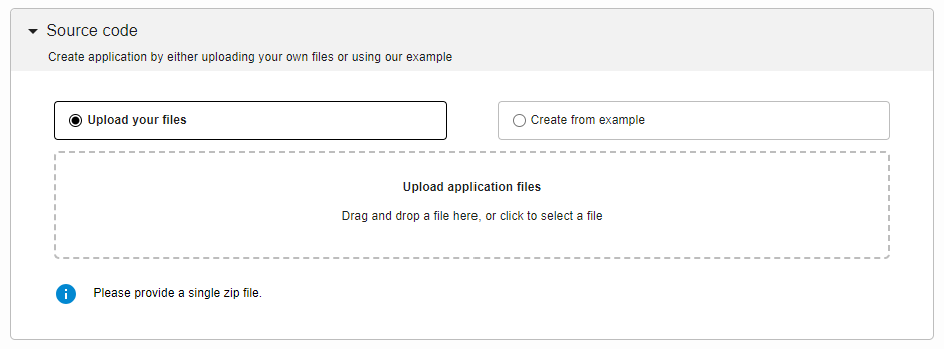
Now you are done configuring your application! Scroll down and click create and your app should begin deploying automatically. After it is deployed, you can access the application in the given link.
For more information on deploying a Streamlit app, check out the documentation here.
FastHTML
To deploy FastHTML apps on Ploomber Cloud, you need to use the docker deployment method. First, create a Ploomber Cloud account if you have not done so. The Docker deployment is available to pro users but a 10-day free trial is available. After making the account and logging in, follow these steps:
- Create a zipped folder with the necessary files.
Dockerfileapp.pywhich contains you FastHTML applicationrequirements.txtwhich contains all Python packages used in your app.
Here is a template for the Dockerfile, you may need to install additional dependencies depending on what Python packages you are using.
FROM python:3.11

RUN apt-get update

COPY . /app

WORKDIR /app

RUN pip install -r requirements.txt --no-cache-dir

ENTRYPOINT ["uvicorn", "app:app", "--host=0.0.0.0", "--port=80"]
- Customize and deploy your app.
Now that you have your zip file prepared and you are logged into Ploomber Cloud, you should see this screen:

Click on NEW and under Overview, give your app a custom name and description.
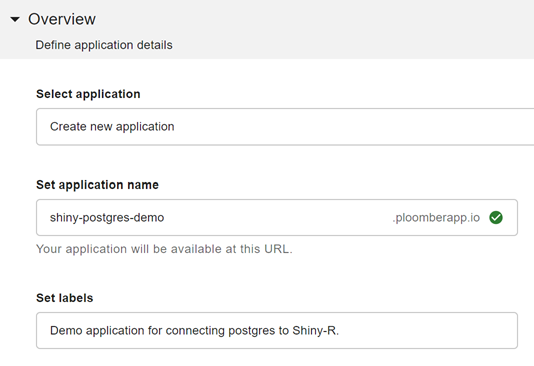
Once you are ready, select Docker under Framework and upload your zip file.
Next, you can optionally customize the hardware, such as the amount of RAM you want to run your application on. You could also enable password protection if you would like.
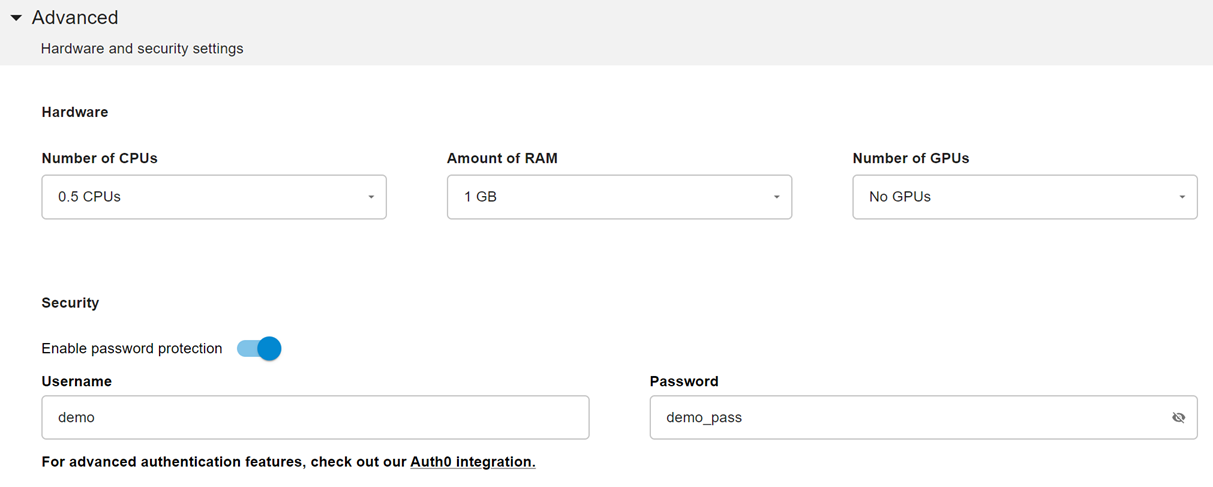
After you are done customizing, click create and the website will automatically deploy. Once it is deployed, you will be able to access the url. For further information on the deployment process, check out the Docker deployment documentation here.


