In this tutorial, we’ll show you how to build a complete Flask application that allows loading your tickets from HubSpot into a database, perform vector similarity search, and retrieves the most relevant information to help reps answer new tickets. By the end of this tutorial you’ll have a fully deployed application.
To follow this tutorial, you’ll need a Ploomber Cloud account, a HubSpot account, and an OpenAI account.
Let’s get into it!
Download code
First, let’s install the ploomber-cloud CLI:
pip install ploomber-cloud
Download the sample code:
ploomber-cloud examples flask/hubspot-llm
cd hubspot-llm
And let’s initialize our project:
ploomber-cloud init
The next sections explain the architecture and code in detail, if you rather skip to
the deployment part, go to the Configure project section.
Architecture

Let’s examine the components of our system at a high-level.
The Flask app receives requests from our users and responds. It’ll ask users to authenticate (or create an account) and offer an interface for them to ask questions.
The Database (SQLite) stores the tickets downloaded from HubSpot and the embeddings (using OpenAI)
we compute for each one. It also performs similarity search (via sqlite-vec) so we can retrieve the relevant tickets when asking a
question.
Since downloading all tickets, parsing them and computing embeddings takes some time. We have a job queue that allows us to execute this work in the background. The RabbitMQ server acts as a message broker, storing the background jobs in a queue, while the Celery worker processes these jobs by downloading the tickets from HubSpot, storing them in the database, and computing embeddings that we’ll use later for similarity search.
Finally, Supervisor is a process control system that ensures our application components stay running. If any process crashes (like the Flask app or Celery worker), Supervisor automatically restarts it, making our application more reliable and resilient to failures.
Code walkthrough
The flask application (app.py)
Let’s go through the main endpoints in our Flask application:
Authentication endpoints (/login, /register, /logout)
The login endpoint handles both GET and POST requests. For POST requests, it validates credentials and creates a session:
@app.route("/login", methods=["GET", "POST"])
def login():
    if request.method == "POST":
        email = request.form.get("email")
        password = request.form.get("password")

        # Validate credentials and create session
        with Session(engine) as db_session:
            user = db_session.query(User).filter_by(email=email).first()
            if user and user.check_password(password):
                session["email"] = user.email
                return redirect(url_for("index"))
            # ... error handling
The register endpoint creates new user accounts:
@app.route("/register", methods=["GET", "POST"])
def register():
    if request.method == "POST":
        # Get form data
        email = request.form.get("email")
        password = request.form.get("password")

        # Create new user in database
        with Session(engine) as db_session:
            user = User(email=email, token_info="{}")
            user.set_password(password)
            db_session.add(user)
            # ... error handling
Search functionality (/search)
The search endpoint processes queries and returns answers based on the stored tickets:
@app.post("/search")
@login_required
def search_post():
    query = request.form["query"]
    answer = answer_query(query)  # Uses similarity search and LLM
    return render_template("search-results.html", answer=answer)
Ticket management (/tickets, /load)
The /tickets endpoint displays all stored tickets:
@app.get("/tickets")
@login_required
def tickets():
    with Session(engine) as db_session:
        tickets = db_session.query(Ticket).all()
    return render_template("tickets.html", tickets=tickets, logged_in=True)
The /load endpoint triggers background processing to fetch tickets from HubSpot:
@app.post("/load")
@login_required
def load():
    load_tickets.delay(limit=50)  # Async task using Celery
    return jsonify({"status": "success"})
Ticket loading
The ticket loading process is implemented in load.py. Here’s how it works:
First, we have a function to compute embeddings using OpenAI’s API:
def compute_embedding(text: str | list[str], return_single: bool = True) -> list[float]:
    client = OpenAI()
    response = client.embeddings.create(input=text, model="text-embedding-3-small")
    # Returns single embedding or list of embeddings
    if len(response.data) == 1 and return_single:
        return response.data[0].embedding
    else:
        return [d.embedding for d in response.data]
Next, we have an iterator that fetches tickets from HubSpot’s API in batches:
def iter_tickets(after=None, limit=None, _fetched=0):
    client = hubspot.Client.create(access_token=SETTINGS.HUBSPOT_ACCESS_TOKEN)
    # Fetch tickets in batches of 100 (maximum per API call)
    api_response = client.crm.tickets.basic_api.get_page(
        limit=100,
        archived=False,
        after=after
    )
    # ... pagination handling
The main load_tickets() function orchestrates the process:
- Optionally resets the database if requested
- Finds the last processed ticket ID to resume from that point
- Processes tickets in batches of 10:
- Computes embeddings for the batch using OpenAI
- Stores tickets and embeddings in the database
def load_tickets(limit=None, dry_run=False, reset=False):
    # Optional database reset
    if reset:
        with Session(engine) as db_session:
            db_session.query(Ticket).delete()
            db_session.commit()

    # Find last processed ticket
    with Session(engine) as db_session:
        last_token = db_session.query(Ticket.hubspot_ticket_id).order_by(Ticket.id.desc()).first()
        after = str(int(last_token[0]) + 1) if last_token else None

    # Process tickets in batches
    with Session(engine) as db_session:
        batch = []
        batch_contents = []

        for ticket in iter_tickets(limit=limit, after=after):
            ticket = Ticket(
                name=ticket.properties["subject"],
                content=ticket.properties["content"],
                hubspot_ticket_id=ticket.id,
            )
            batch.append(ticket)
            batch_contents.append(ticket.content)

            # Process batch when it reaches size 10
            if len(batch) == 10:
                embeddings = compute_embedding(batch_contents, return_single=False)
                # Store tickets with embeddings
                for doc, emb in zip(batch, embeddings):
                    doc.embedding = emb
                    db_session.add(doc)
                batch = []
                batch_contents = []

        # Handle any remaining tickets
        if batch:
            # ... similar batch processing
Keeping up with new tickets
To keep the database up-to-date with new tickets, we use Celery to run periodic background tasks. Here’s how it works:
# hubspot_loader/background.py
from celery import Celery
from hubspot_loader import load

app = Celery("hubspot_loader.background", broker="amqp://localhost")
app.conf.broker_connection_retry_on_startup = True

@app.on_after_configure.connect
def setup_periodic_tasks(sender: Celery, **kwargs):
    # Run every 60 minutes
    PERIOD = 60 * 60

    sender.add_periodic_task(
        PERIOD,
        load_tickets,
        name="load_tickets",
    )

@app.task
def load_tickets(limit=50):
    load.load_tickets(limit=limit)
The code above:
- Creates a Celery app configured to use RabbitMQ as the message broker
- Sets up a periodic task that runs every 60 minutes using the
@app.on_after_configure.connectdecorator - Defines the
load_ticketstask that calls our existing ticket loading function
The task fetches up to 50 tickets per run by default. Since we track the last processed ticket ID in the database, each run will only process new tickets that haven’t been seen before.
Configure project
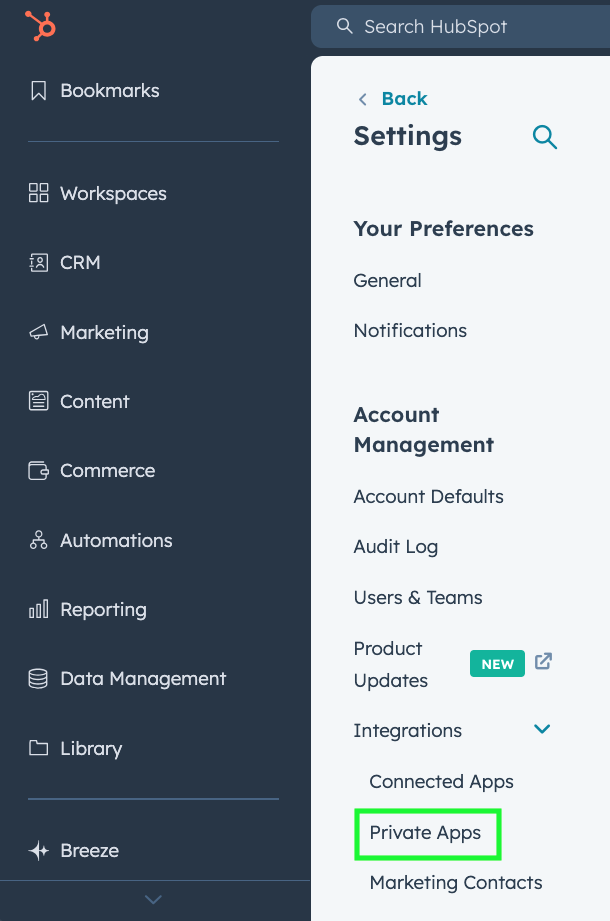
Let’s now see how to get access to HubSpot’s API. First, we need to create a private app. Click on the settings icon on HubSpot (gear icon):

Under the Integrations section, find the Private Apps sections and click on it:
Click on Create a private app:

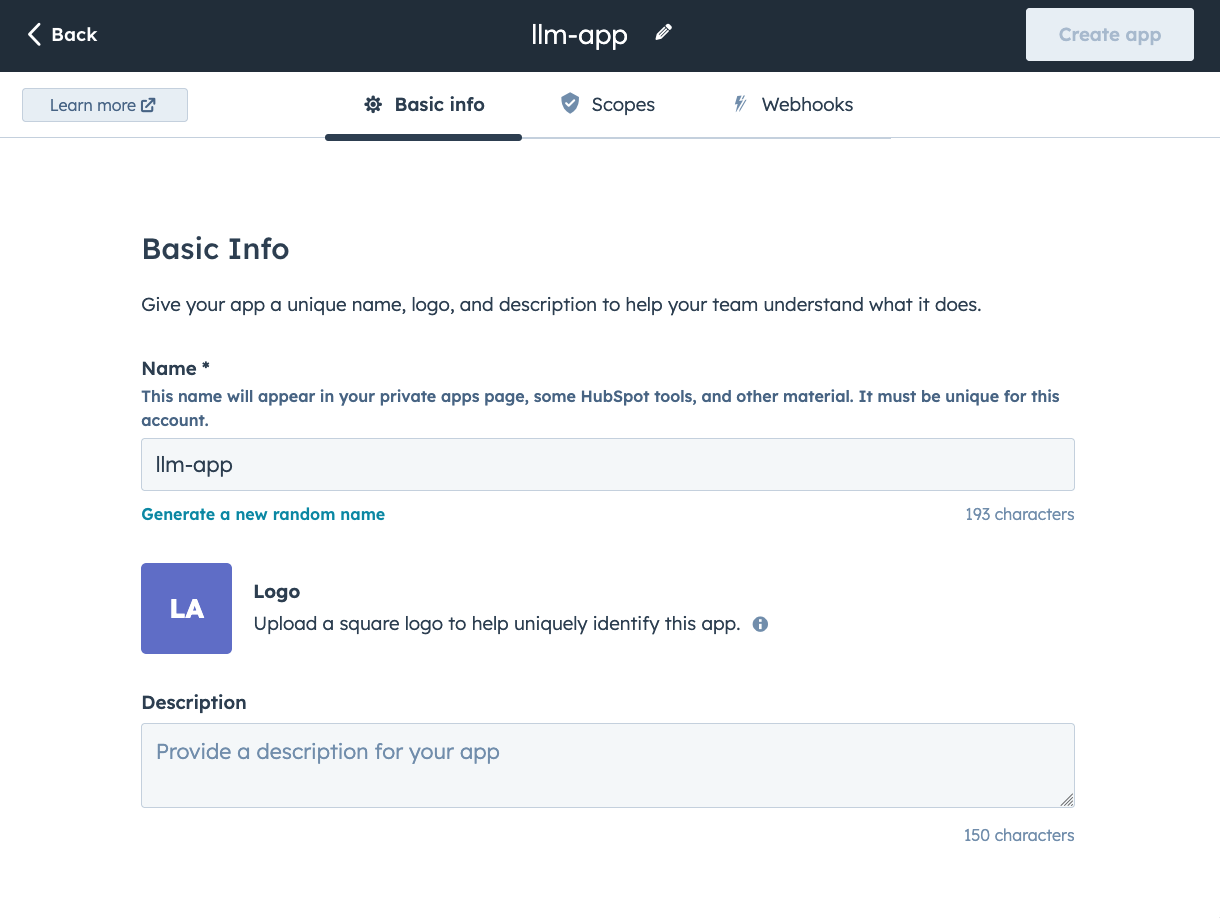
You’ll see the Basic Info section. You can leave it as-is or customize it:
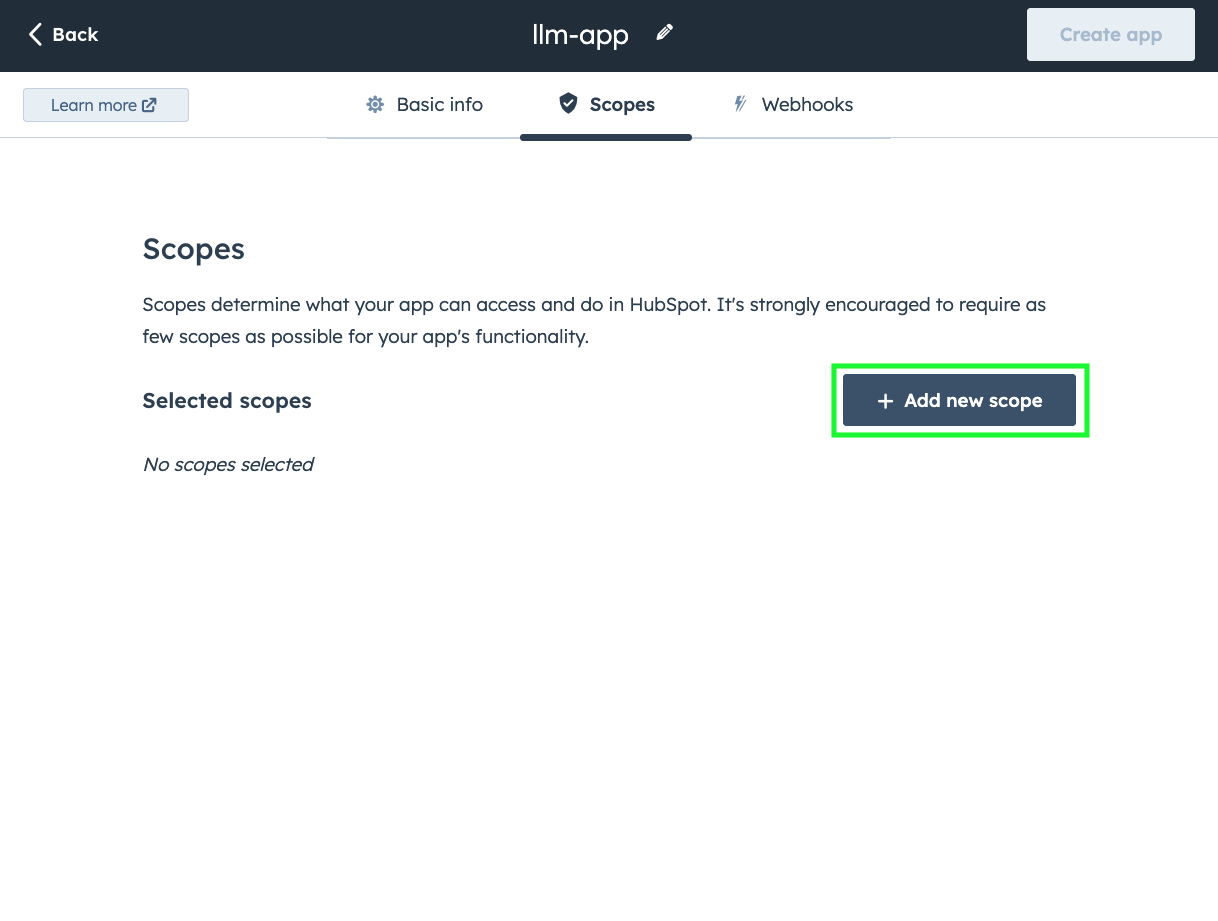
Now we need to add permissions (scopes) to our app, move to the Scopes tab and
click on + Add new scope:
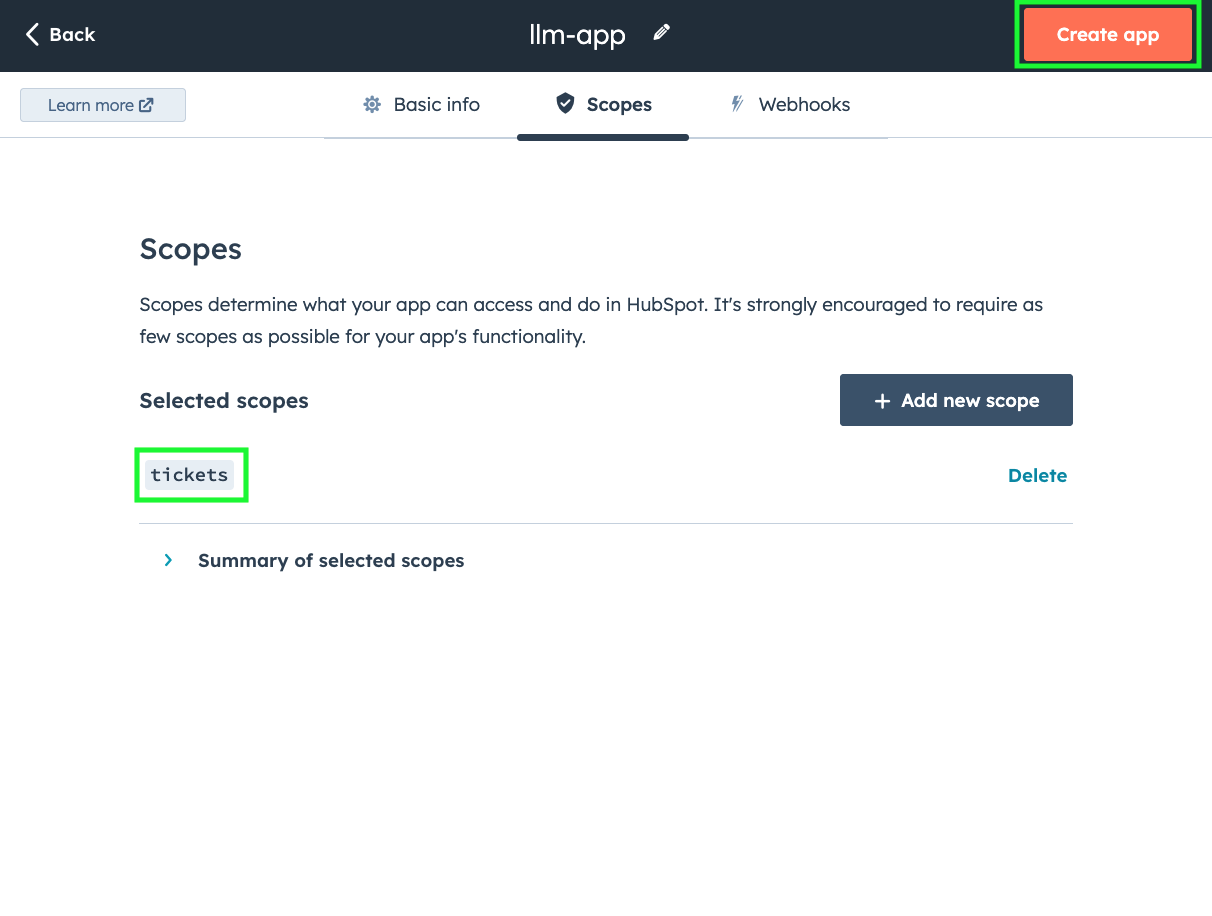
In the search bar, enter tickets and add the scope. Once you confirm, you’ll be taken
back to the Scopes section and you should see tickets under Selected scopes.
Click on Create app in the top right corner:
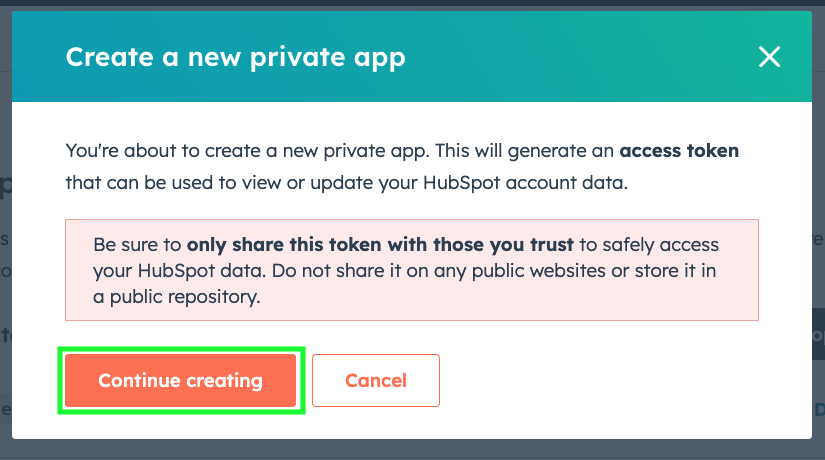
Confirm by clicking on Continue creating:
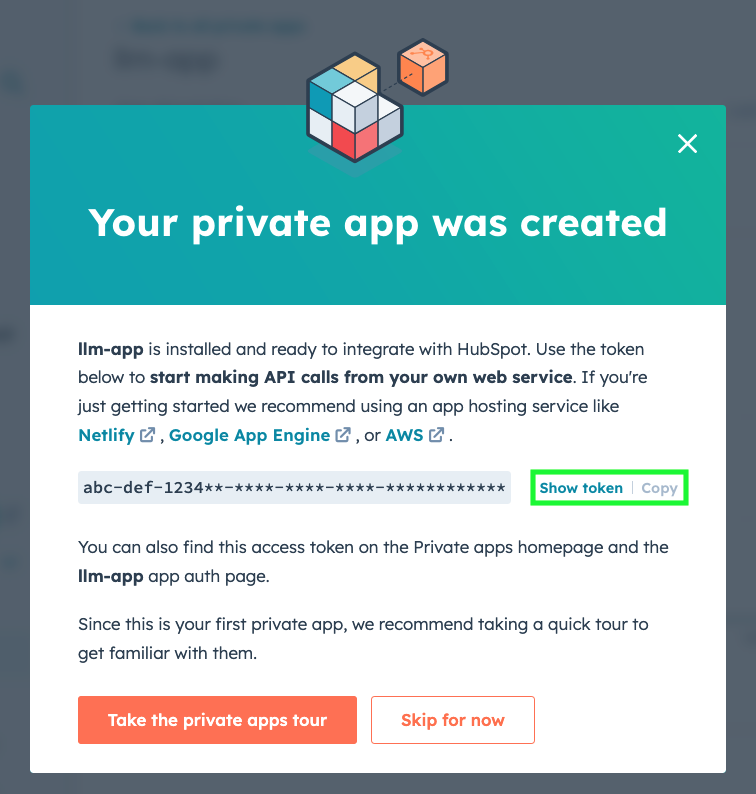
A new screen will confirm the app creation, click on Show token and then on Copy.
Store this token safely as we’ll need it in the next section.
Deploy project
Move to the sample code you downloaded in the first step (hubspot-llm) and create a
.env file (note the leading dot) with the following content:
OPENAI_API_KEY=<YOUR-OPENAI-TOKEN>
HUBSPOT_ACCESS_TOKEN=<YOUR-HUBSPOT-TOKEN>
And replace the values with your OpenAI key and the HubSpot token (the one we generated in the previous section.)
We’re ready to deploy:
ploomber-cloud deploy
The command will print a URL to track progress. After a minute or so, the app will be available:
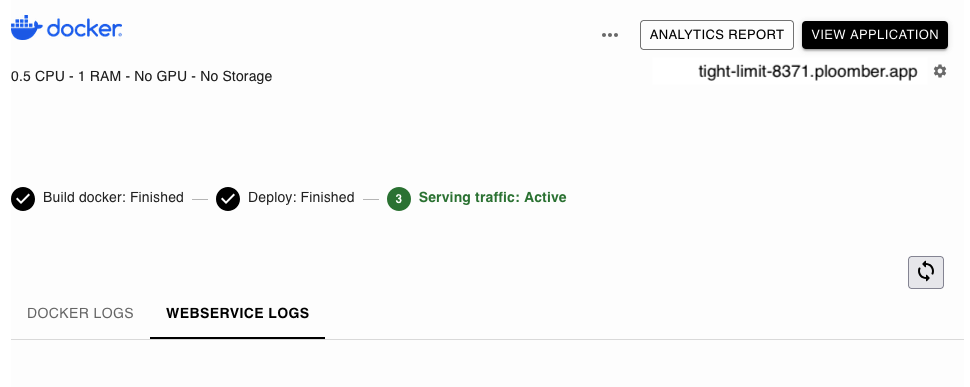
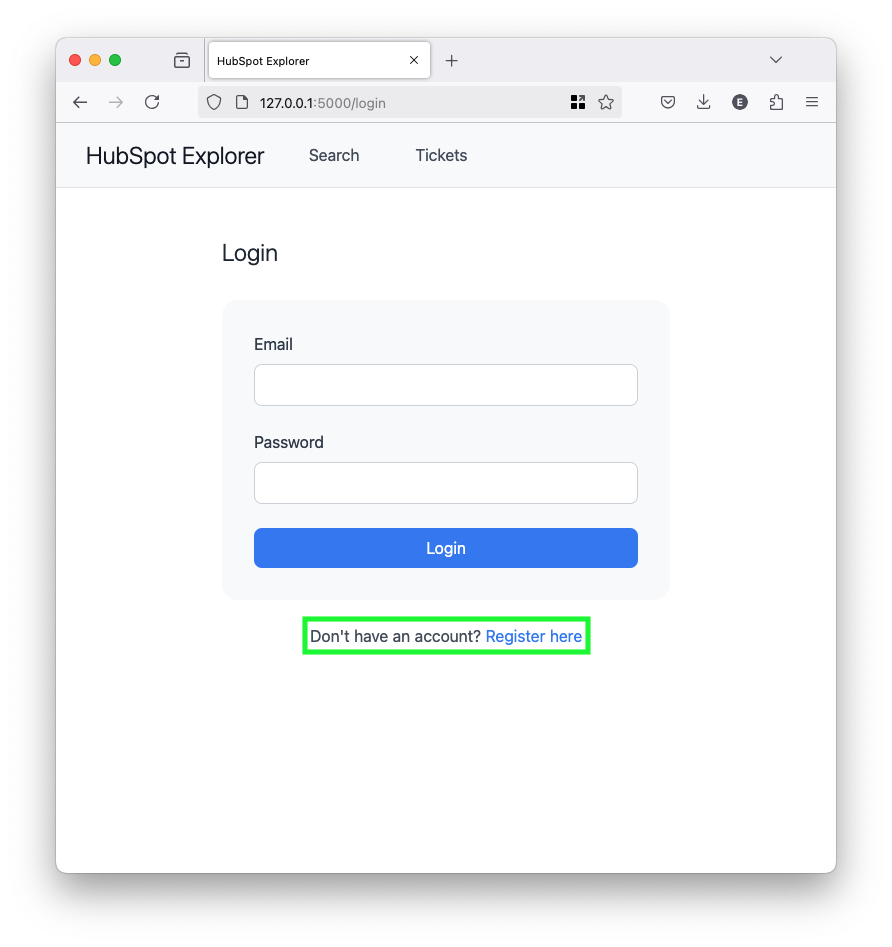
Once that happens, open the app URL and you’ll see the form to login. Click on
Register here to create a new account::
Enter email and password for the new account:
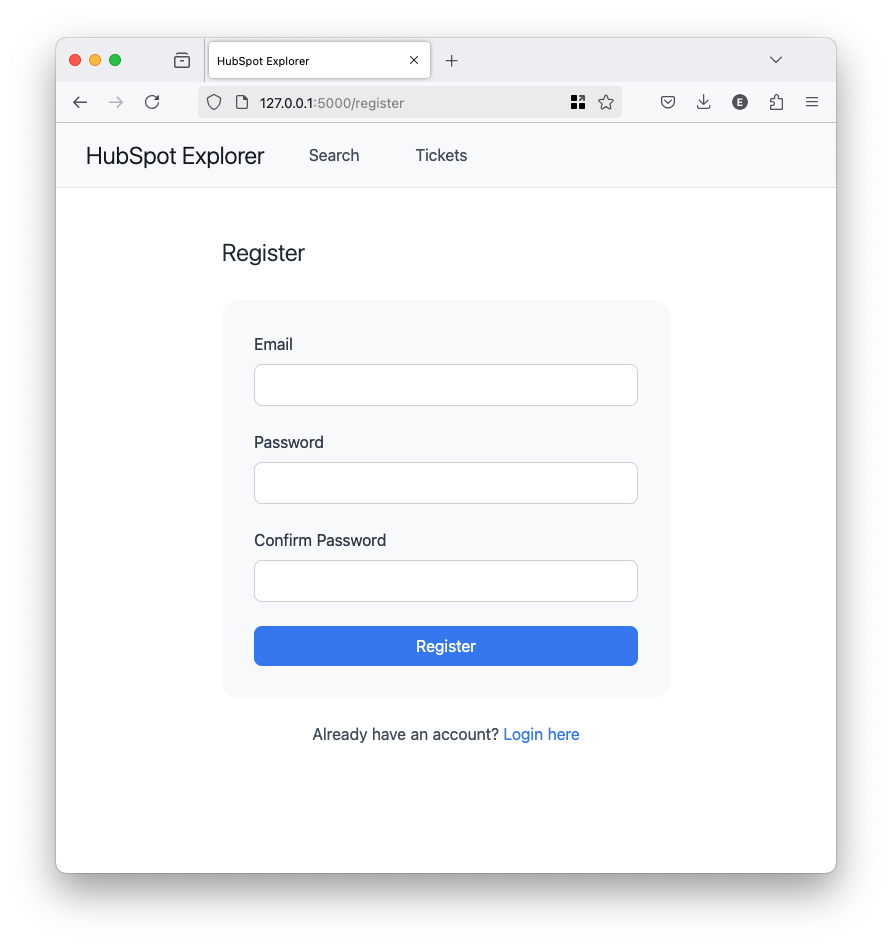
Once you’re logged in, click in Load tickets:
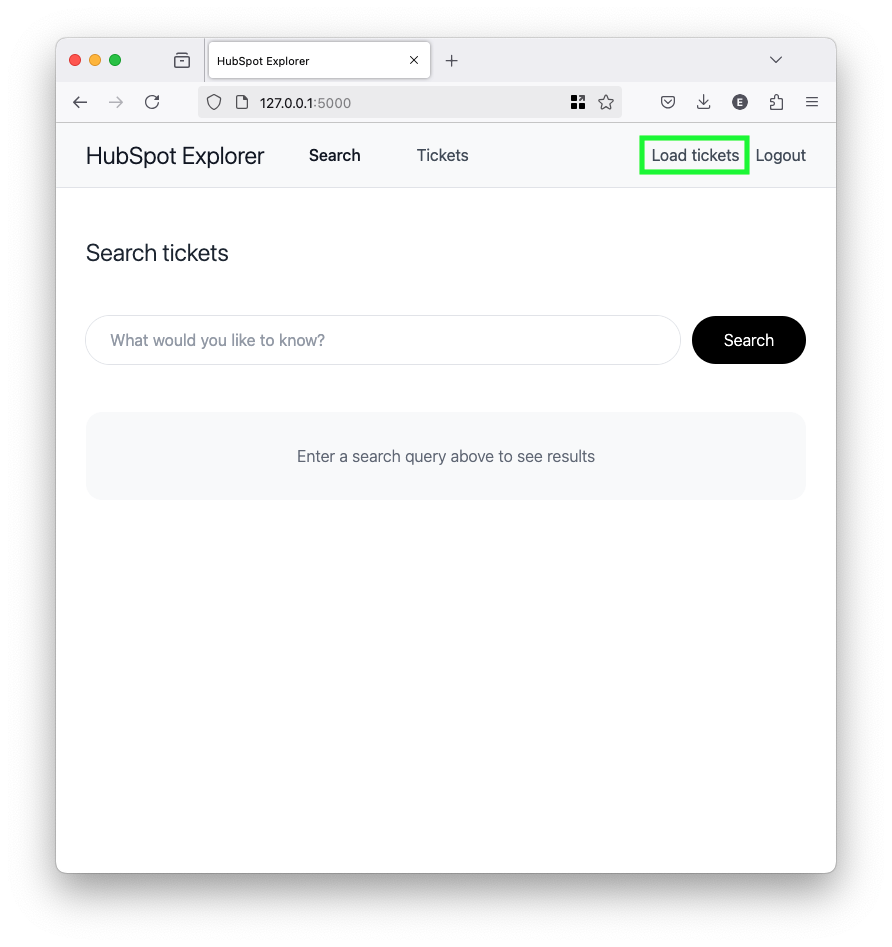
This will start downloading tickets from HubSpot. The process takes 1-2 minutes.
Once the process is done, you’ll see the tickets in the Tickets section. You can also track progress from the Ploomber Cloud platform, you’ll see something like this in the logs when all the tickets have been loaded:
2025-01-09T23:40:02.883000 - [2025-01-09 23:40:02,883: INFO/ForkPoolWorker-2] Task hubspot_loader.background.load_tickets[xyz] succeeded in 5.4s: None
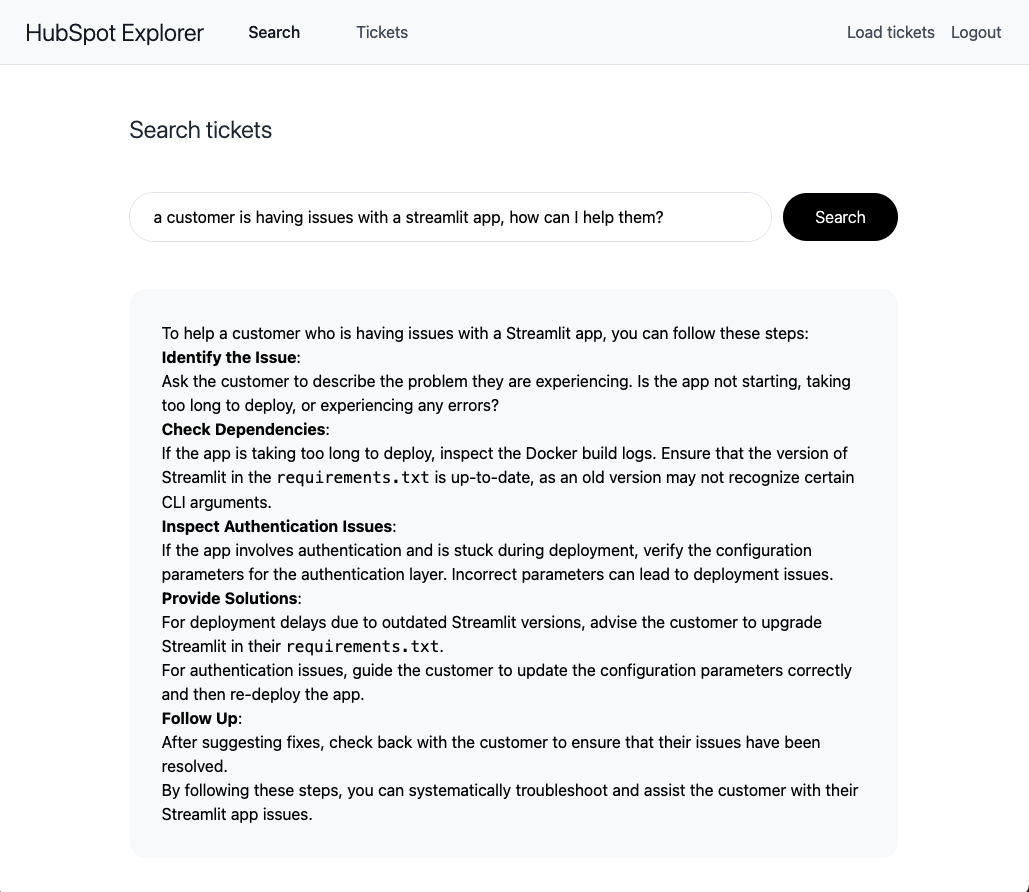
Finally, click on Search and start asking questions about your tickets! Here’s a sample question we asked using our HubSpot tickets:
Limitations
This application is a proof of concept designed to demonstrate the core functionality of integrating HubSpot with AI capabilities. As such, it has several limitations that make it unsuitable for production use. The application lacks important features like proper security measures, and robust error handling for HubSpot API calls. We’ve made some architectural choices to keep things simple, such as not storing all available tickets (by default, we only download 50 tickets), and implementing basic session management. Additionally, the lack of persistent storage means all data is wiped when the app restarts. If you’re interested in deploying a production-ready system that integrates HubSpot with AI capabilities, please reach out to us to discuss our enterprise-grade solutions that address these limitations.


