


With the presence of social media, advertising and image data collection, we can analyze images to understand consumer trends, patterns in user behavior among others. In some cases, text appears in photos shared on social media, screenshots of tweets, scanned documents in offices, and even in the form of handwritten notes. This ubiquity of text in images presents a unique challenge and opportunity: how do we extract and use this information?
Enter Optical Character Recognition (OCR), a technology designed to address this challenge. OCR is not just about digitizing written words; it’s about unlocking information embedded in images. It turns photos of text, be it from a printed page, a document scan, or a digital image, into a treasure trove of searchable, editable, and analyzable data. Whether it’s digitizing historical documents to preserve human heritage or processing business receipts for streamlined accounting, OCR stands as a crucial tool in harnessing the power of text hidden within our visual world.
In this blog, we will learn how to implement OCR with Python and build an application that can extract text from uploaded images and deploy our application using Ploomber Cloud
The final and deployed application can be found here
OCR is a field of research in pattern recognition, artificial intelligence, and computer vision. Its primary purpose is to recognize text within a digital image. This technology is widely used to digitize printed texts so that they can be electronically edited, searched, stored more compactly, displayed online, and used in machine processes like machine translation, text-to-speech, and data mining.
OCR has a wide range of applications, including:
Let’s delve into a practical example of deploying an OCR application using Python. We’ll walk through the code and explain how it works.
In this practical example, we will create and deploy an Optical Character Recognition (OCR) application using Python. The application is designed to extract text from images, a task that has become increasingly vital in various fields, from digitizing historical documents to processing business documents.
A complete project can be found here
The primary goal of our application is to provide a user-friendly interface where users can upload images and receive the extracted text. To achieve this, we will use EasyOCR, a Python library for OCR, and Solara to build a web-based interface. The application will allow users to:
EasyOCR is a Python library for extracting text from images. It supports over 40 languages and can detect multiple languages within a single image. It also supports GPU acceleration using CUDA and OpenCL.
Solara is a Python library for creating web-based interfaces for Python scripts. It allows you to create a web-based interface for your Python script without having to write any HTML or JavaScript code. Its focus is on building reusable UI components that can be used across multiple projects.
We’ll start by installing the required libraries. We’ll use pip to install the libraries.
pip install easyocr
pip install solara
Before diving into the UI, let’s first set up the OCR functionality.
In the code below we import the easyocr library and initialize the reader. We also import the Path class from the pathlib library. We’ll use this class to get the path to the sample image. We then initialize a reader object with the languages we want to use. In this case, we’ll use Chinese and English. We also set the gpu parameter to False to disable GPU acceleration.
import easyocr
from pathlib import Path

# Initialize the easyocr reader
reader = easyocr.Reader(['ch_sim', 'en'], gpu=False)
We create a State class to manage the application’s state, including the image being processed and the OCR results. The State class in this context serves as a central component for managing the state of the OCR application.Here’s a breakdown of its functionality:
Reactive Variables: The class defines several reactive variables to keep track of the application’s state.
Methods:
load_sample Method: This static method is used to load a sample image (label.png) into the application.load_from_file Method: Allows users to upload their own image file.reset Method: Resets the application’s state to its initial condition.import solara
class State:
image = solara.reactive(None)
new_image_loaded = solara.reactive(False)
extraction_complete = solara.reactive(False)
extracted_text = solara.reactive("")
@staticmethod
def load_sample():
image_path = Path("label.png")
State.image.value = image_path.read_bytes()
State.new_image_loaded.value = True
State.extracted_text.value = reader.readtext(State.image.value, detail=0)
State.extraction_complete.value = True
@staticmethod
def load_from_file(file):
State.extraction_complete.value = False
State.image.value = file["file_obj"].read()
State.new_image_loaded.value = True
State.extracted_text.value = reader.readtext(State.image.value, detail=0)
State.extraction_complete.value = True
@staticmethod
def reset():
State.image.value = None
State.new_image_loaded.value = False
State.extraction_complete.value = False
State.extracted_text.value = ""
Now, let’s construct the user interface (UI) using solara. The UI will include components for uploading images, a display area for the image and extracted text, and controls to reset the application or load a sample image.
We will define two components, Page and Layout, using the solara library to create a user interface (UI) for an OCR (Optical Character Recognition) application.
Page Component:
The component starts by accessing the current image state (State.image.value). It creates an application bar title (solara.AppBarTitle) displaying the title “OCR App”. A card (solara.Card) is used to describe the app, instructing users to either drop an image in a specified area or click on the “Sample image” button.
A sidebar is created using solara.Sidebar, containing a card for controls. Inside this card, there is a column layout with a row for the “Sample image” button (solara.Button) and a file drop area (FileDrop).
The “Sample image” button loads a predefined sample image using State.load_sample. The file drop area allows users to upload their images, triggering State.load_from_file when a file is uploaded. A link to “Ploomber Cloud” is provided as a markdown text.
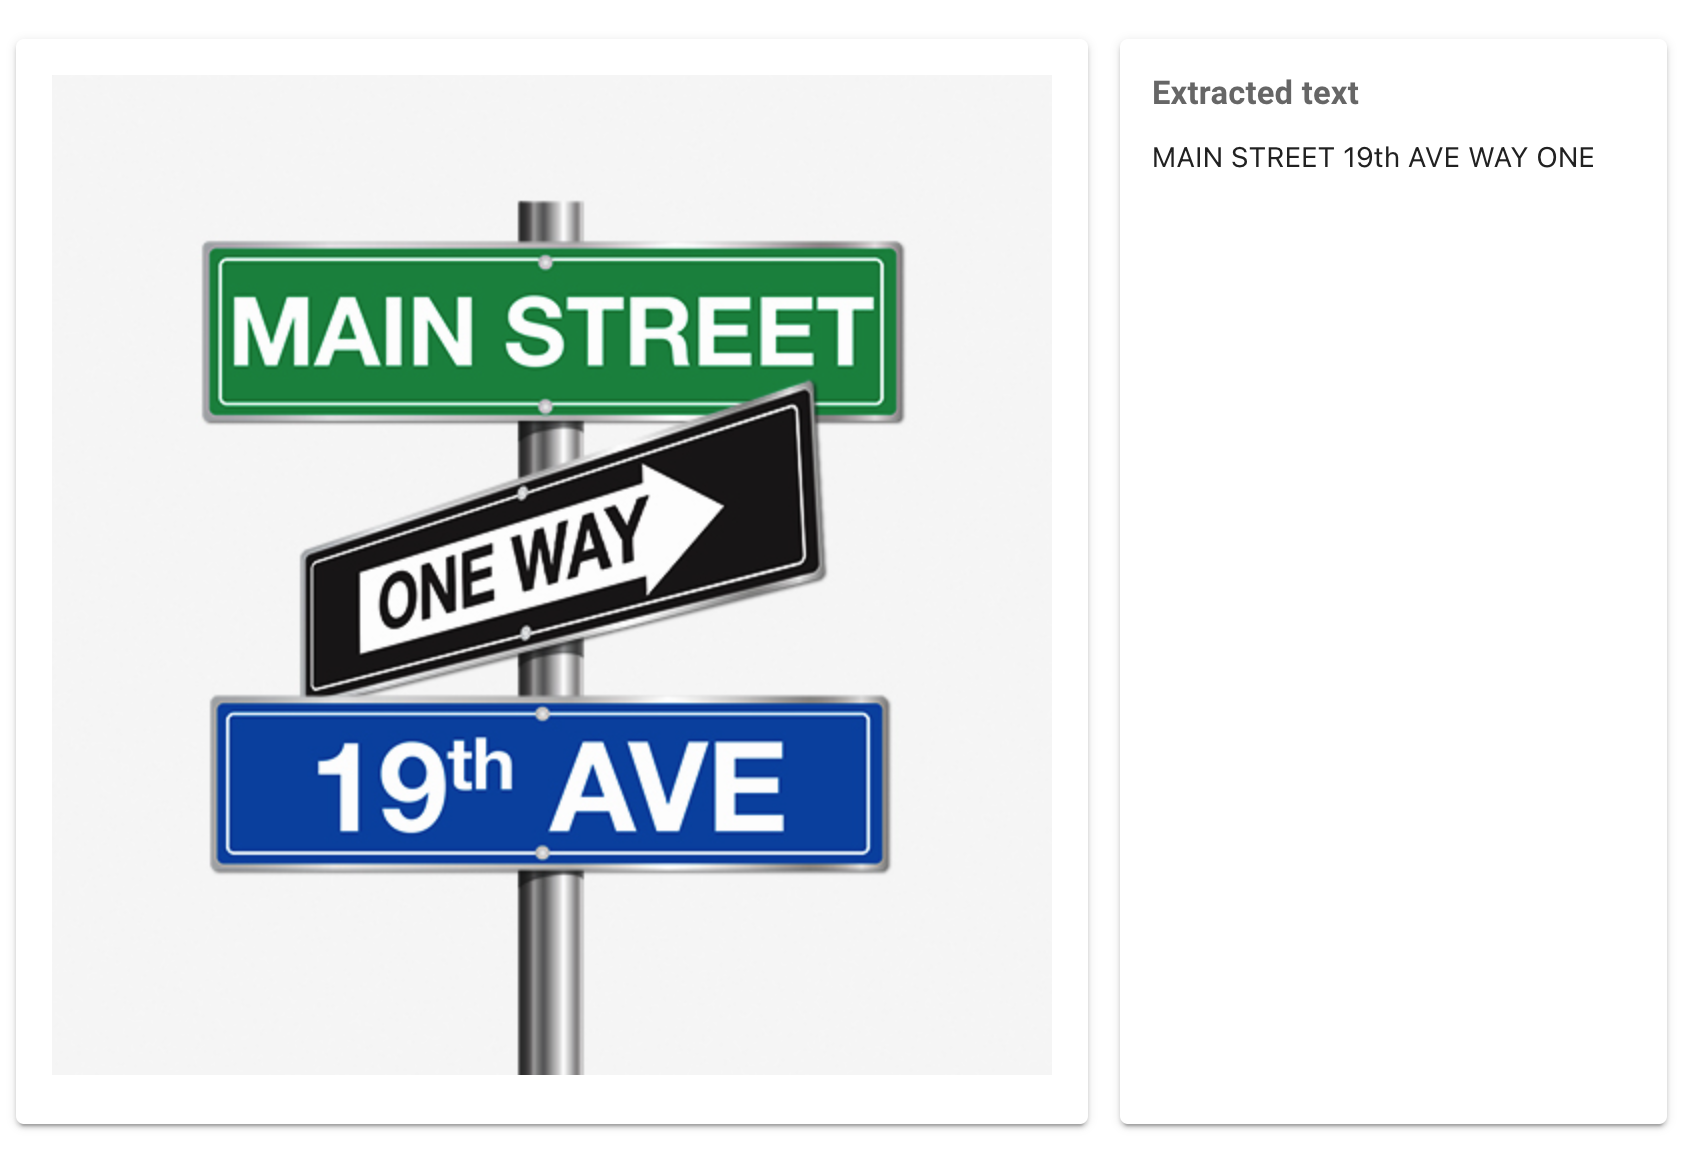
If a new image is loaded but extraction is not complete, it shows a message “Extracting text…” with a linear progress indicator (solara.ProgressLinear). Once the extraction is complete, it displays the image and extracted text side by side in a horizontal box layout (solara.HBox). If no text is found, it displays a message accordingly. It handles the case where no image is loaded by displaying an informational message.
Layout Component:
The Layout component defines the overall layout structure of the application. It uses solara.use_route to manage routing (though not detailed in this snippet). The layout is defined by solara.AppLayout, which wraps around the children components, likely including the Page component and others as part of the complete application UI.
@solara.component
def Page():

    image = State.image.value

    with solara.AppBarTitle():
        solara.Text("OCR App")

    with solara.Card(title="About", elevation=6, style="background-color: #f5f5f5;"):
        solara.Markdown("""This app can extract text from images.
        Drop an image in the box to the left to get started or click on \"Sample image\"""")

    with solara.Sidebar():
        with solara.Card("Controls", margin=0, elevation=0):
            with solara.Column():
                with solara.Row():
                    solara.Button("Sample image", color="primary", text=True, outlined=True, on_click=State.load_sample)
                FileDrop(on_file=State.load_from_file, label="Drag an image file here")

                solara.Markdown("Hosted in [Ploomber Cloud](https://ploomber.io/)")

    if State.new_image_loaded.value and State.extraction_complete.value == False:
        with solara.Div():
            solara.Text("Extracting text...")
            solara.ProgressLinear(True)

    if State.extraction_complete.value:
        with solara.HBox():
            with solara.Card():
                solara.Image(image, format="jpeg")
            with solara.Card():
                if State.extracted_text.value:
                    solara.HTML(tag="h3", style="margin: auto;", unsafe_innerHTML="Extracted text")
                    solara.Markdown('\n'.join(State.extracted_text.value))
                else:
                    solara.Markdown("No text found")

    if State.image.value is None:
        solara.Info("No image loaded, click on the sample image button to load a sample image, or upload a file.")


@solara.component
def Layout(children):
    route, routes = solara.use_route()
    return solara.AppLayout(children=children)
With Ploomber Cloud, we can easily package and deploy our application as a web application. Ploomber Cloud is a platform for deploying and managing data web apps. It also provides a dashboard for managing your pipelines and monitoring their performance.
First, head to the Ploomber Cloud sign-up page and create a free account using your email and a password.
After signing up, check your inbox (and spam folder, just in case) for a confirmation email. Click the provided link to activate your account.
Now, return to Ploomber Cloud and sign in with your credentials. Next, explore how to deploy your first application.
We will start by installing Ploomber Cloud. We will use pip to install the library.
pip install ploomber-cloud
To interact with Ploomber Cloud, you’ll need an API key. After signing up, navigate to your account section and copy the API key.
You can then connect your API key to your project through the command line:
ploomber-cloud key YOUR-KEY
We can then initialize our app in the same folder as our app.py file:
ploomber-cloud init
This will create a ploomber-cloud.json file in the directory where you ran the command. This file contains the configuration for your project. You can edit this file to customize your project’s configuration. This is what it looks like:
{
    "id": "APP_ID",
    "type": "APP_TYPE"
}
The id field is the ID of your project. The type field is the type of your project. We will use Docker.
We will start by creating a Dockerfile with the following contents:
FROM python:3.11

COPY app.py app.py
COPY label.png label.png
RUN pip install torch==2.1.1 torchvision==0.16.1 --index-url https://download.pytorch.org/whl/cpu
RUN pip install solara easyocr

ENTRYPOINT ["solara", "run", "app.py", "--host=0.0.0.0", "--port=80"]
The Dockerfile starts by using the python:3.11 image as the base image. We then copy the application files (app.py and label.png) into the container. We then install the required libraries using pip. Finally, we set the entry point to run the application using the solara command.
To deploy, we simply run
ploomber-cloud deploy
Review this blog post for a detailed guide on how to deploy the application using Ploomber Cloud and GitHub actions here.
Seamless deployment for data scientists and developers. Ploomber handles infrastructure so you focus on building. Secure and scalable—from personal projects to enterprise apps. Support for Streamlit, Dash, Docker, and AI-powered applications. Because life's too short for deployment headaches.

