


Authentication is a critical aspect of security in today’s digital age. It is essential to ensure that only authorized users can access the application, thereby protecting sensitive data from malicious attacks. It also allows applications to provide personalized experiences to users based on their profiles. In this way, users are assured that their information is secure and that they are interacting with legitimate systems.
In this tutorial, we’ll cover some approaches to authenticating a Panel application.
Securing your applications with Ploomber Cloud is as easy as a single click and entering your username and password. The setup process is effortless, thus making it a suitable choice for developers
of different skill levels. Ensuring security is crucial for any web application, and Ploomber Cloud prioritizes this aspect by encrypting all credentials. This encryption process transforms your username and password into a highly complex format, making it extremely challenging for unauthorized individuals to decipher. Whether you’re managing sensitive data or simply aiming to limit access to specific users, Ploomber Cloud’s encryption ensures the safety of your authentication details.
Here’s how to set the credentials for your Panel application:

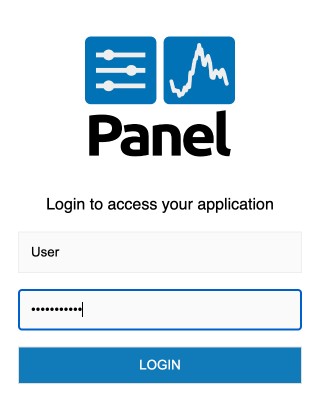
Once you click on VIEW APPLICATION after deployment completion, you’ll be prompted for the username and password. Enter your credentials set in the previous step for accessing the application.

The authentication process mentioned here is framework-agnostic and can be implemented in any type of application, not limited to just Panel.
Note that Ploomber Cloud’s password protection works for a single set of credentials. However, if you need a more sophisticated way of securing your application you can check out Auth0. Auth0 is a platform that allows developers to implement secure login processes and control access to applications.
Here are some advantages of using auth0:
Ploomber Cloud enables you to easily secure your Panel applications using auth0.
Let’s look at a sample application in which we read the HTTP header X-Auth-Name from the current session. We also define a logout link:
name = pn.state.headers.get("X-Auth-Name") or "Anonymous"
logout_link = pn.pane.Markdown("[Logout](/logout)")
To deploy this application on Ploomber Cloud, you first need to install the CLI:
pip install ploomber-cloud
Then, you can run the below command to download the sample application that demonstrates auth0 integration:
ploomber-cloud examples panel/app-with-auth0
cd into the app-with-auth0 directory and initialize the project. This should create a ploomber-cloud.json file with the project id information.
ploomber-cloud init
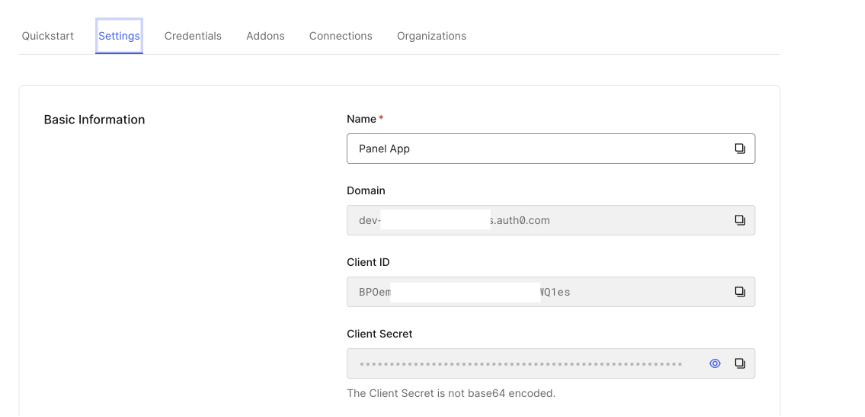
To set up auth0 authentication for the project we need to create a new application in the Auth0 account:
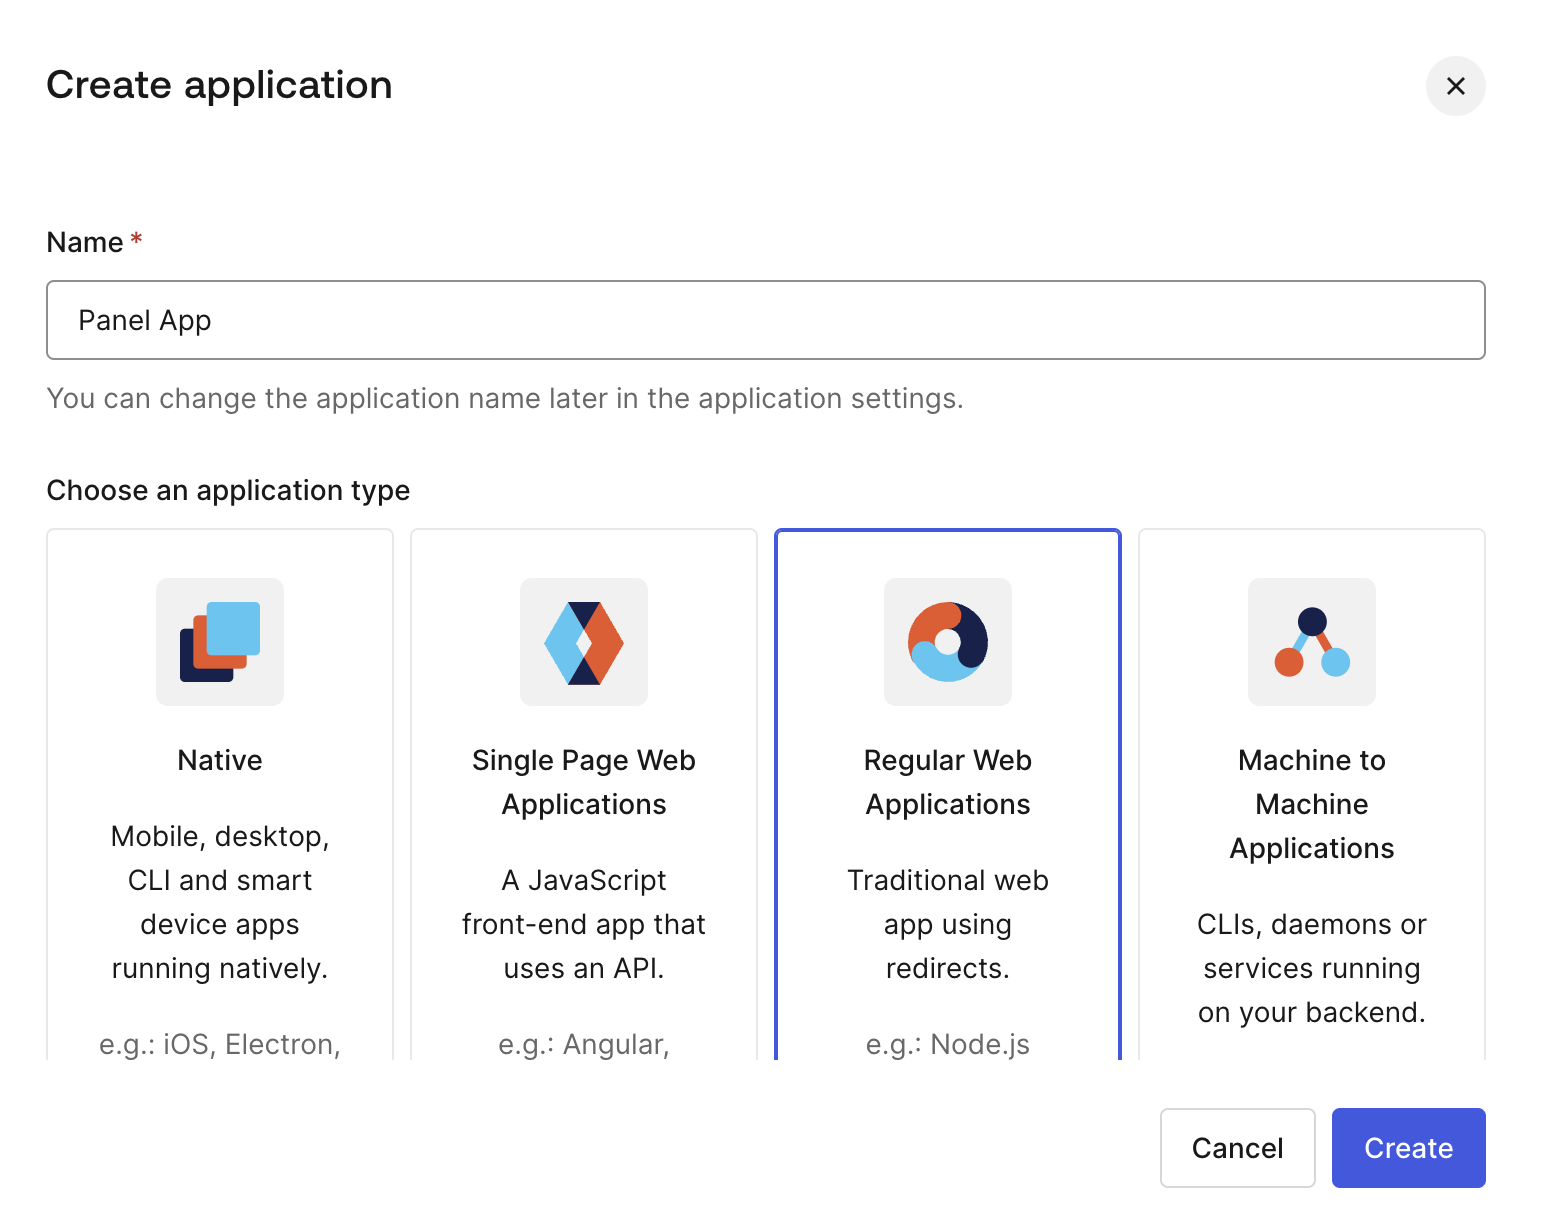
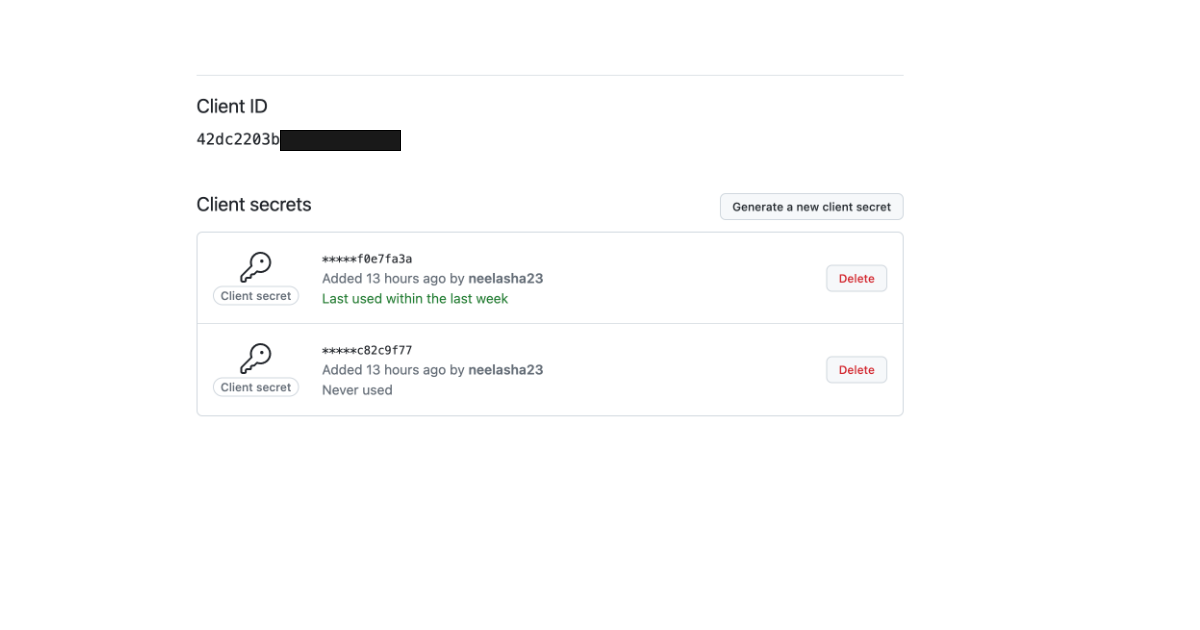
Once done, note down the values of Client ID, Client Secret and Domain in the application Settings page.
Next, run ploomber-cloud templates auth0 in the project root folder. You need to set Client ID, Client Secret and Domain as the AUTH_CLIENT_ID, AUTH_CLIENT_SECRET and AUTH_ISSUER_BASE_URL respectively:
% ploomber-cloud templates auth0
Enter the value for AUTH_CLIENT_ID: BP0e**********************Wq1eS
Enter the value for AUTH_CLIENT_SECRET: IdiW3KmjVR7SUjk********************************7WbyLC0zCcvE9XCj
Enter the value for AUTH_ISSUER_BASE_URL: dev-****************.us.auth0.com
Successfully configured auth0. To deploy, run 'ploomber-cloud deploy'
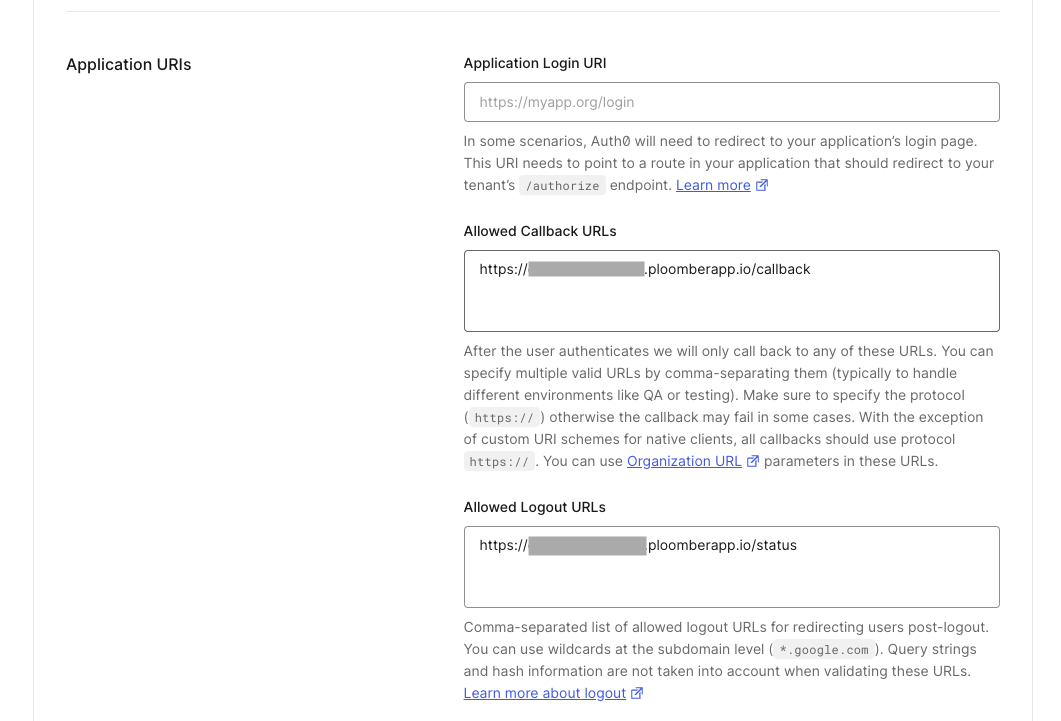
Once the auth0 setup is done you should find a .env file with the credentials entered in the previous step. To deploy the project run ploomber-cloud deploy. The application ID will be of the format https://application-name-1999.ploomber.app. Copy this URL and set callback URLs as follows:
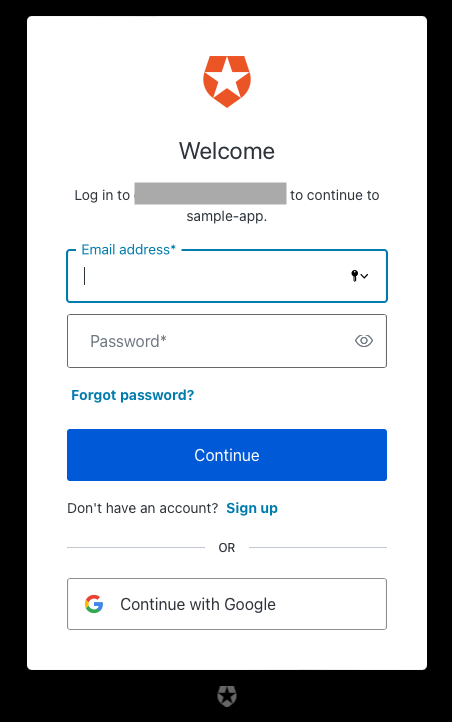
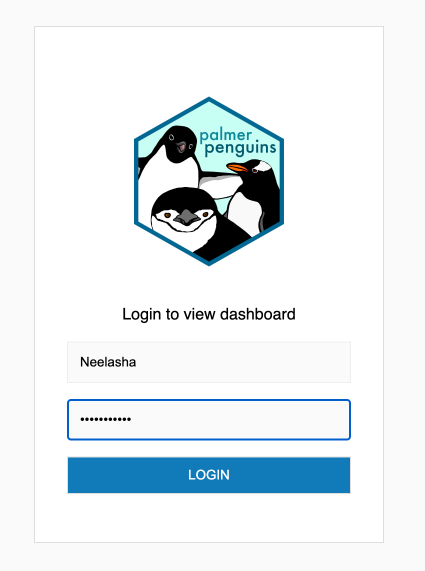
Once the application deployment is complete you can click on the VIEW APPLICATION button and you should see the login page:
To learn more about auth0 integration check out the documentation.
Panel comes equipped with several built-in authentication providers for applications. OAuth 2.0 serves as the primary authentication mechanism used by Panel. In simpler terms, OAuth delegates the authentication process to an external provider such as GitHub, Google, or Azure AD. This allows the user credentials to be authenticated by the third-party provider, granting restricted access to the APIs of that service.
For straightforward scenarios, it might be adequate to activate a basic authentication provider. This provider merely checks the provided login details against a master password or stored credentials in a file.
You can start your server by passing the --basic-auth command line argument:
panel serve app.py --basic-auth my_password --cookie-secret my_super_safe_cookie_secret
You can log in to the application by entering any valid username and the password my_password.
It’s also possible to use the --basic-auth argument for different users with potentially different access controls.
Define the users in a credentials.json file:
{
    "user1": "my_password",
    "admin": "my_super_safe_password"
}
Now serve the application with the basic authentication:
panel serve app.py --basic-auth credentials.json --cookie-secret my_super_safe_cookie_secret
Log in to the application with username user1 and password my_password and use should see this message:

The authentication template can be customized by providing a custom template with the --basic-login-template CLI argument. The template needs to submit username and password to the /login endpoint of the Panel server.
We’ll create a custom login template for the Penguins data visualisation project.
Here’s a custom template named basic_login.html:
<!-- Uses the template from https://github.com/bokeh/bokeh/tree/branch-3.2/examples/server/app/server_auth -->
<!DOCTYPE html>
<html>
<head>
    <meta charset="utf-8">
    <meta content="width=device-width, initial-scale=1.0" name="viewport">
    <meta content="en" name="docsearch:language">
    <title>Penguins Data Visualisation</title>
    <link rel="icon" type="image/x-icon" href="{{ PANEL_CDN }}images/favicon.ico">
    <style>
    * {
      box-sizing: border-box;
      margin:0;
      padding: 0;
    }
    html {
      height: 100%;
    }
    body {
      font-family: 'Segoe UI', sans-serif;;
      font-size: 1em;
      height: 100%;
      line-height: 1.6;
    }
    p {
      padding-bottom: 5px;
    }
    .wrap {
      align-items: center;
      background: #fafafa;
      display: flex;
      height: 100%;
      justify-content: center;
      width: 100%;
    }
    .login-form {
      background: #ffffff;
      border: 1px solid #ddd;
      margin: 0 auto;
      padding: 2em;
      width: 350px;
    }
    .form-input {
      background: #fafafa;
      border: 1px solid #eeeeee;
      padding: 12px;
      width: 100%;
    }
    .form-group {
      margin-bottom: 1em;
    }
    .form-button {
      background: #107bba;
      border: 1px solid #ddd;
      color: #ffffff;
      padding: 10px;
      text-transform: uppercase;
      width: 100%;
    }
    .form-button:hover {
      background: #0072b5;
    }
    .form-header {
      text-align: center;
    }
    .form-footer {
      text-align: center;
    }
    #logo {
      margin-top: 2em;
    }
    #error-message {
      text-align: center;
      margin-bottom: 0em;
    }
    </style>
</head>
<body>
  <div class="wrap">
    <form class="login-form" action="./login" method="post">
      <div class="form-header">
        <h3><img id="logo" src="https://raw.githubusercontent.com/allisonhorst/palmerpenguins/main/man/figures/palmerpenguins.png" width="150" height="170"></h3>
        <br>
        <p> Login to view dashboard</p>
      </div>
      <div id="error-message" class="form-group">
        <p style="color:rgb(255, 0, 0);font-weight:bold" class="errormessage">{{errormessage}}</p>
      </div>
      <p></p>
      <!--Email Input-->
      <div class="form-group">
        <input name="username" type="text" class="form-input" autocapitalize="off" autocorrect="off" placeholder="username">
      </div>
      <!--Password Input-->
      <div class="form-group">
        <input name="password" type="password" class="form-input" placeholder="password">
      </div>
      <!--Login Button-->
      <div class="form-group">
        <button class="form-button" type="submit">Login</button>
      </div>
      <div><small></small></div>
    </form>
  </div>
</body>
</html>
Modify the app.py file to add the following:
logout button:logout = pn.widgets.Button(name="Log out")
logout.js_on_click(code="""window.location.href = './logout'""")
welcome = f"## Welcome {pn.state.user}! Meet the Palmer penguins!"
logout button:art = pn.Column(
logout, welcome, penguins_art, credit, instructions, license, sizing_mode="stretch_width"
).servable(area="sidebar")
Now run the server:
panel serve app.py --basic-auth my_password --basic-login-template basic_login.html --cookie-secret my_super_safe_cookie_secret
You should see the login screen where you need to enter your username and password as my_password:
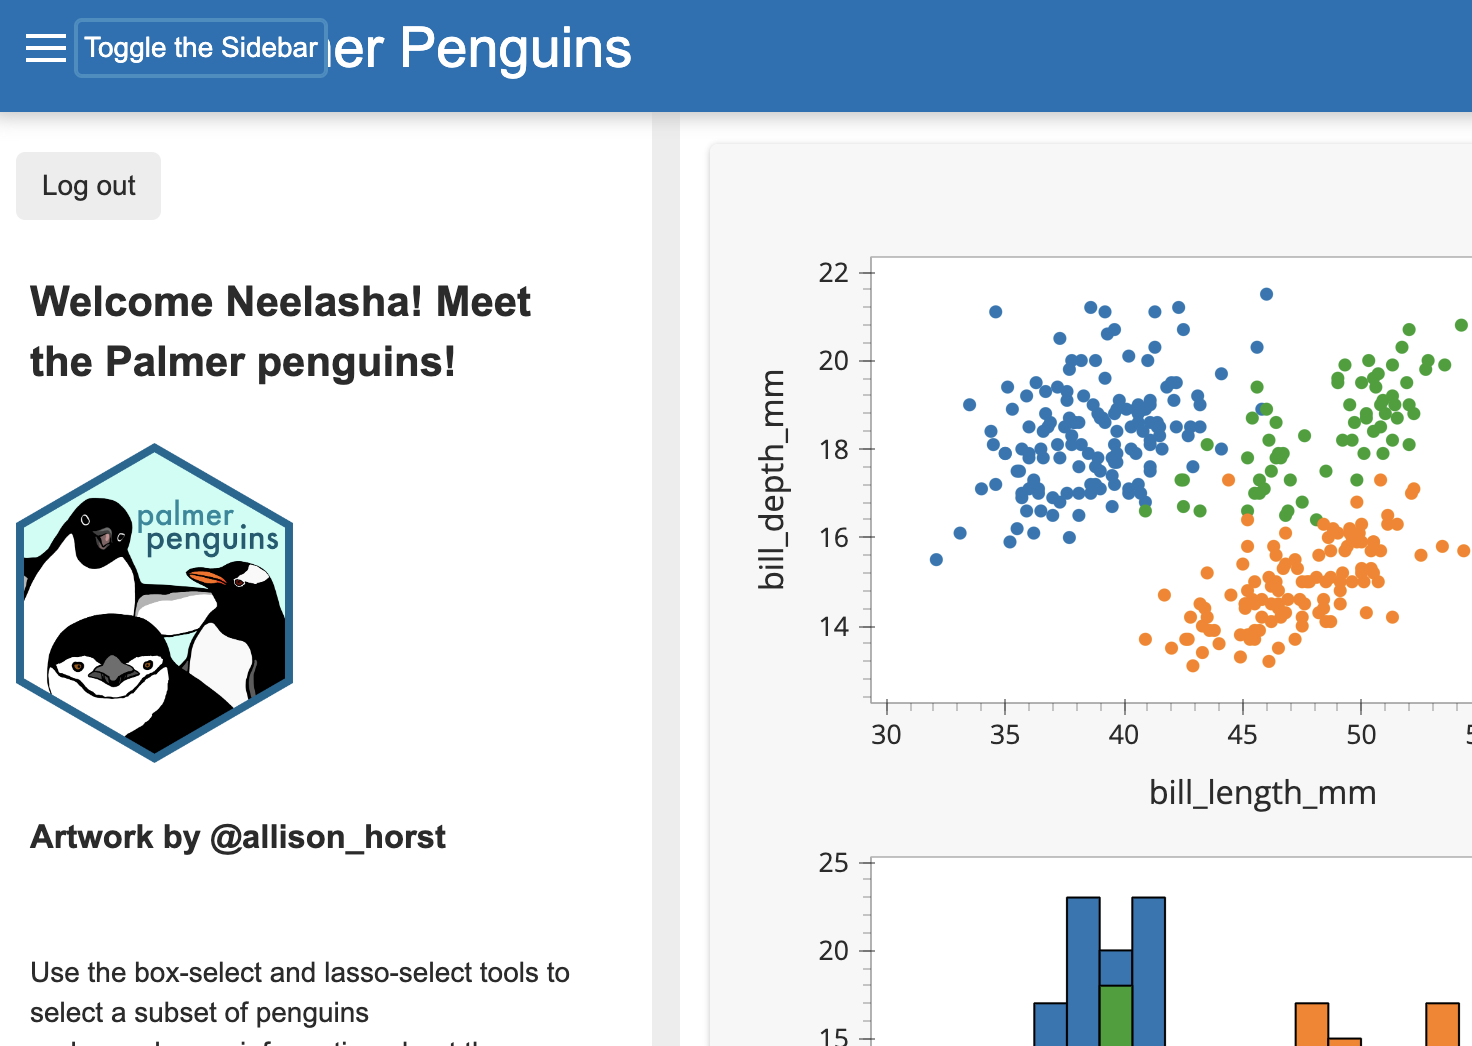
Once logged in you should see the username in the welcome message:
Refer to the Configuring Basic Authentication guide to learn more about basic authentication.
Configuring OAuth restricts access to the application until the user logs in through the selected provider. It is much more secure than traditional methods, as it uses tokens instead of credentials to authenticate access. Have a look at the OAuth Providers that Panel supports out of the box.
Let’s look at a step-by-step guide to setting up OAuth using GitHub:
First, you need to follow the instructions for creating an OAuth app. Once registered, you should receive a client_id and client_secret from GitHub.
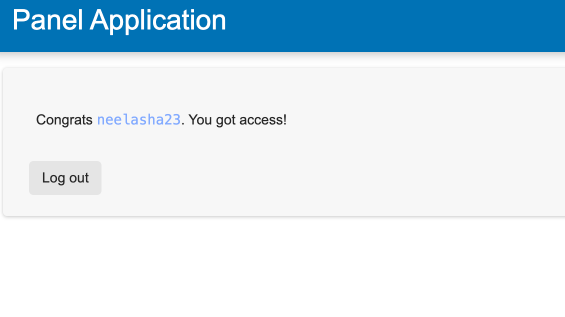
Consider a simple Panel application that prints a message for successful access:
import panel as pn
pn.extension(template="fast")
logout = pn.widgets.Button(name="Log out")
logout.js_on_click(code="""window.location.href = './logout'""")
pn.Column(f"Congrats `{pn.state.user}`. You got access!", logout).servable()
Save this code in an oauth_example.py file and start the application by running:
panel serve oauth_example.py --oauth-provider=github --oauth-key=... --oauth-secret=... --cookie-secret=... --oauth-encryption-key=...
Here’s how you can obtain each of these command line parameters:
oauth-key: Client key received by GitHub.oauth-secret: Client secret received by GitHub.cookie-secret: You can run the panel secret CLI argument or generate some other random non-guessable string.oauth-encryption-key: Install the cryptography package and run the panel serve CLI command.Once the application is up and running and you try to access it, you’ll be asked to sign in using GitHub:

On successful login you’ll get the below message:
Refer to the Configuring OAuth guide for more details.
In this tutorial, we demonstrated authentication mechanisms for Panel applications, such as those provided by Ploomber Cloud and Panel’s built-in authentication providers like OAuth 2.0. Through these authentications, developers can ensure that their applications are secure and trustworthy.
The choice of authentication approach depends on the specific requirements and security considerations of the application.
Ploomber Cloud authentication is a simple yet very secure way to ensure protection against unauthorized access. Panel’s basic authentication is appropriate for applications where a single master password or a small set of credentials can adequately control user access.
OAuth Authentication, on the other hand, provides advanced security features and integration options for applications requiring third-party authentication and access control.
Seamless deployment for data scientists and developers. Ploomber handles infrastructure so you focus on building. Secure and scalable—from personal projects to enterprise apps. Support for Streamlit, Dash, Docker, and AI-powered applications. Because life's too short for deployment headaches.

