


vLLM is an exciting new Large Language Model (LLM) project. With over 200k monthly downloads, vLLM has allowed thousands of developers to develop their own LLMs and create their own versions of ChatGPT. But why build another ChatGPT when the original already exists? Well, when you create your own application, you can specialize it for your needs, by:
In this tutorial, I’ll show you how to leverage open-source tools such as vLLM, Chainlit, and Ploomber Cloud to create your own private ChatGPT in minutes.
With vLLM, you can perform inference and chat and choose from a variety of different models. We’re going to use Google’s gemma-2b-it model as our LLM. We’ll host it as an API on Ploomber Cloud. Then, we’ll create a simple chat interface using Chainlit to allow users to interact with the model.
Ploomber Cloud provides extensive resources to make this project easier:
If you’re looking for a deeper dive into vLLM as a whole, check out this amazing blog: Deploying vLLM: a Step-by-Step Guide. It discusses setting up vLLM from scratch and explores a few different features of the library. In this article, we’ll go over a few of those steps to understand how vLLM works.
If you want build as quickly as possible, skip to this step.
Before we can start, we need to install vLLM:
pip install vllm
Keep in mind that vLLM requires Linux and Python >=3.8. Furthermore, it requires a GPU with compute capability >=7.0 (e.g., V100, T4, RTX20xx, A100, L4, H100).
Finally, vLLM is compiled with CUDA 12.1, so you need to ensure that your machine is running such CUDA version. To check it, run:
nvcc --version
If you’re not running CUDA 12.1 you can either install a version of vLLM compiled with the CUDA version you’re running (see the installation instructions to learn more), or install CUDA 12.1.
NOTE: If your machine doesn’t have a GPU with such compute capability or you aren’t running the right version of CUDA, no worries. Skip to Deploy the server where we deploy the application to Ploomber Cloud.
Starting vLLM is as easy as this command:
python -m vllm.entrypoints.openai.api_server --model=MODELTORUN
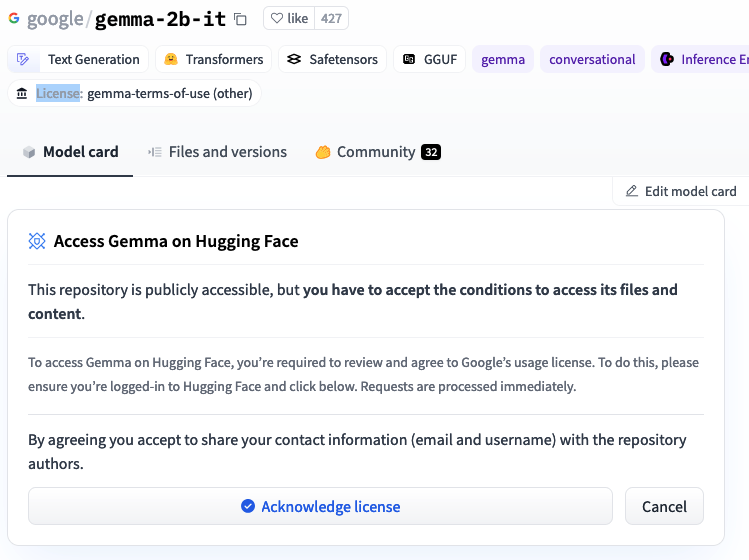
vLLM supports many different models, but for this project we’ll use Google’s gemma-2b-it.
Starting vLLM with this model will look like this:
python -m vllm.entrypoints.openai.api_server --model=gemma-2b-it
Before you can use gemma-2b-it, you’ll need to accept their license,
hence, you need to create a HuggingFace account, accept the model’s license, and generate
a token.
Once you’ve done this, go to your tokens section, and grab a token, then, before starting vLLM, set the token as follows:
export HF_TOKEN=YOURTOKEN
Now you can start the server:
python -m vllm.entrypoints.openai.api_server --model=google/gemma-2b-it
Now that the server is running locally, you can test it. OpenAI’s Python library makes it easy:
# NOTE: remember to run: pip install openai
from openai import OpenAI

openai_api_key = "EMPTY"
openai_api_base = "http://localhost:8000/v1"

client = OpenAI(
    api_key=openai_api_key,
    base_url=openai_api_base,
)

chat_response = client.chat.completions.create(
    model="google/gemma-2b-it",
    messages=[
        {"role": "user", "content": "Tell me in one sentence what Mexico is famous for"},
    ]
)
print(chat_response.choices[0].message.content)
To make this easier, we can use this vLLM example to deploy the LLM. We’ll be following these instructions to deploy. First, download the raw files from GitHub, or use the Ploomber Cloud CLI to download them:
pip install ploomber-cloud
ploomber-cloud examples docker/vllm-gpu
Now, navigate to the folder where you downloaded the files. The Dockerfile should look like this:
# we need pyotrch==2.1.2 for vllm==0.3.3
FROM pytorch/pytorch:2.1.2-cuda12.1-cudnn8-devel

WORKDIR /srv

COPY requirements.txt /srv/
RUN pip install -r requirements.txt --no-cache-dir

COPY . /srv

# NOTE: this requires HF_TOKEN so the model can be downloaded. The account associated
# with the token must have access to the google/gemma-2b-it model.
ENTRYPOINT ["python", "-m", "vllm.entrypoints.openai.api_server", "--host", "0.0.0.0", "--port", "80", "--model", "google/gemma-2b-it", "--dtype=half"]
Mind the note at the bottom. When we deploy, we’ll make sure to set HF_TOKEN as a secret, or else the deploy will fail.
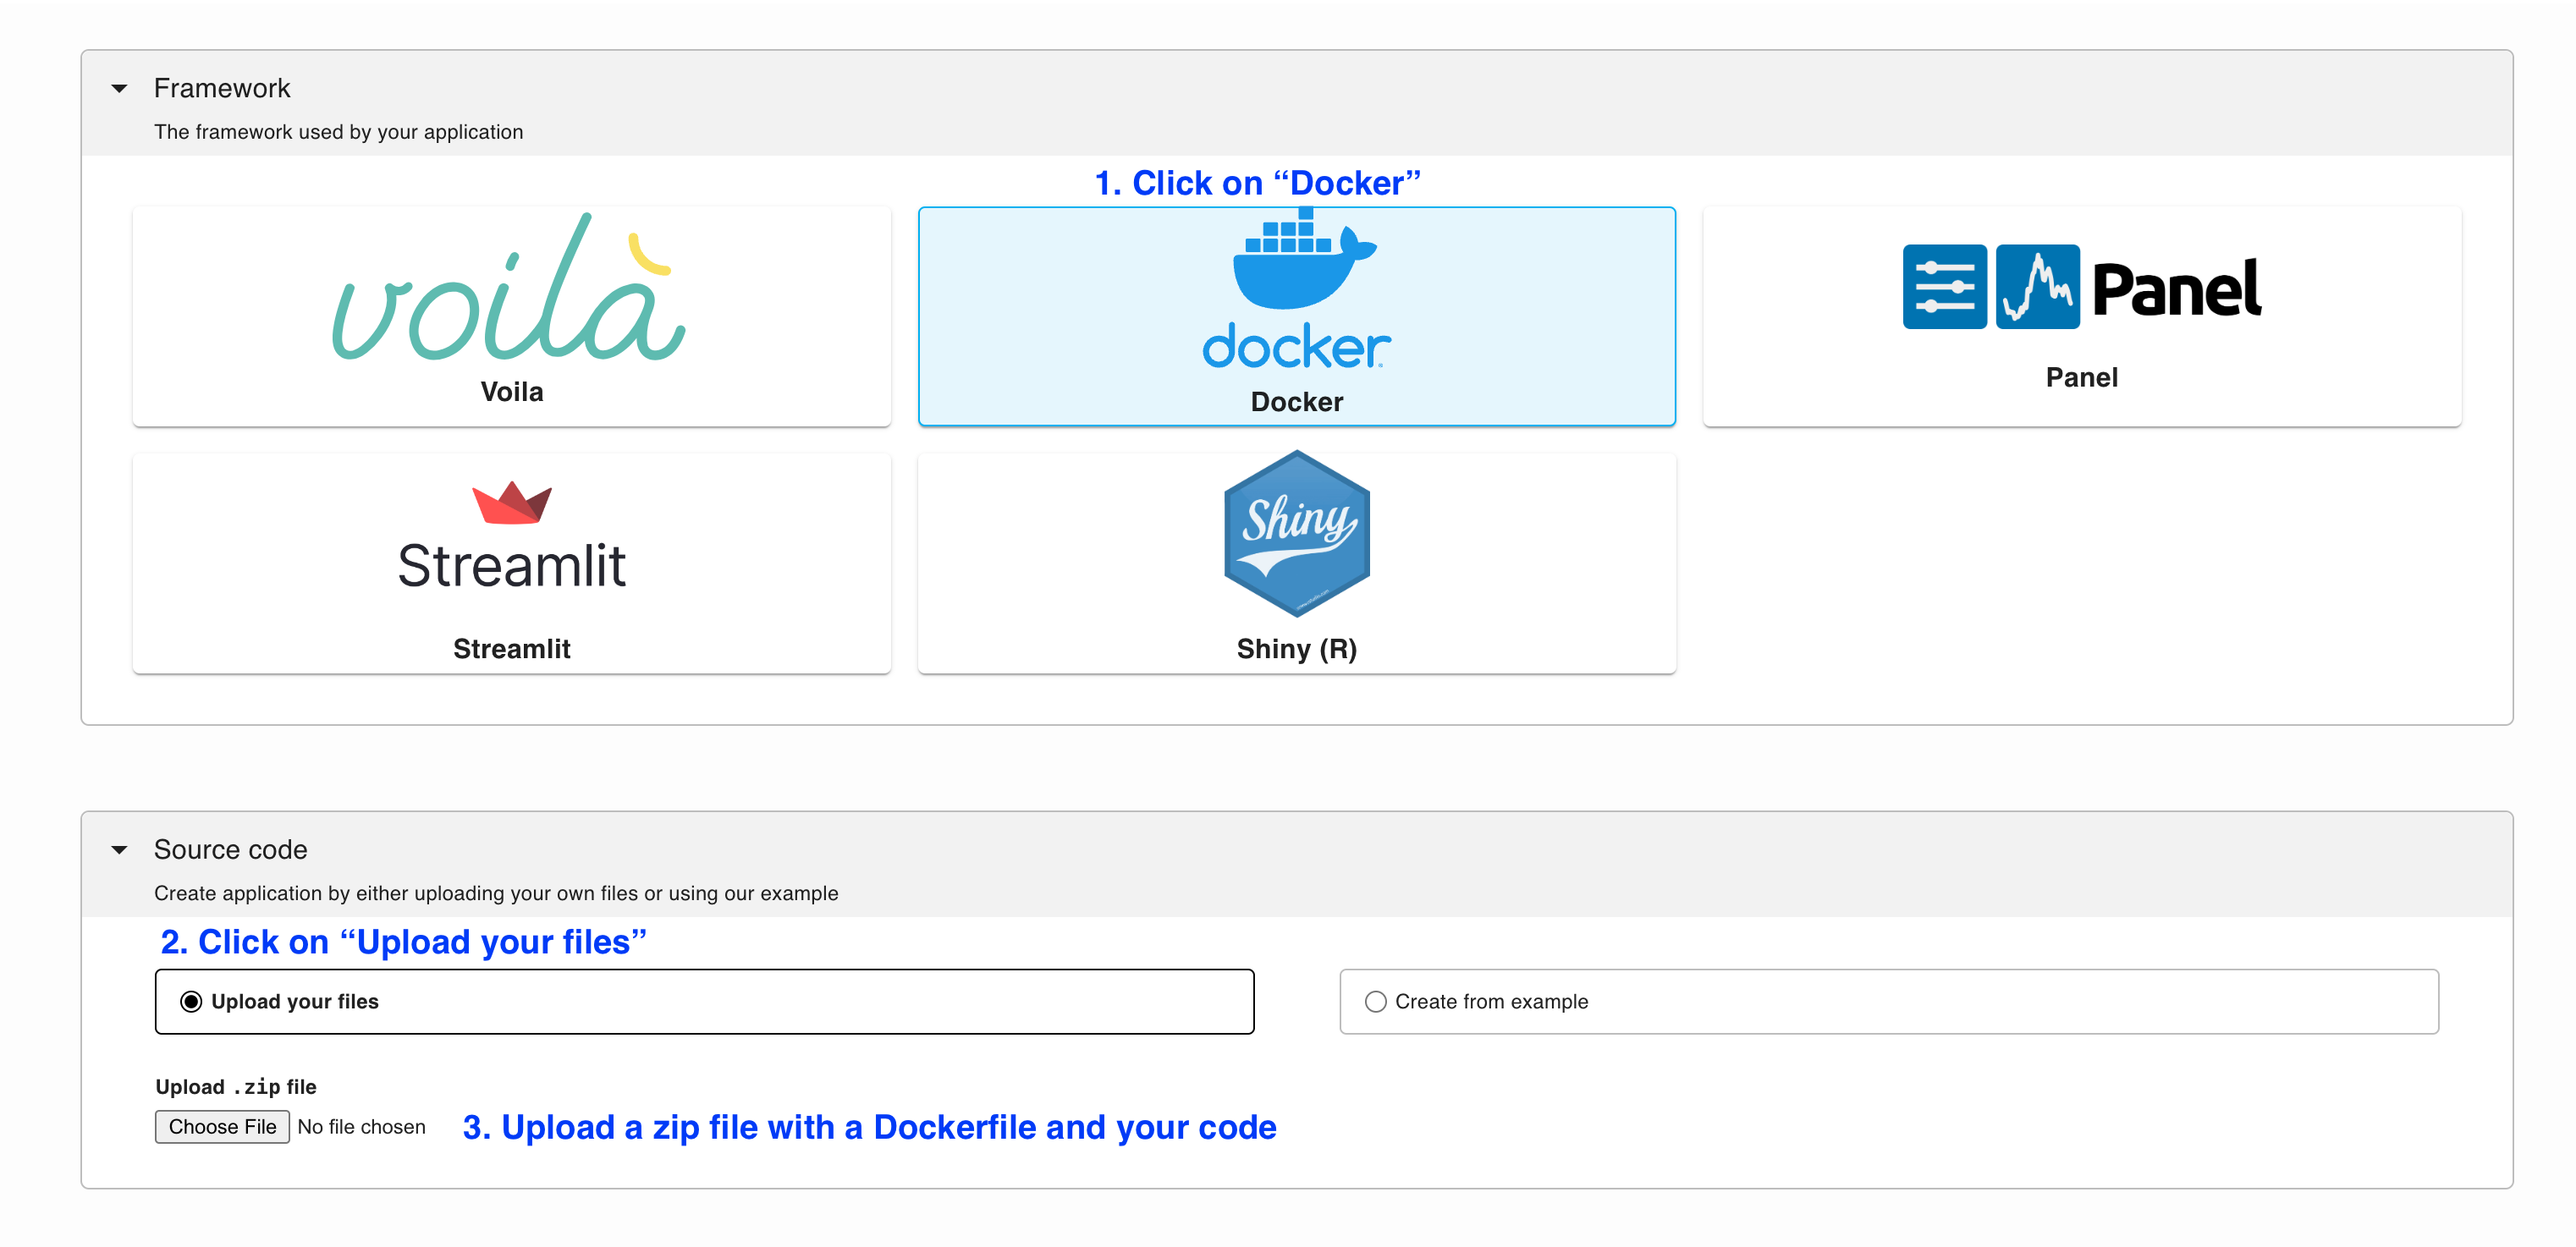
Create a zip file with Dockerfile and requirements.txt in it and navigate to Ploomber Cloud.
Click Create new application, select Docker, and upload your zip:
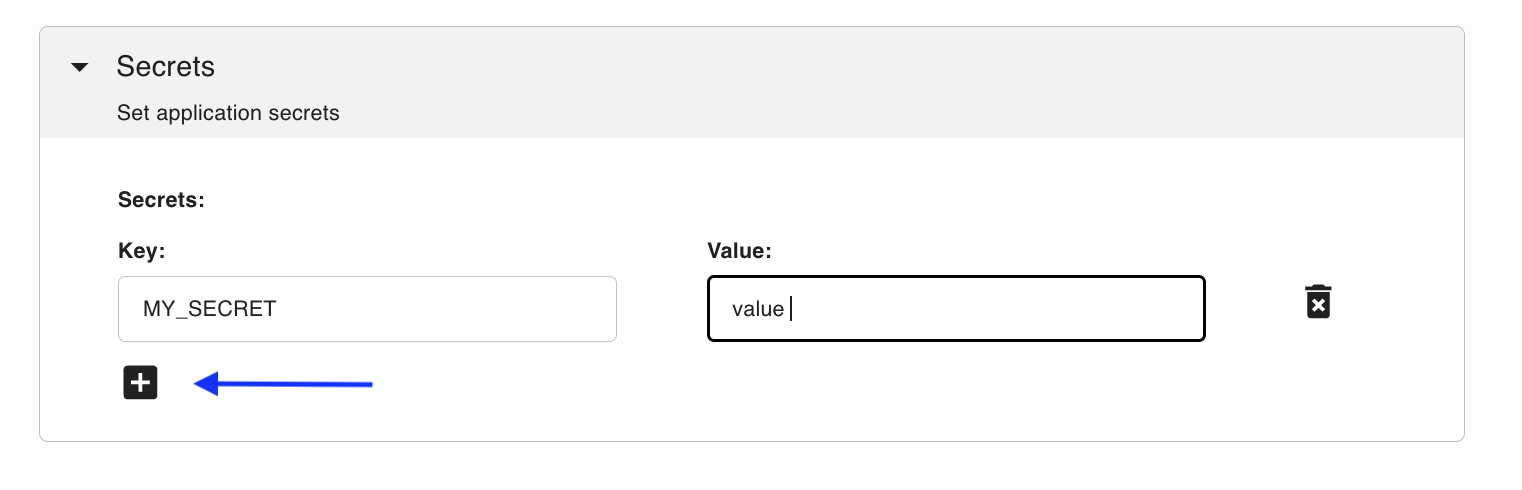
Under Secrets, add your HF_TOKEN. For security, we also recommend setting a VLLM_API_KEY. Generate one yourself with:
python -c 'import secrets; print(secrets.token_urlsafe())'
Then click the + and add both secrets:
Once you’ve set those secrets, ensure you select a GPU:
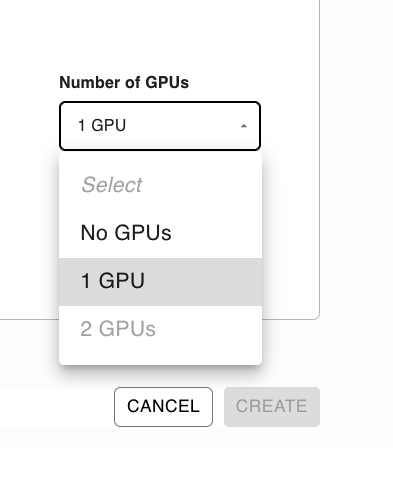
NOTE: GPUs are currently a Pro feature, but you can start a 10 day free trial here.
Now, click Deploy! Deployment will take ~10 minutes since Ploomber has to build your Docker image, deploy the server and download the model.
The server will be ready to take requests when the WEBSERVICE LOGS show something like this:
2024-03-28T01:09:58.367000 - INFO: Uvicorn running on http://0.0.0.0:80 (Press CTRL+C to quit)
Interestingly, the ChatGPT System Prompt was leaked recently. While it has since been patched, it raises a conversation about system prompts and how they influence the behavior of the LLM as a whole.
Amanda Askell did an in-depth breakdown of Claude’s system prompt where she discusses the limitations and potential biases of LLMs. Her main points are that system prompts allow us to provide the system “live” info such as the date, and allow for more customization after training the model. She noted that the model had a natural bias against right-wing views, so they used the system prompt to encourage it to be less partisan in its replies. They also included helpful notes as to how the model should format replies, the length of replies, and how protective it should be over revealing its own prompt.
As system prompts are ever-changing, we should view them as an important key in unlocking capabilities and fine-tuning the behavior of LLMs. As the technology continues to improve, the system prompt will prove itself more and more powerful in getting the most out of these complex models.
Perhaps in the future, users will have a more direct way to affect these system prompts to tweak the model for unique use cases. By altering the system prompt, we can see the nuanced ways in which it affects the behavior of the LLM.
Chainlit makes it incredibly simple to build a ChatGPT-like interface with their OpenAI integration.
Today we’ll pull this example, which uses the Chainlit OpenAI integration with a few small changes. Download the code from GitHub or use:
pip install ploomber-cloud
ploomber-cloud examples chainlit/private-chatgpt
The app.py looks like this:
from openai import AsyncOpenAI
import chainlit as cl
import os

# Enter the personal API key that you set for the host,
# or leave it blank if you didn't set one
vllm_key = os.environ.get("VLLM_API_KEY") or ""

# Modify this value to match your host, remember to add /v1 at the end
api_base = "https://aged-math-3623.ploomber.app/v1"

client = AsyncOpenAI(
    api_key=vllm_key,
    base_url=api_base,
)

# Instrument the OpenAI client
cl.instrument_openai()

settings = {
    "model": "google/gemma-2b-it",
    # ... more settings
}

messages = []

@cl.on_chat_start
def main():
    messages = []
    cl.user_session.set("messages", messages)

@cl.on_message
async def on_message(message: cl.Message):
    messages = cl.user_session.get("messages")
    messages = messages + [
        {
            "content": message.content,
            "role": "user"
        }
    ]
    response = await client.chat.completions.create(
        messages=messages,
        **settings
    )
    messages = messages + [{
        "content": response.choices[0].message.content,
        "role": "assistant",
    }]
    cl.user_session.set("messages", messages)
    await cl.Message(content=response.choices[0].message.content).send()
Make sure you set the same VLLM_API_KEY that you set when you deployed the LLM:
export VLLM_API_KEY=YOUR_KEY
Don’t forget to replace the URL for api_base with your own host URL. Don’t forget to add /v1 at the end.
Now, initialize your project:
ploomber-cloud init
And deploy:
ploomber-cloud deploy --watch
Wait a few minutes and voila! You’ve just built a private ChatGPT using vLLM and Chainlit!
Your app should look like this:
There you have it! This tutorial got you started with a simple LLM using vLLM + Gemma and a Chainlit interface. To build on this, you could try:
Seamless deployment for data scientists and developers. Ploomber handles infrastructure so you focus on building. Secure and scalable—from personal projects to enterprise apps. Support for Streamlit, Dash, Docker, and AI-powered applications. Because life's too short for deployment headaches.

