


You’ve been working hard on your Shiny application and it’s time to share it! But suppose you want to secure the application via a username and password - how might you do that? In this article, we’ll compare methods to add authentication to your Shiny app.
Adding authentication to your Shiny app is very simple with Ploomber Cloud. To start, you need to create an account and follow the instructions to deploy a Shiny app.
Create a zip file with the following files:
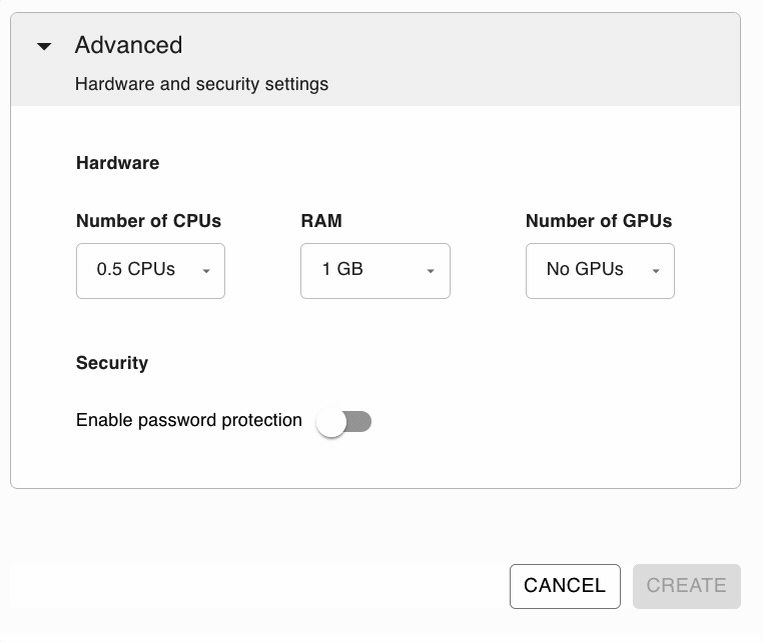
startApp.Rinstall.Rapp.RNow open Ploomber Cloud, create a new application, and add your zip file. Under the deployment options, under Advanced -> Security, click Enable password protection. Then, set any username and password you like, and click Deploy! Be sure to note down the username and password you entered in case you can’t remember it later.
Note: Password protection is currently only available for Pro users, but you can start a 10 day free trial here.
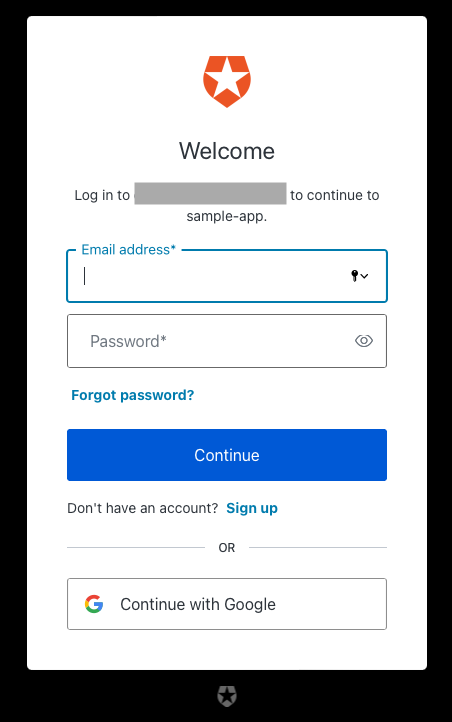
Once your app is deployed, navigate to the page where you’ll need to enter your username and password to access the app. In Chrome, it looks like this:

There you have it! You’ve added authentication to your app in minutes with no extra code needed.
Note that Ploomber Cloud’s password protection works for a single set of credentials. However, if you need a more sophisticated way of securing your application you can check out Auth0. Auth0 is a platform that allows developers to implement secure login processes and control access to applications.
Here are some advantages of using auth0:
Ploomber Cloud enables you to easily secure your Shiny R applications using auth0.
Let’s look at a sample application in which we would define a reactive output element. We read the HTTP headers HTTP_X_AUTH_NAME and HTTP_X_AUTH_SUB from the current session:
output$welcome_message <- renderText({
    auth_name <- read_header(session, "HTTP_X_AUTH_NAME")
    auth_sub <- read_header(session, "HTTP_X_AUTH_SUB")
    paste("Welcome,", auth_name, "!", "(", auth_sub, ")")
  })
To deploy this application on Ploomber Cloud, you first need to install the CLI:
pip install ploomber-cloud
Then, you can run the below command to download the sample application that demonstrates auth0 integration:
ploomber-cloud examples shiny-r/app-with-auth0
cd into the app-with-auth0 directory and initialize the project. This should create a ploomber-cloud.json file with the project id information.
ploomber-cloud init
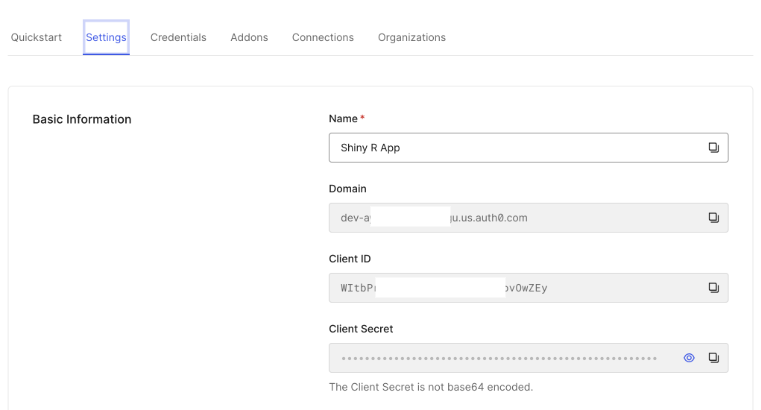
To set up auth0 authentication for the project we need to create a new application in the Auth0 account:
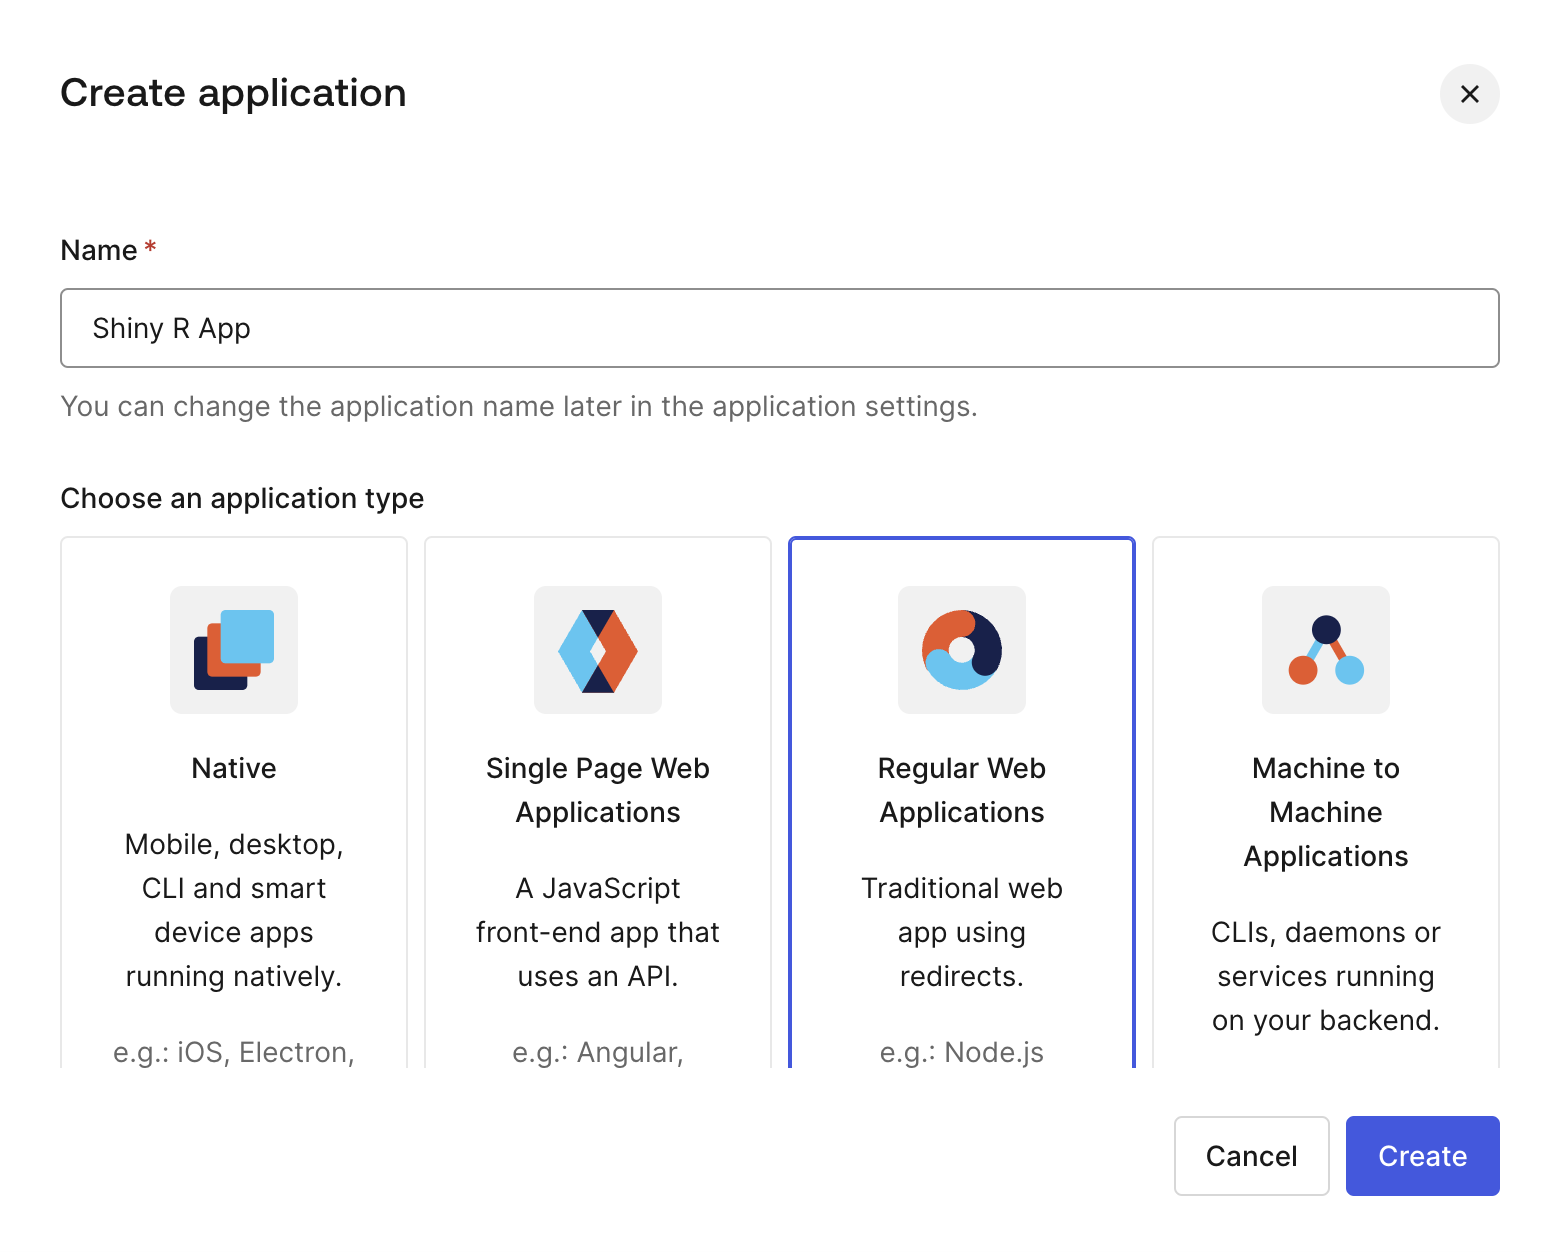
Once done, note down the values of Client ID, Client Secret and Domain in the application Settings page.
Next, run ploomber-cloud templates auth0 in the project root folder. You need to set Client ID, Client Secret and Domain as the AUTH_CLIENT_ID, AUTH_CLIENT_SECRET and AUTH_ISSUER_BASE_URL respectively:
% ploomber-cloud templates auth0
Enter the value for AUTH_CLIENT_ID: WItb**********************OwZEy
Enter the value for AUTH_CLIENT_SECRET: IdiW3KmjVR7SUjk********************************7WbyLC0zCcvE9XCj
Enter the value for AUTH_ISSUER_BASE_URL: dev-****************.us.auth0.com
Successfully configured auth0. To deploy, run 'ploomber-cloud deploy'
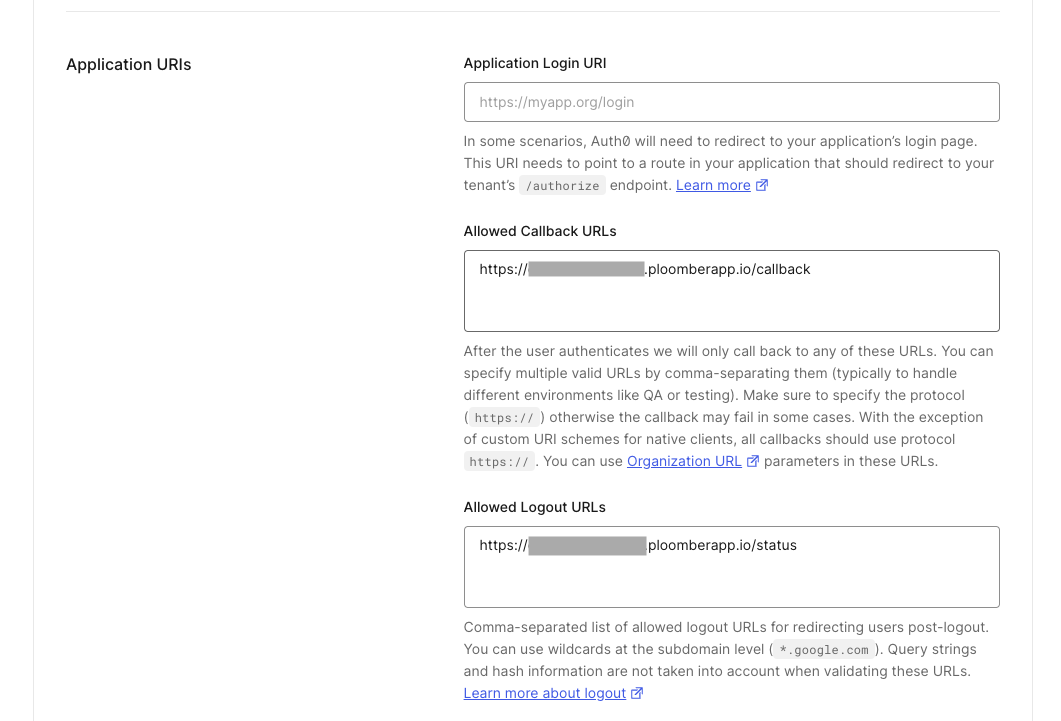
Once the auth0 setup is done you should find a .env file with the credentials entered in the previous step. To deploy the project run ploomber-cloud deploy. The application ID will be of the format https://application-name-1999.ploomber.app. Copy this URL and set callback URLs as follows:
Once the application deployment is complete you can click on the VIEW APPLICATION button and you should see the login page:
To learn more about auth0 integration check out the documentation.
shinyauthr is an open-source R package providing module functions that can be used to add an authentication layer to your Shiny apps. You first need to install the package:
install.packages("shinyauthr")
The package provides 2 module functions each with a UI and server element:
loginUI()loginServer()logoutUI()logoutServer()Here’s a barebones example that shows how you might implement your login functionality (via the shinyauthr docs):
library(shiny)

# dataframe that holds usernames, passwords and other user data
user_base <- tibble::tibble(
  user = c("user1", "user2"),
  password = c("pass1", "pass2"),
  permissions = c("admin", "standard"),
  name = c("User One", "User Two")
)

ui <- fluidPage(
  # add logout button UI
  div(class = "pull-right", shinyauthr::logoutUI(id = "logout")),
  # add login panel UI function
  shinyauthr::loginUI(id = "login"),
  # setup table output to show user info after login
  tableOutput("user_table")
)

server <- function(input, output, session) {

  # call login module supplying data frame,
  # user and password cols and reactive trigger
  credentials <- shinyauthr::loginServer(
    id = "login",
    data = user_base,
    user_col = user,
    pwd_col = password,
    log_out = reactive(logout_init())
  )

  # call the logout module with reactive trigger to hide/show
  logout_init <- shinyauthr::logoutServer(
    id = "logout",
    active = reactive(credentials()$user_auth)
  )

  output$user_table <- renderTable({
    # use req to only render results when credentials()$user_auth is TRUE
    req(credentials()$user_auth)
    credentials()$info
  })
}

shinyApp(ui = ui, server = server)
Shinyauthr is relatively easy to use although it requires adding some code to your app. It also provides options for cookie-based authentication and hashing passwords with Sodium, both of which might require more work on the coding front. However, the package is open-source, so it is free to use.
shinymanager is another open-source R package similar to shinyauthr. It is a simple and secure authentication mechanism for single Shiny applications. It leverages a SQLite database to store user information.
You can install it from CRAN using:
install.packages("shinymanager")
Get started by adding this code to your app:
# define some basic credentials (on data.frame)
credentials <- data.frame(
  user = c("shiny", "shinymanager"), # mandatory
  password = c("azerty", "12345"), # mandatory
  start = c("2019-04-15"), # optinal (all others)
  expire = c(NA, "2019-12-31"),
  admin = c(FALSE, TRUE),
  comment = "Simple and secure authentification mechanism
  for single ‘Shiny’ applications.",
  stringsAsFactors = FALSE
)

library(shiny)
library(shinymanager)

ui <- fluidPage(
  tags$h2("My secure application"),
  verbatimTextOutput("auth_output")
)

# Wrap your UI with secure_app
ui <- secure_app(ui)


server <- function(input, output, session) {

  # call the server part
  # check_credentials returns a function to authenticate users
  res_auth <- secure_server(
    check_credentials = check_credentials(credentials)
  )

  output$auth_output <- renderPrint({
    reactiveValuesToList(res_auth)
  })

  # your classic server logic

}

shinyApp(ui, server)
Then, you need an instance of SQLite to store user information. Shinymanager offers a SQLite database for you to use, or you can configure your own database.
The package also offers a few nice features which you can customize on your own:
For more detailed info on shinymanager, see the shinymanager docs.
Shinyproxy is an enterprise platform to deploy data-science apps. While it offers enterprise features, it is an open-source project.. To use it, you need an instance of Java 8 and Docker. Once you have those, download shinyproxy.
Deploying an app using shinyproy requires you to write a Dockerfile. It should look like this:
FROM openanalytics/r-base

LABEL maintainer "Tobias Verbeke <tobias.verbeke@openanalytics.eu>"

# system libraries of general use
RUN apt-get update && apt-get install -y \
    sudo \
    pandoc \
    pandoc-citeproc \
    libcurl4-gnutls-dev \
    libcairo2-dev \
    libxt-dev \
    libssl-dev \
    libssh2-1-dev \
    libssl1.0.0

# system library dependency for the euler app
RUN apt-get update && apt-get install -y \
    libmpfr-dev

# basic shiny functionality
RUN R -e "install.packages(c('shiny', 'rmarkdown'), repos='https://cloud.r-project.org/')"

# install dependencies of the euler app
RUN R -e "install.packages('Rmpfr', repos='https://cloud.r-project.org/')"

# copy the app to the image
RUN mkdir /root/euler
COPY euler /root/euler

COPY Rprofile.site /usr/lib/R/etc/

EXPOSE 3838

CMD ["R", "-e", "shiny::runApp('/root/euler')"]
Then, you can build the Docker image:
sudo docker build -t openanalytics/shinyproxy-template .
You’ll also need an application.yml to configure shinyproxy:
specs:
  - id: euler
    display-name: Euler's number
    container-cmd: ["R", "-e", "shiny::runApp('/root/euler')"]
    container-image: openanalytics/shinyproxy-template
    access-groups: scientists
Then, run shinyproxy using Java:
java -jar shinyproxy-3.0.2.jar
For a more detailed guide on shinyproxy, see the docs.
Shinyproxy is useful because it offers many options for authentication, such as Single-Sign On and Social login. If you want customization, this platform is useful. However, if you are just looking for simple and quick authentication, it involves quite a few moving parts and several steps to get started.
Shinyapps.io is a platform exclusively dedicated to hosting Shiny apps. They offer different authentication and user management options based on your payment plan. You can authenticate your apps using:
To start, sign up for an account and follow the deployment instructions for Shiny R.
Once you get an app running, you can configure user authentication. To enable authentication, navigate to the administrative interface, select the application to modify, and click on the Users tab. Change the Application Visibility to Private and click on Save Settings. It should look like this:
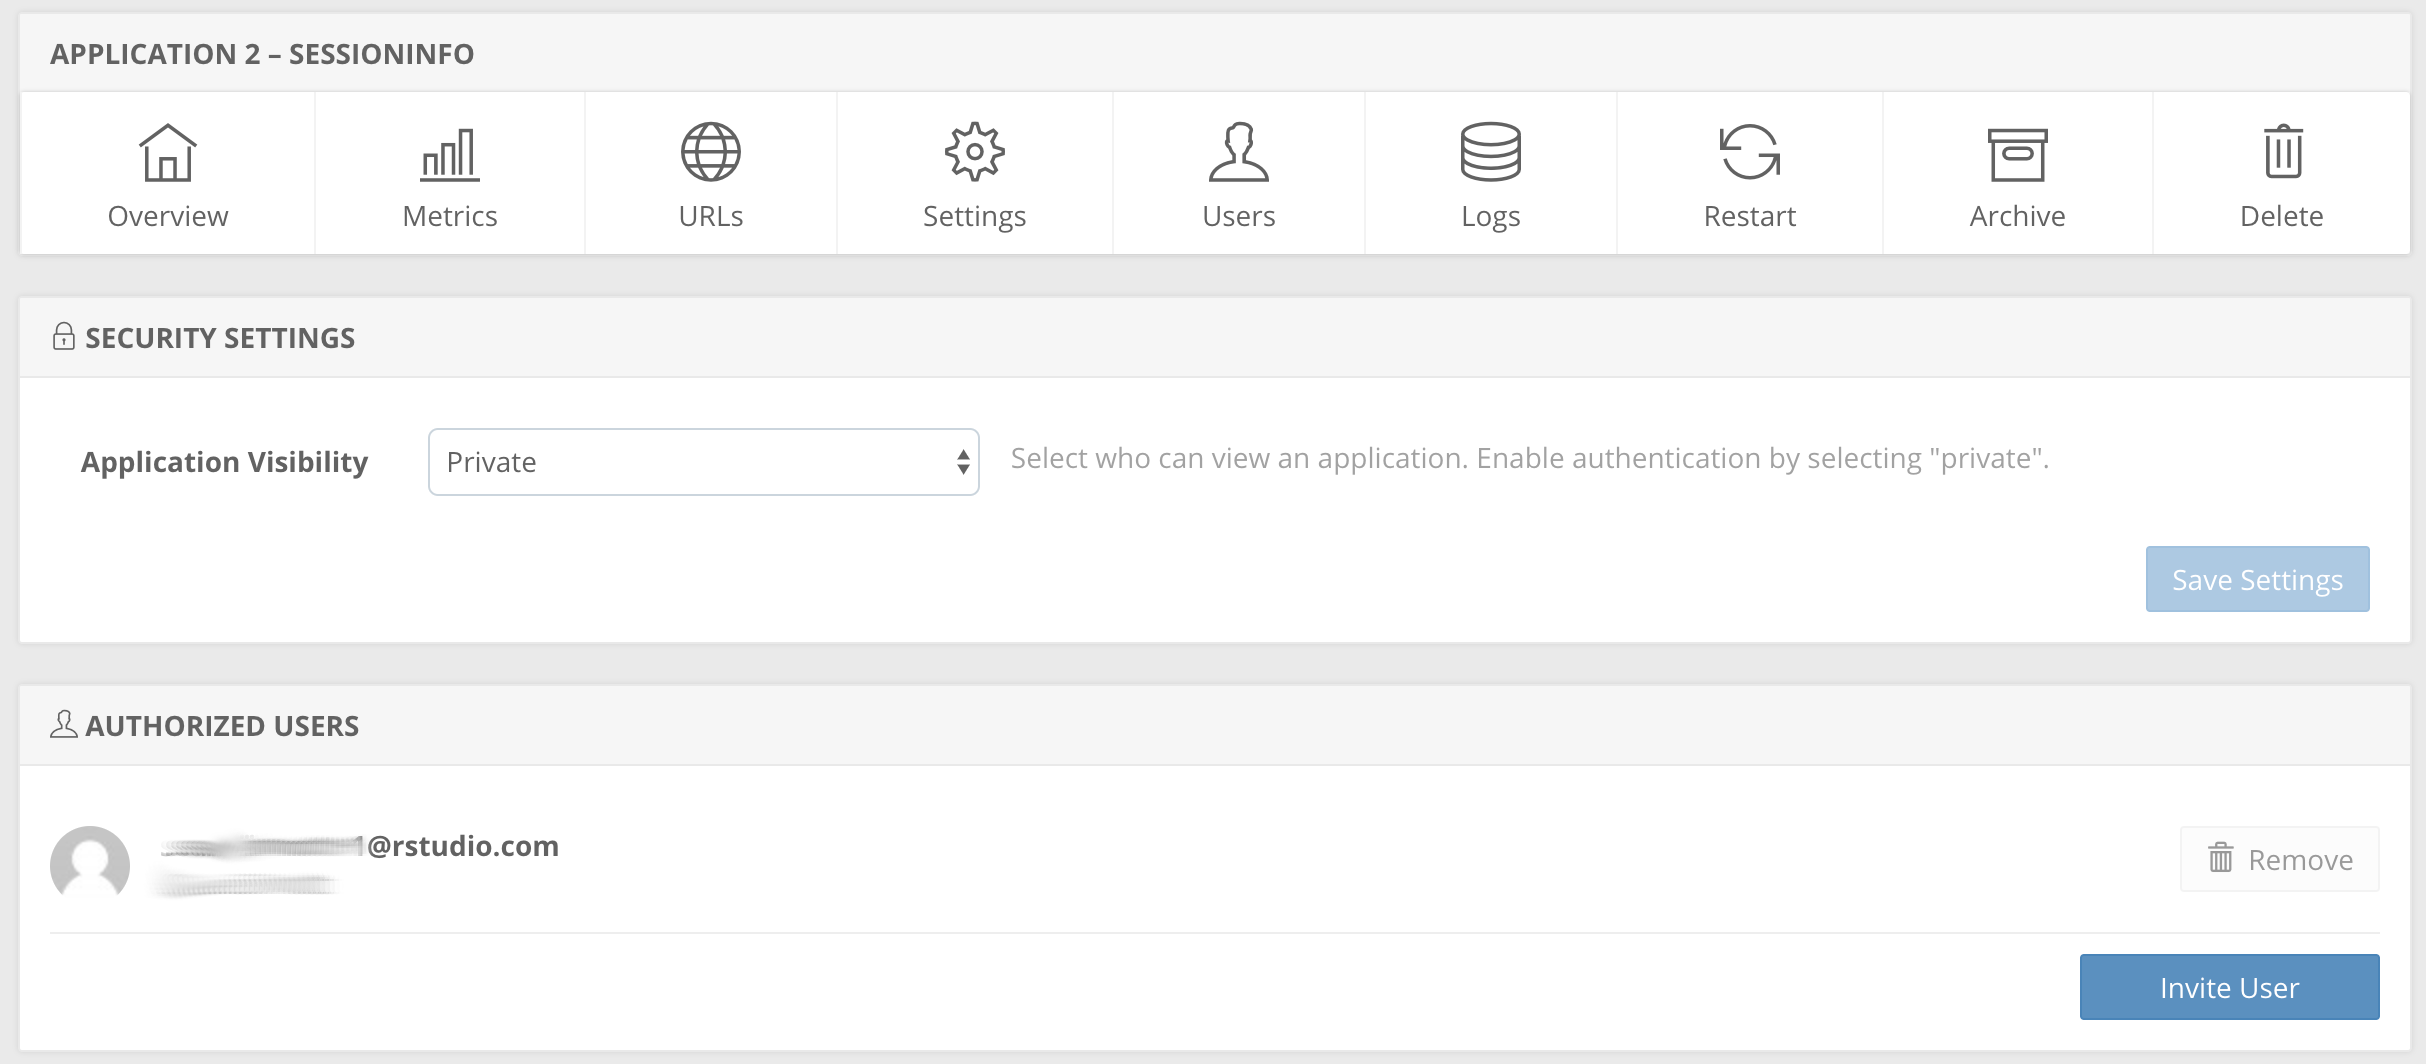
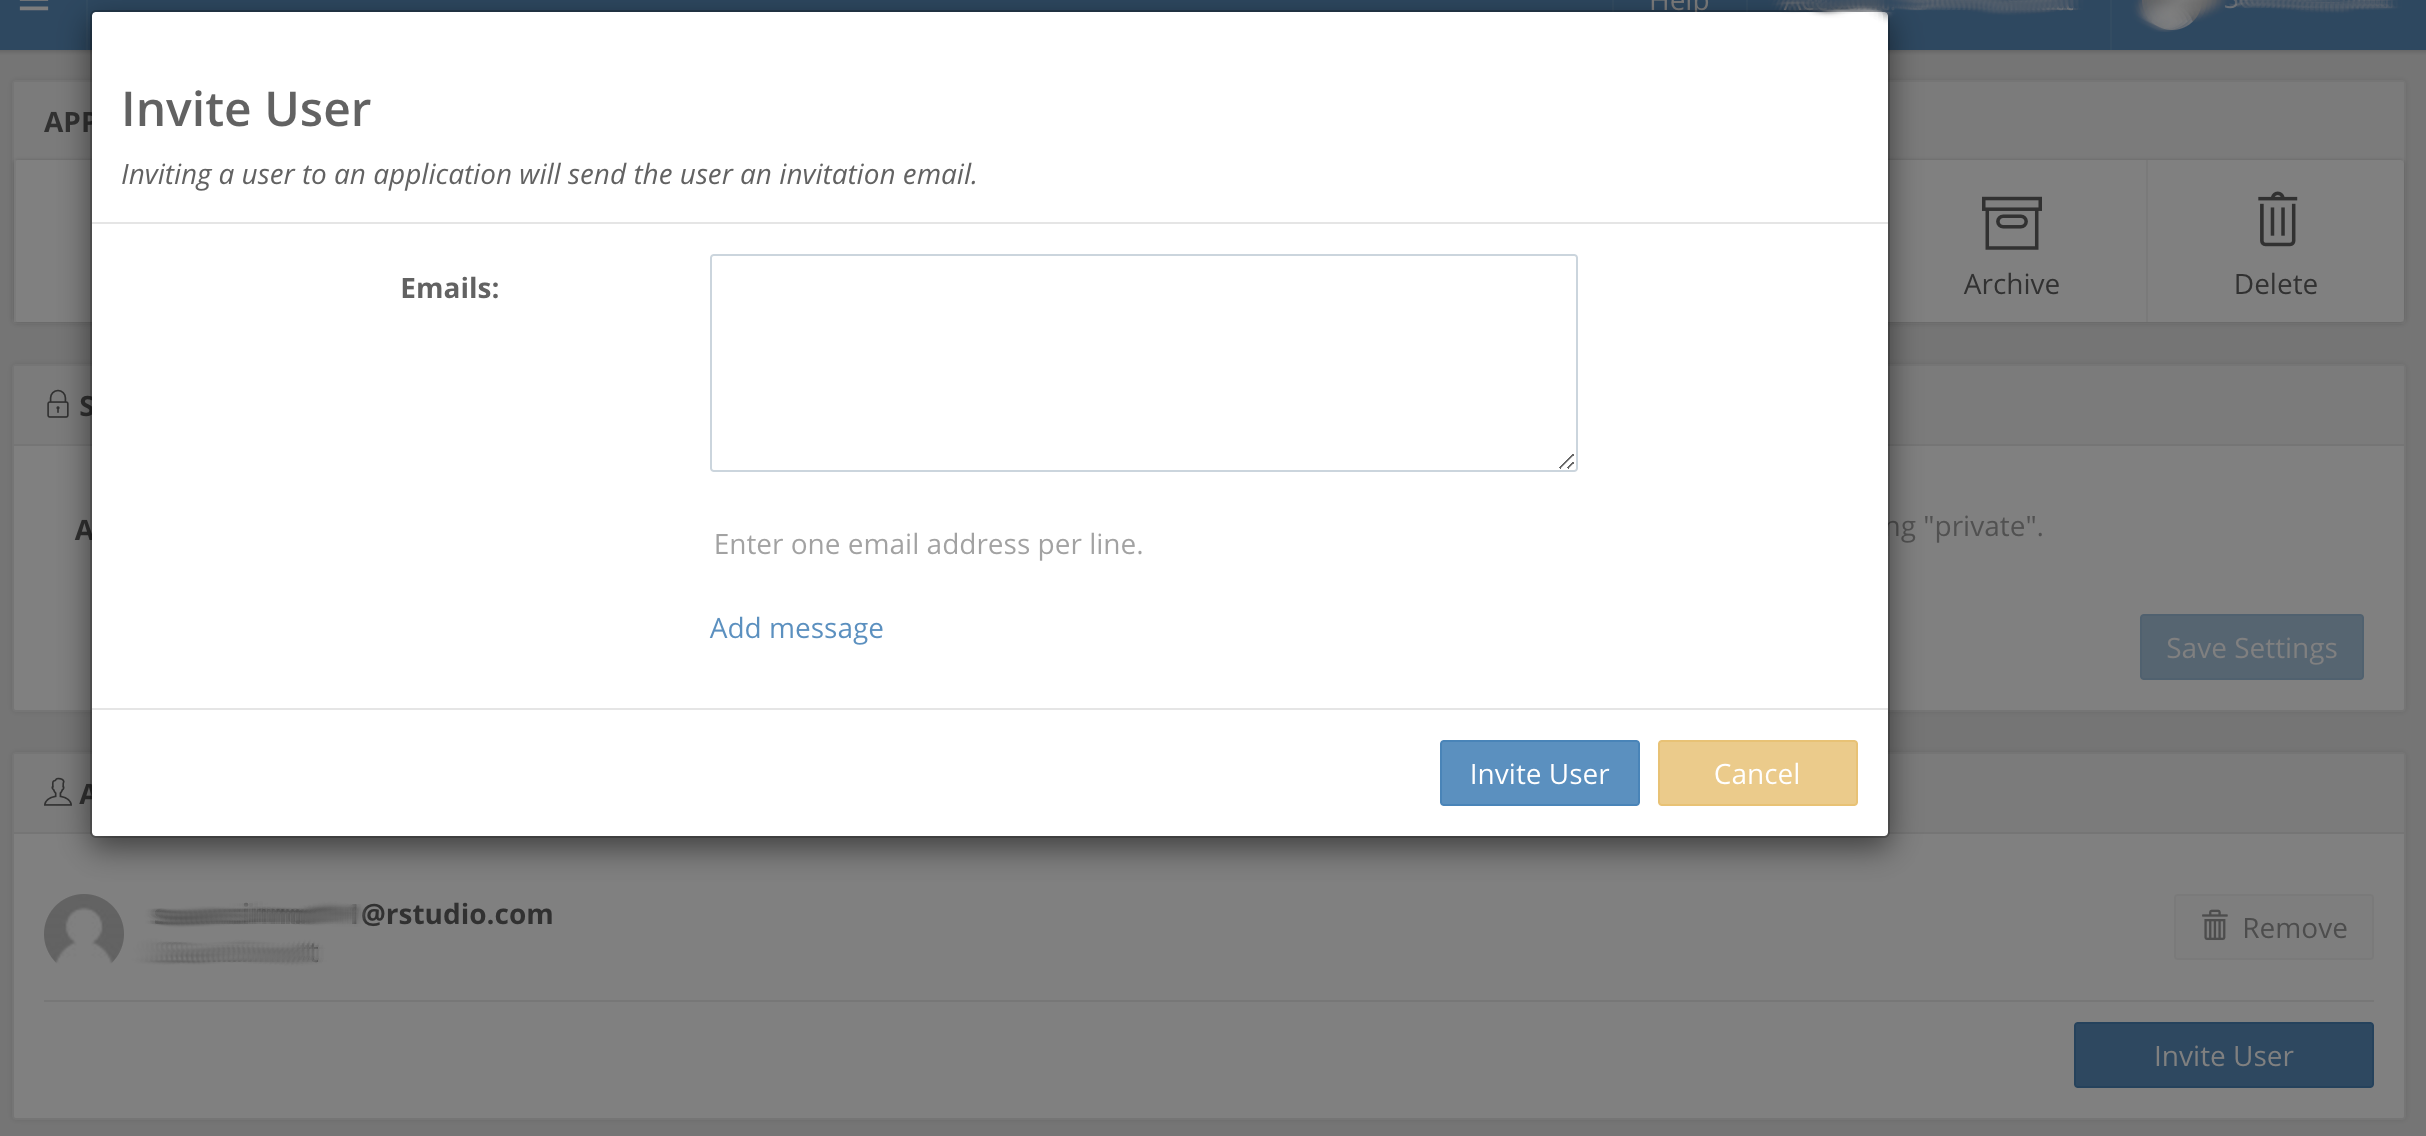
After the application is restarted, the owner of the account and other members of the account will automatically be included in the list of authorized users. You can now add other authorized users by clicking the Invite User button and entering their email addresses in the subsequent dialog. These users will receive application invitations which will grant them access to the application after they follow the link in the email.
If you have a small list of users you want to make your application available to, Shinyapps.io is relatively simple and helpful. However, these users have to sign up for an account themselves. Additionally, the only people who may access the app are those that you’ve explicitly invited, eliminating the option of sharing your app via a general username and password.
That’s it! In this article we compared methods of adding authentication to your Shiny app:
Shinymanager and shinyauthr are viable open-source packages which you need to incorporate into your application code. Shinyproxy and shinyapps.io are platforms that will deploy your Shiny app and offer authentication options, although they might require more complex set-up and configuration steps. Ploomber Cloud, however, secures and deploys your app in one step, with no additional code required. The username and password allow you to share your app to the right people (and only the right people) with minimal hassle.
Seamless deployment for data scientists and developers. Ploomber handles infrastructure so you focus on building. Secure and scalable—from personal projects to enterprise apps. Support for Streamlit, Dash, Docker, and AI-powered applications. Because life's too short for deployment headaches.

