


Streamlit has become one of the most popular methods to build and share data apps in pure Python. Thanks to its open-source framework, it has been adopted by thousands of data scientists, AI engineers, and software engineers looking to build projects quickly and cleanly. As users have built more and more apps, the need for important features like authentication has been more apparent.
Currently, Streamlit supports authentication through the streamlit-authenticator package. However it’s not perfect, so users have requested more robust native support for authentication in Streamlit. As a response, the team recently created proposed plans for expanded native authentication. While promising, we don’t know how long such features might take to implement, and they may not fit certain users' needs. Especially in a production environment, a more reliable and secure form of authentication is necessary.
Auth0, created by Okta, is the industry standard for reverse-proxy authentication. It is a simple, adaptable, yet powerful authentication and authorization platform. It takes care of user access, social login, logout/email verification, and user management so that developers can focus on their own applications. It is a low-friction option to provide secure and reliable authentication.
While Auth0 is the natural choice for developers to add production-grade authentication to their apps, Streamlit currently doesn’t provide an integration with Auth0. If users want to configure it, they will have to do it themselves. Thankfully, Ploomber Cloud can now do that for you.
When you deploy an app with Ploomber Cloud, you may also access Auth0 integration without any additional code on your end and with full-time 1-on-1 support. It takes a few simple steps, and Ploomber Cloud will protect your Streamlit app behind an in-house reverse proxy with Auth0.
Note: Auth0 integration is only available for customers in the Teams plan. If you’re interested in learning more, contact contact@ploomber.io
In this blog, we’ll show you the steps to add Auth0 to your Streamlit app via Ploomber Cloud.
If you haven’t done so yet, sign up for Ploomber Cloud. You’ll also need an API key to complete this tutorial. You also need an account with Auth0.
Once you’ve completed these steps, install Ploomber Cloud via the command-line interface. Open your terminal and run:
pip install ploomber-cloud --upgrade
If you already have a Streamlit app you would like to deploy, just make sure you have these two files:
app.py: the base file for your Streamlit app. You may have functionality in other .py files, but the root of your app must be named app.pyrequirements.txt: any dependencies for your app. They’ll be installed via pipIf you would like to use an example, you can get one easily with:
ploomber-cloud examples streamlit/app-with-auth0
Follow the steps to download the application files.
Now that you have your account and application files, simply navigate to the root of your app directory and run:
ploomber-cloud templates auth0
The Auth0 template requires your project to be initialized. If it hasn’t been initialized yet, you can initialize it on the spot. You should see something like this:
Project must be initialized to continue. Would you like to initialize? [y/N]: y
Initializing new project...
Inferred project type: 'your-project-type'
Is this correct? [y/N]: y
Your app 'project-name-1999' has been configured successfully!
To configure resources for this project, run 'ploomber-cloud resources' or to deploy with default configurations, run 'ploomber-cloud deploy'
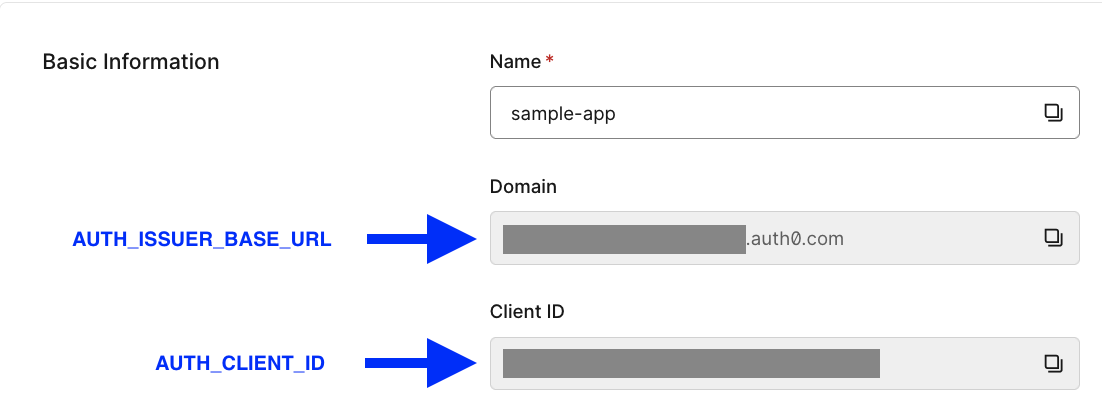
If your project has already been initialized, you won’t see this. You’ll then be prompted to enter three credentials from Auth0:
AUTH_CLIENT_IDAUTH_ISSUER_BASE_URLThese can be obtained from your Auth0 application page. If you haven’t yet created an application, log into Auth0 and create one. Then find the credentials here:
Once you’ve entered your credentials, you should see a confirmation like this:
Successfully configured auth0. To deploy, run 'ploomber-cloud deploy'
If you already created an .env file, these credentials have been be saved there (along with your other secrets). If you haven’t, one has been be created for you with the credentials saved.
Now, run ploomber-cloud deploy to deploy your project.
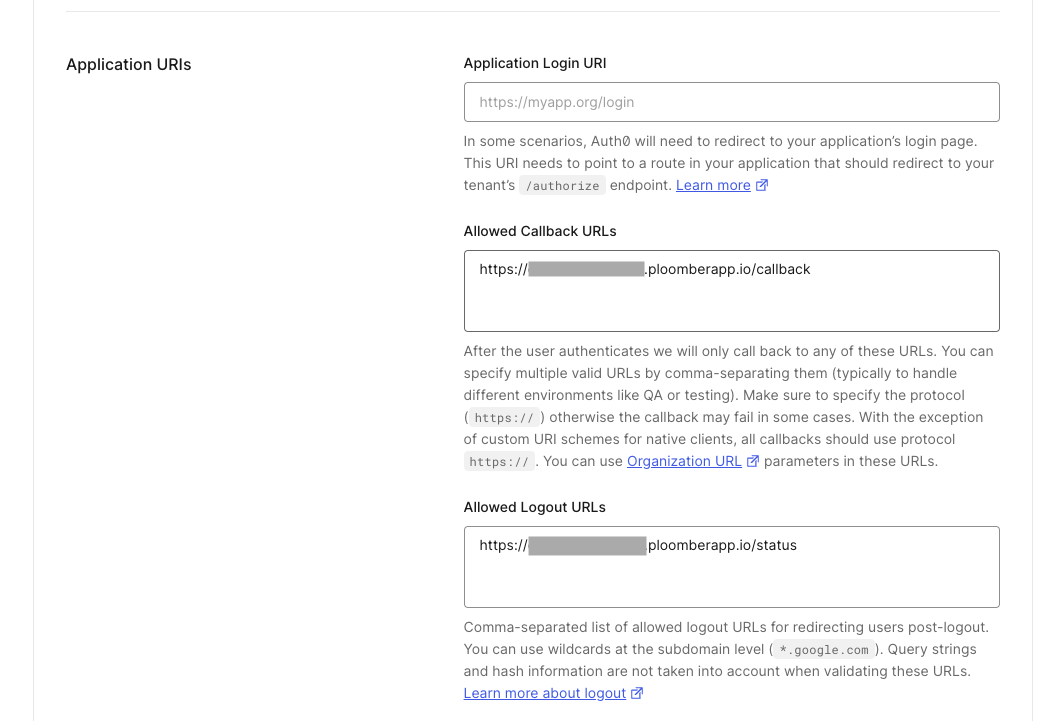
/callback and /status URLsAlmost done! We just need to set the /callback and /status URLs for your Auth0 app. Navigate to your Ploomber project’s application page and copy the application URL. It should look like https://application-name-1999.ploomber.app.
Now, go back to the Auth0 application page and scroll down to Application URIs. Set these values:
https://application-name-1999.ploomber.app/callbackhttps://application-name-1999.ploomber.app/statusIt should look like this:
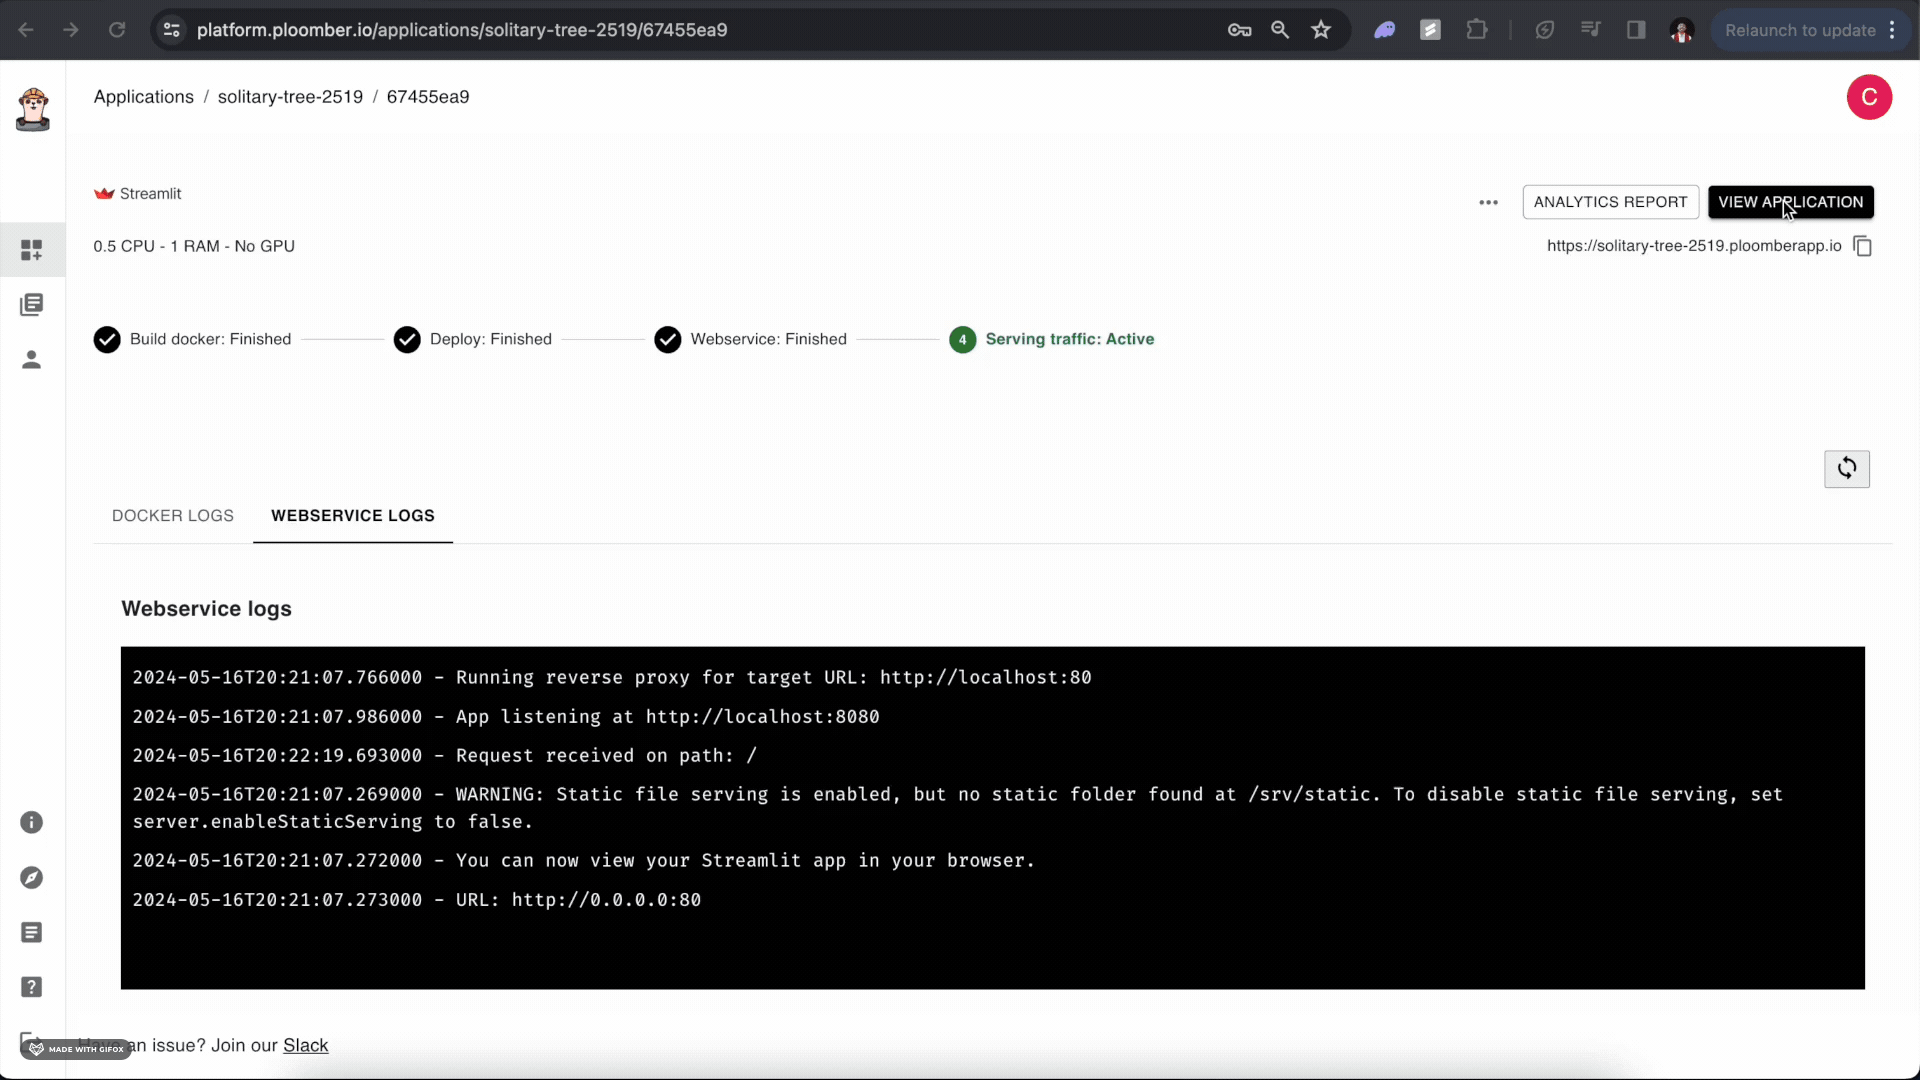
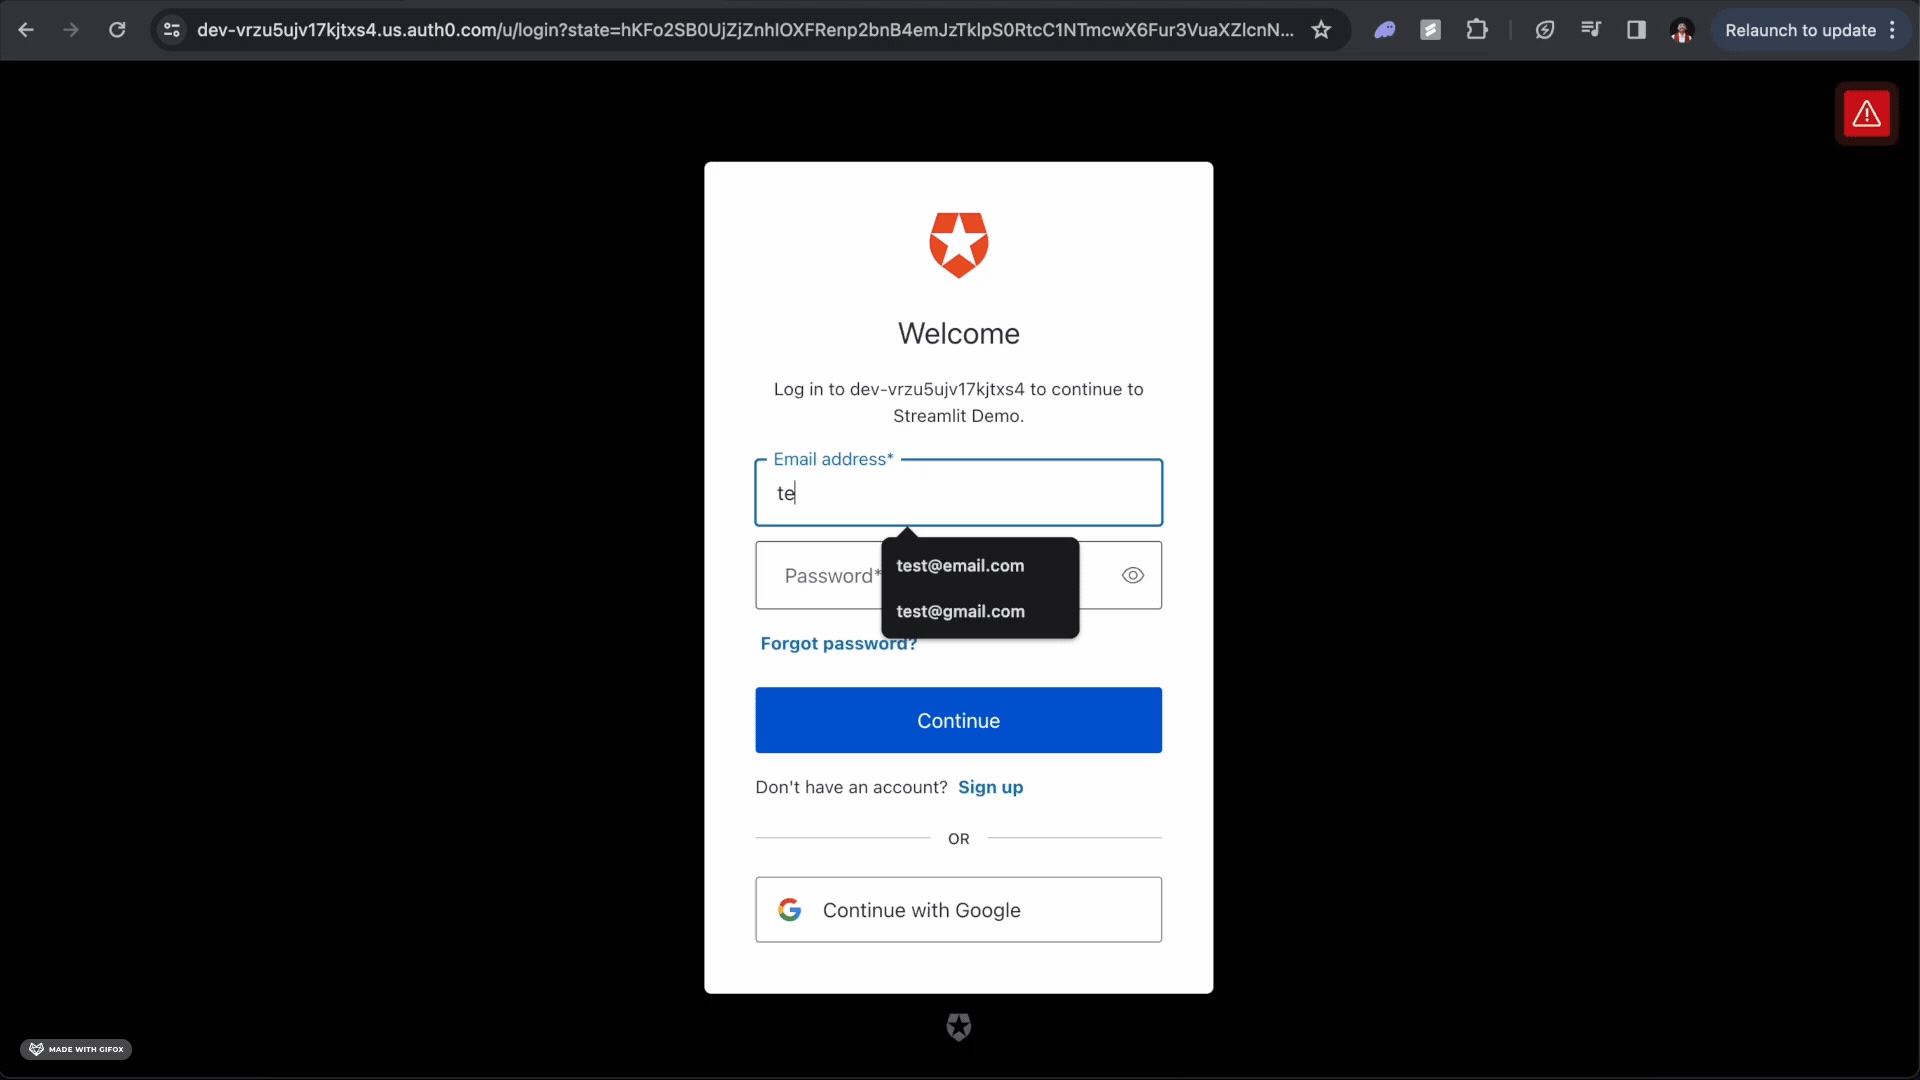
You’re all set! Once your application has finished deploying, click View Application. You should be met with Auth0 authentication:
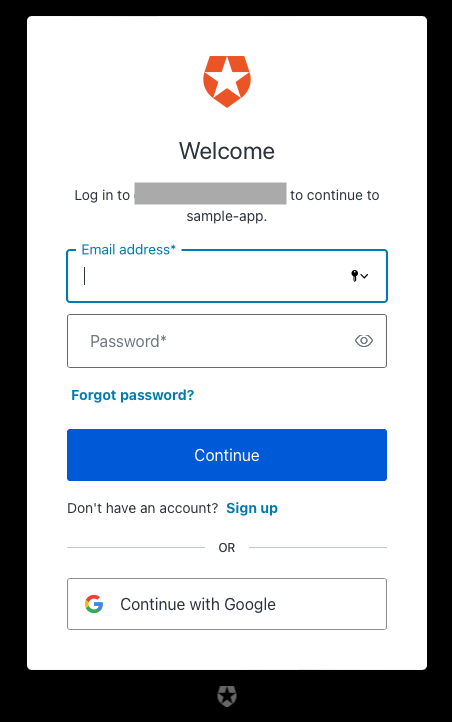
Simply sign up and then login and you’ll be re-directed to your application. Overall, the application sign up flow will look like this:
Once you’re signed up, you can login and logout like so:
To know which user logged in, you can read the following headers:
X-Auth-Name: returns the user’s emailX-Auth-Sub: returns the user ID (as identified by Auth0)To log out a user, you can create a link to the /logout endpoint.
import streamlit as st

st.markdown("[Logout](/logout)")
The Streamlit example code showcases all of this functionality.
For more details and instruction on Auth0 integration, see the Ploomber Cloud docs.
Seamless deployment for data scientists and developers. Ploomber handles infrastructure so you focus on building. Secure and scalable—from personal projects to enterprise apps. Support for Streamlit, Dash, Docker, and AI-powered applications. Because life's too short for deployment headaches.

