


In this tutorial we will look at two approaches of deploying Streamlit applications from GitHub. Here are some benefits of deploying from GitHub:
First, you need to create an account on Ploomber Cloud and get an API Key. Next, set the API Key as a GitHub secret.
Create a virtual environment and install the CLI by running:
pip install --upgrade ploomber-cloud
We will download a basic Streamlit app by running the below command:
ploomber-cloud examples streamlit/basic-app
You should find a basic-app directory downloaded to the desired location. Now we will cd into this directory and create a GitHub repository from this project. First, initialize the project by running:
ploomber-cloud init
This should create a ploomber-cloud.json file containing the id and type fields. Once deployed the application will be created with this id.
Next, initialize the project as a GitHub repository:
git init -b main
Add and commit all the files in your new local repository:
git add .
git commit -m "First commit"
Add the local repository as a public repository to GitHub by running gh repo create and following the instructions.
Now we will download the workflow template for deploying the project and save it to the path .github/workflows in the project root directory.
Add this directory by running:
git add .github
Once the workflow has been added you would be able to track the deployment in the GitHub Actions logs:
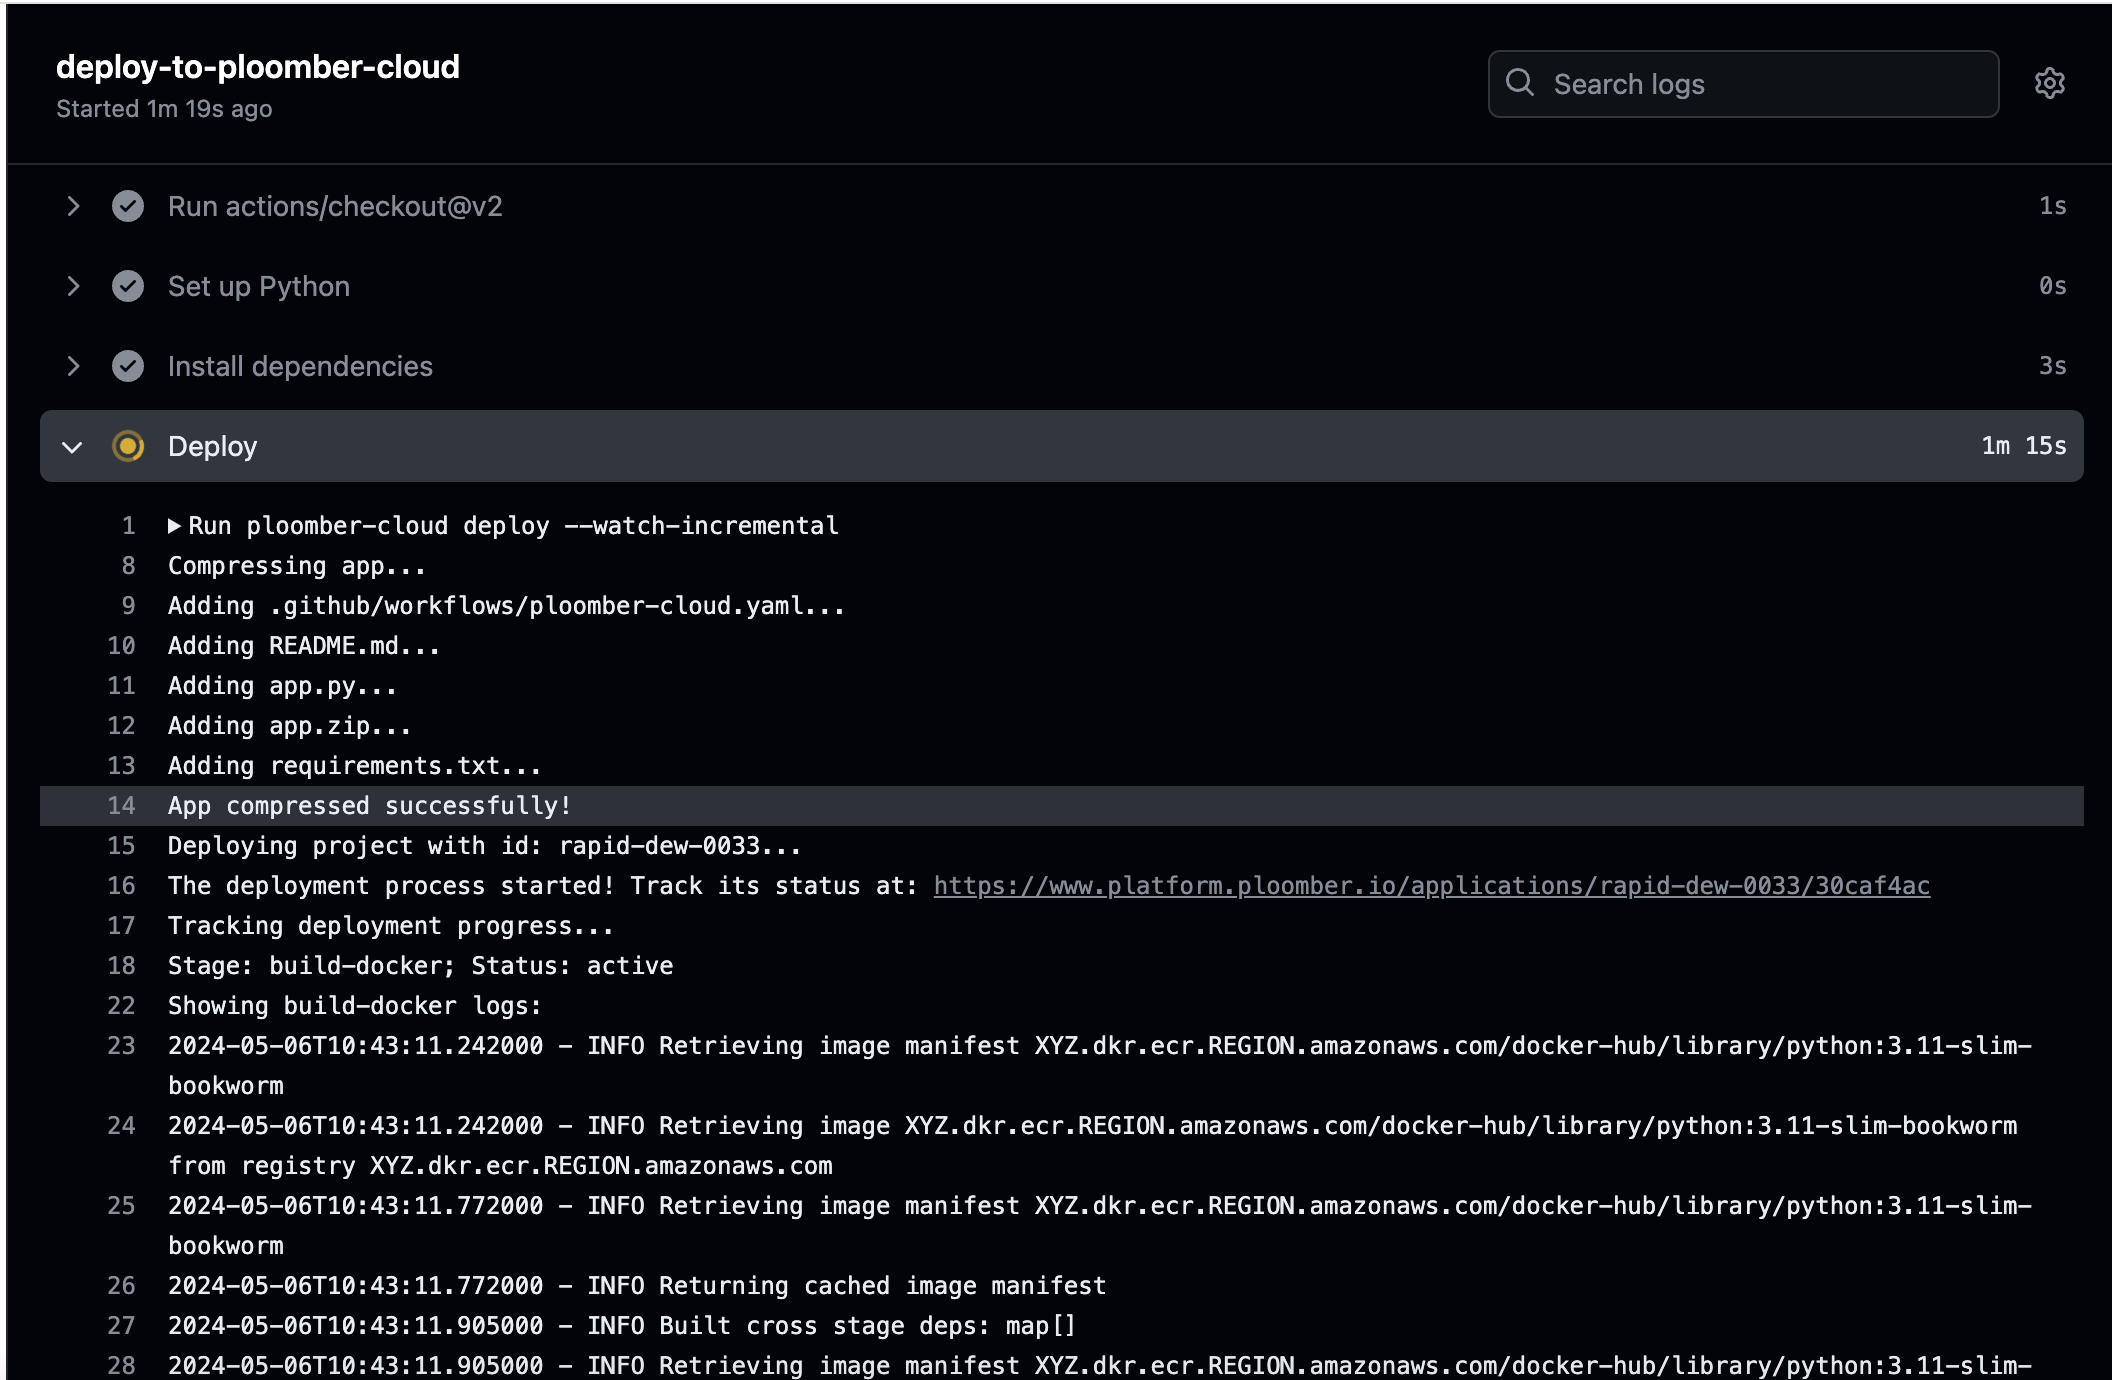
To learn more about GitHub deployments refer to the documentation.
First, set up an account on Streamlit Community Cloud.
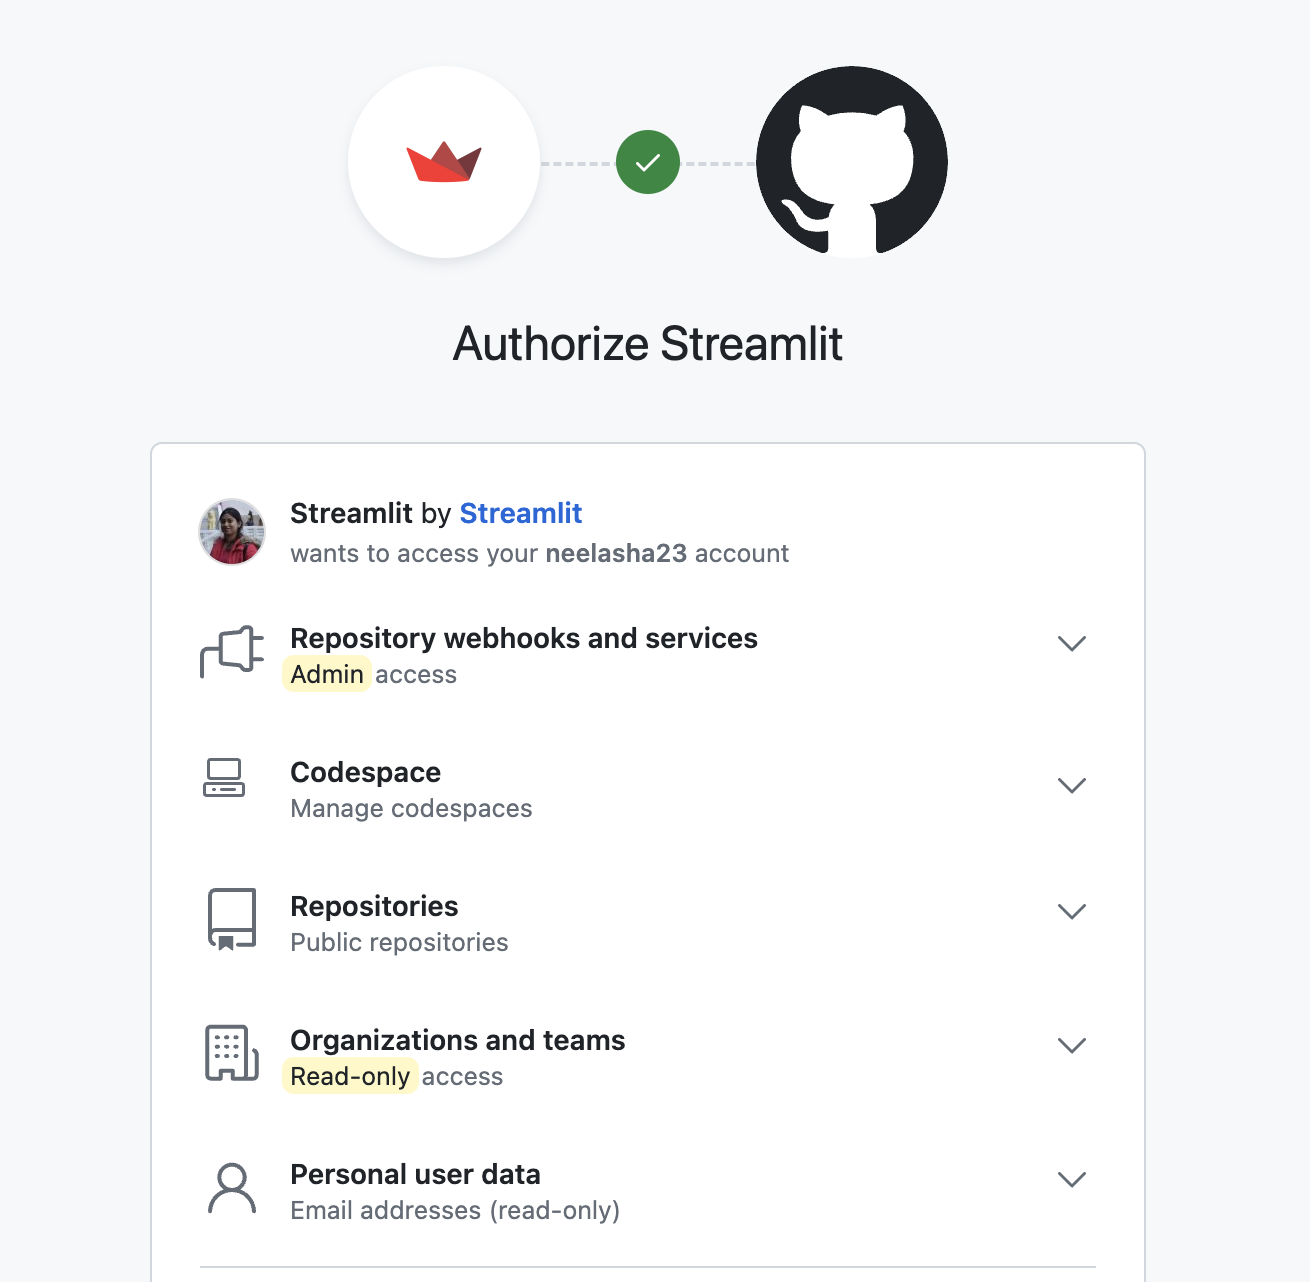
You will need to enter your GitHub credentials and click on Authorize Streamlit to allow Streamlit to access your GitHub account:
Now navigate to Settings -> Linked Accounts and click on Sign in with with GitHub:
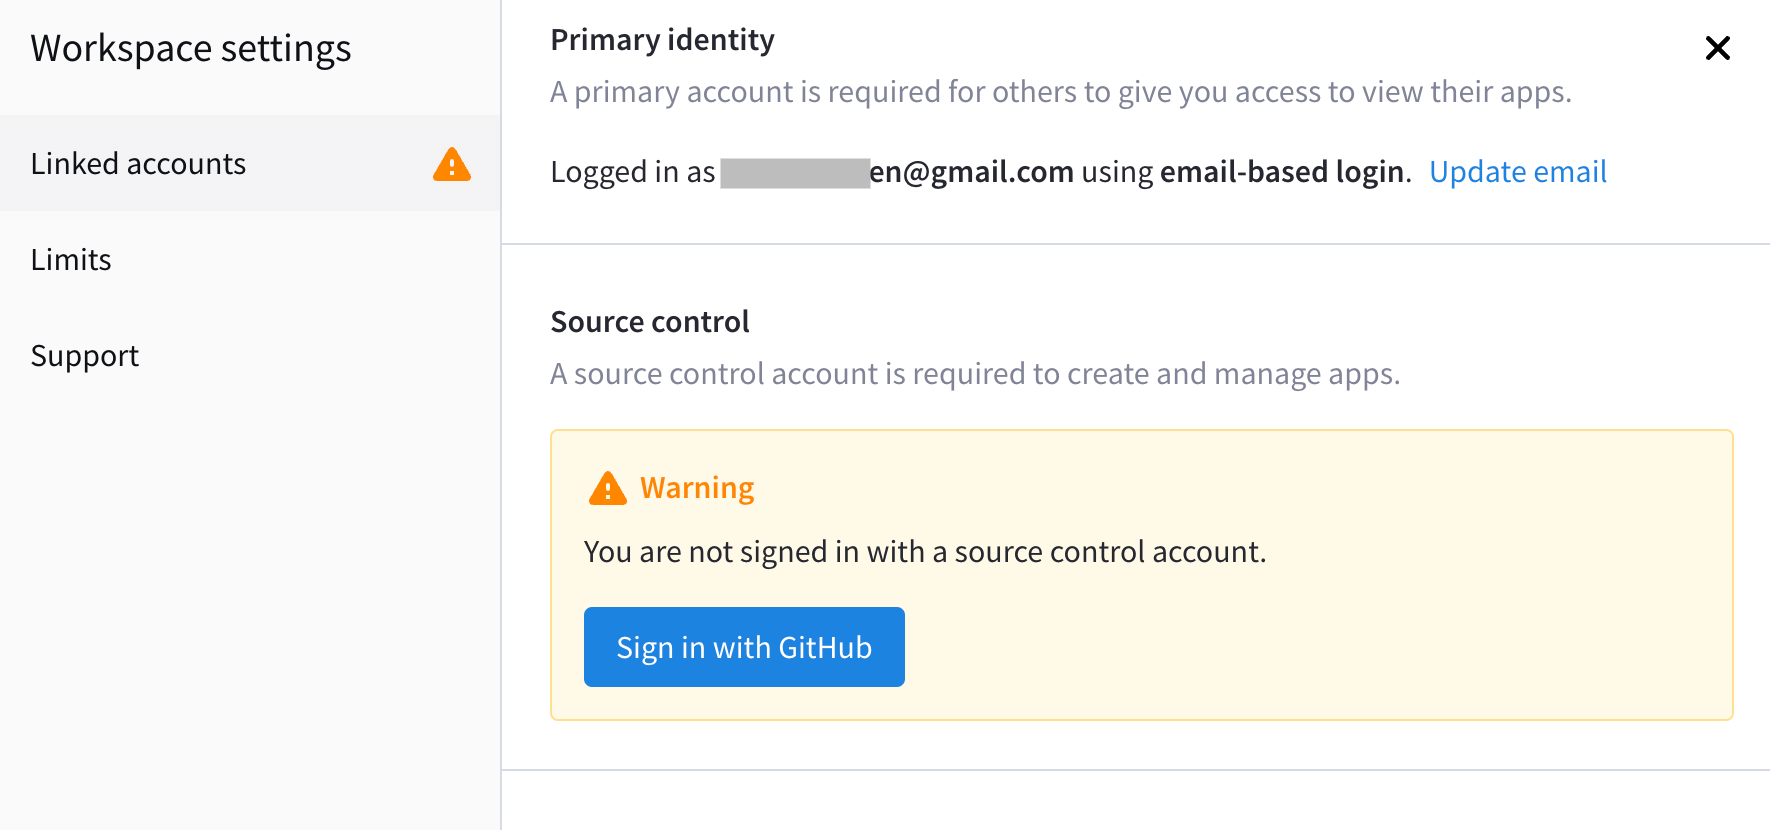
Once done, it should display Logged in as <username> using GitHub. This would allow Community Cloud to deploy your Streamlit apps from your GitHub repositories.
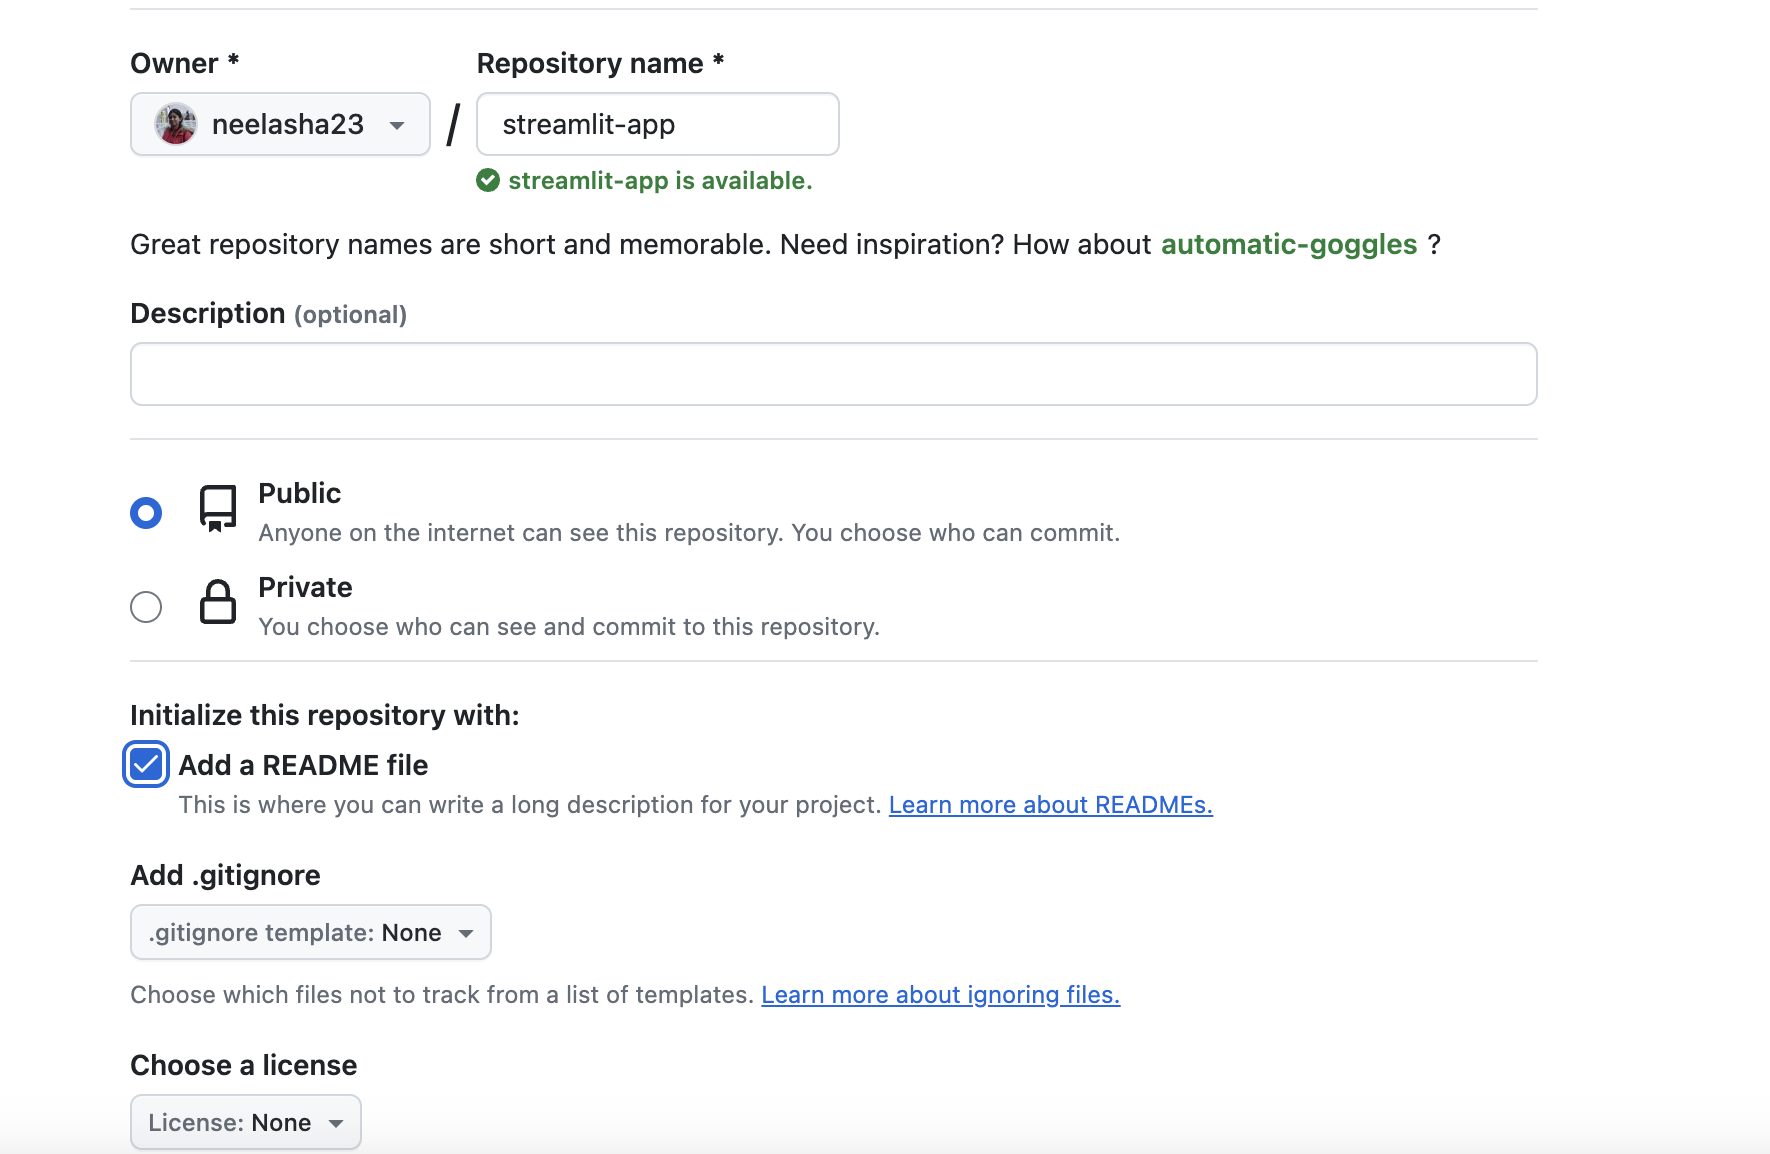
Now, create a new repository on GitHub and name it streamlit-app:
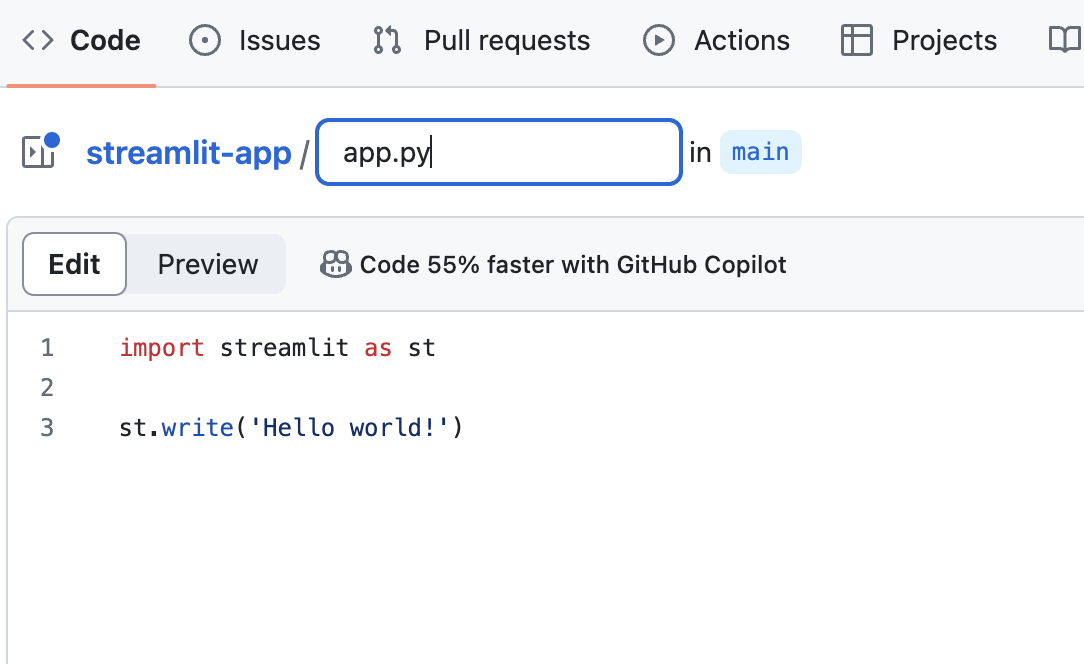
Create a sample file named app.py and commit the file to the repo:
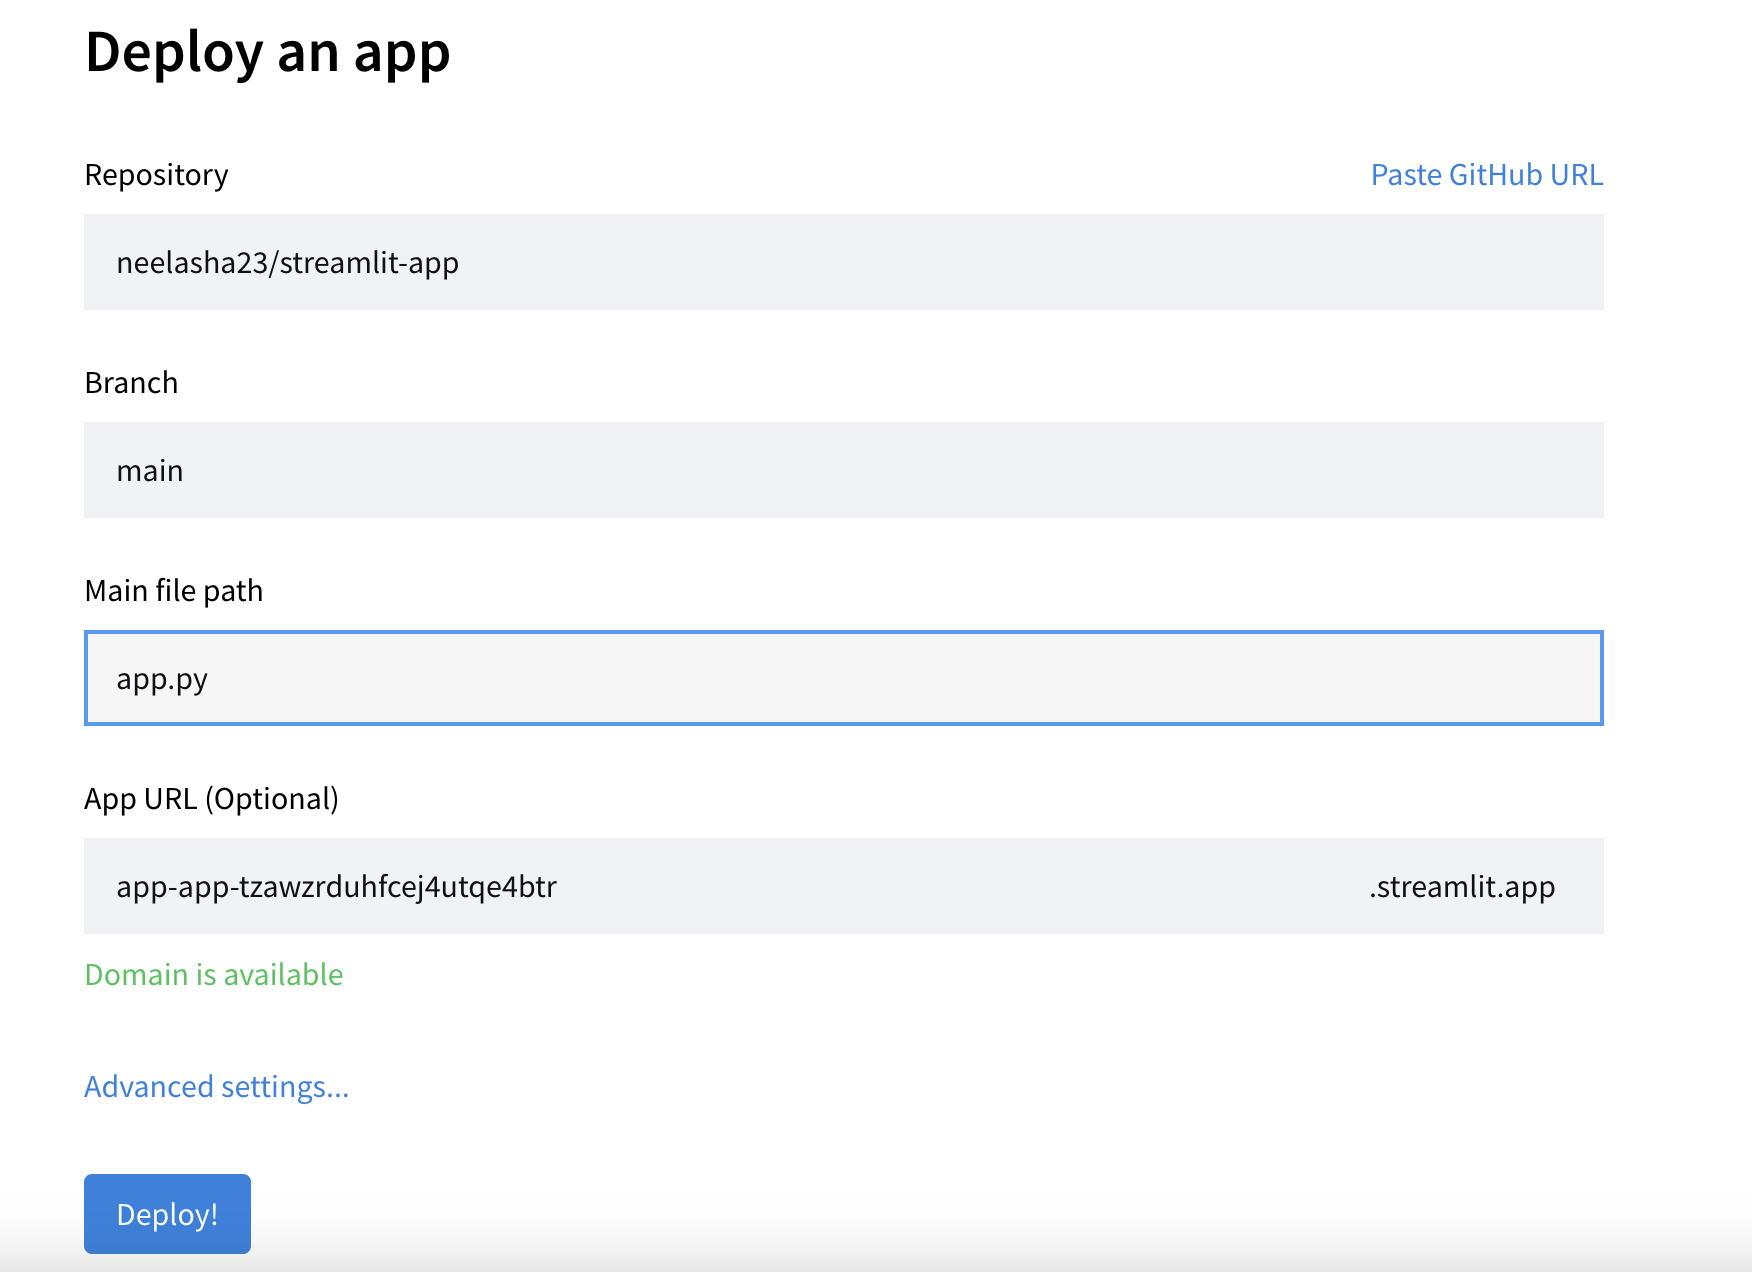
To deploy your app, go back to your Community Cloud account and click on New app. Mention the repository, branch from which to deploy, and the main server file and click on Deploy:
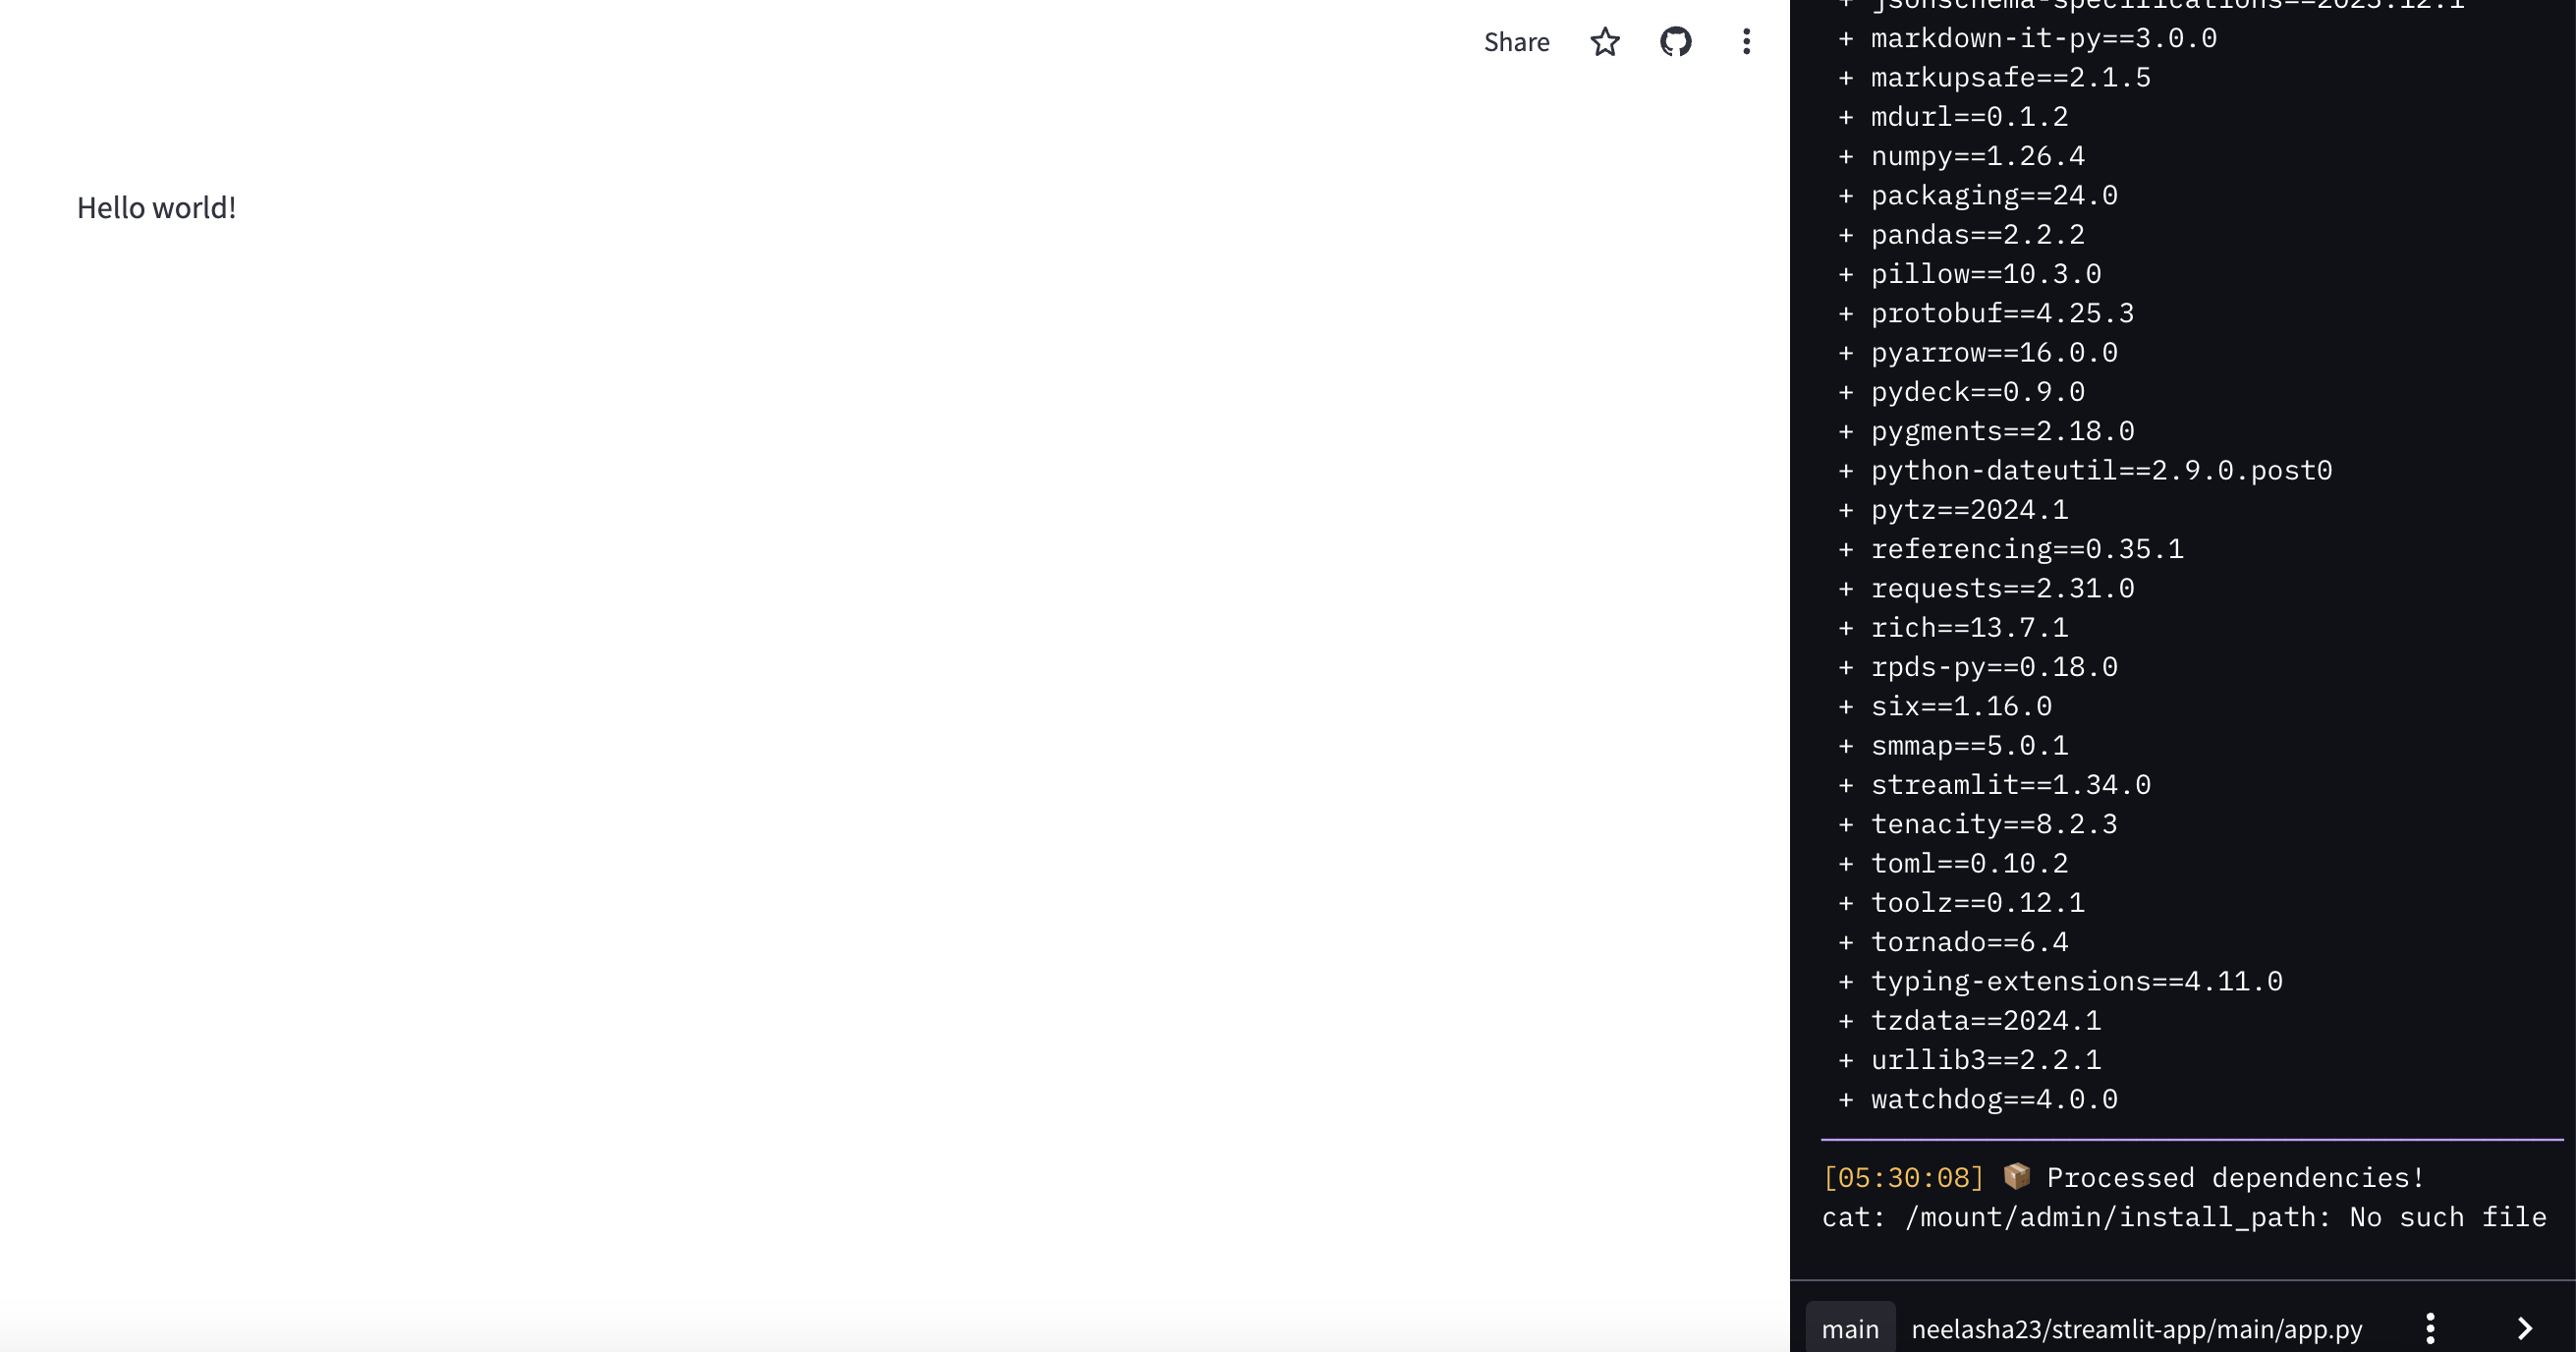
This should get your application up and running on Streamlit cloud:
Whenever you push any changes to the app.py you should see the changes reflected in your application.
In this blog post, we learnt techniques for deploying Streamlit applications from GitHub. To learn more about deploying Streamlit applications using Ploomber Cloud check this link.
Seamless deployment for data scientists and developers. Ploomber handles infrastructure so you focus on building. Secure and scalable—from personal projects to enterprise apps. Support for Streamlit, Dash, Docker, and AI-powered applications. Because life's too short for deployment headaches.

