


In this tutorial, I will show you how to use thebe and JupyterLab to create a static website that can run Python code from a static HTML website.
The main use case is to enable runnable technical documentation, so users can run examples and experiment with libraries without installing anything.
thebethebe is a JavaScript library that allows
you to connect to a Jupyter kernel (a process running a Python REPL) from JavaScript
and execute code. Here’s a demo:
Setting up thebe is simple, you only need to set a few parameters, such as where your
Jupyter server is:
<script type="text/x-thebe-config">
{
    requestKernel: true,
    kernelOptions: {
    name: "python3",
    kernelName: "python3",
    path: ".",
        serverSettings: {
            "baseUrl": "https://jupyter.example.com",
            "token": "somesecretoken"
        }
    },
}
</script>
And then add the code snippets:
<pre data-executable="true" data-language="python">print("Hello!")</pre>

<pre data-executable="true" data-language="python">21 + 21</pre>
Let’s now see how to deploy JupyterLab so we can connect it to thebe. To simplify
things, I’ve written a Dockerfile (note that this turns off any security mechanisms
and should only be used for demo purposes!):
FROM python:3.11

RUN pip install jupyterlab --no-cache-dir

# you can pip install any packages you need

COPY jupyter_server_config.py /root/.jupyter/jupyter_server_config.py

CMD ["jupyter", "lab", "--ip=0.0.0.0", "--no-browser",  "--port=80", "-y", "--allow-root"]
The jupyter_server_config.py looks like this:
c = get_config()
c.ServerApp.ip = "0.0.0.0"
c.ServerApp.token = ""
c.ServerApp.allow_origin = "*"
c.ServerApp.disable_check_xsrf = True
Once deployed, update your thebe configuration (token is empty because we disabled it):
<script type="text/x-thebe-config">
{
    requestKernel: true,
    kernelOptions: {
    name: "python3",
    kernelName: "python3",
    path: ".",
        serverSettings: {
            "baseUrl": "https://jupyter.example.com",
            "token": ""
        }
    },
}
</script>
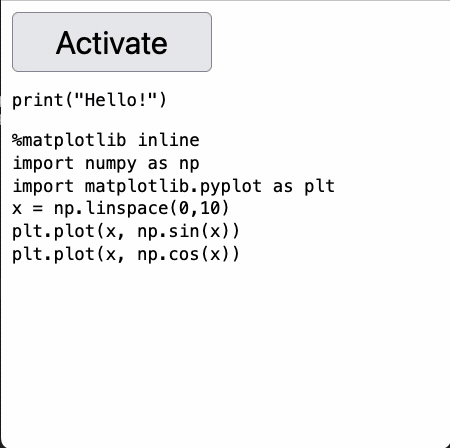
Now we need to deploy a static website so we can try it out; here’s a complete HTML file you can use, change the Jupyter server location:
<!DOCTYPE html>
<html lang="en">

<head>
    <script type="text/x-thebe-config">
        {
          requestKernel: true,
          kernelOptions: {
            name: "python3",
            kernelName: "python3",
            path: ".",
             serverSettings: {
                  "baseUrl": "https://jupyter.example.com",
                  "token": ""
                }
          },
        }
      </script>
    <script src="https://unpkg.com/thebe@latest/lib/index.js"></script>
    <meta charset="UTF-8">
    <meta name="viewport" content="width=device-width, initial-scale=1.0">
    <title>Interactive examples</title>
</head>

<body>
    <button id="activateButton" style="width: 150px; height: 45px; font-size: 1.5em;">Activate</button>
    <script>
        var bootstrapThebe = function () {
            thebelab.bootstrap();
        }

        document.querySelector("#activateButton").addEventListener('click', bootstrapThebe)
    </script>

    <pre data-executable="true" data-language="python">print("Hello!")</pre>
    <pre data-executable="true" data-language="python">21 + 1</pre>
</body>
</html>
You can deploy this in any platform that supports deploying containers. If you want to keep things simple, create an account in Ploomber Cloud and deploy it!
Seamless deployment for data scientists and developers. Ploomber handles infrastructure so you focus on building. Secure and scalable—from personal projects to enterprise apps. Support for Streamlit, Dash, Docker, and AI-powered applications. Because life's too short for deployment headaches.

