Voilà is a popular library that lets you transform a Jupyter Notebook into an interactive dashboard, enabling you to share your work with others. Dashboards often contain sensitive or confidential information, so authentication ensures that only authorized users can access this data. Authenticated users can have personalized dashboards tailored to their specific roles or needs.
In this tutorial, we’ll look at some methods of securing your Voilà dashboards.
Ploomber Cloud
Password Protection
Securing your applications with Ploomber Cloud is as easy as a single click and entering your username and password. The setup process is effortless, thus making it a suitable choice for developers
of different skill levels. Ensuring security is crucial for any web application, and Ploomber Cloud prioritizes this aspect by encrypting all credentials. This encryption process transforms your username and password into a highly complex format, making it extremely challenging for unauthorized individuals to decipher. Whether you’re managing sensitive data or simply aiming to limit access to specific users, Ploomber Cloud’s encryption ensures the safety of your authentication details.
To set the credentials for your Voilà application, turn on the Enable password protection toggle. It should display your login credentials by default. But you can change it to the desired Username and Password.

Once you click on VIEW APPLICATION after deployment completion, you’ll be prompted for the username and password. Enter your credentials set in the previous step for accessing the application.

The authentication process mentioned here is framework-agnostic and can be implemented in any type of application, not limited to just Voilà.
Auth0 Authentication
Auth0 is a platform that allows developers to implement secure login processes and control access to applications. Ploomber Cloud enables you to easily secure your Voilà applications using auth0.
Let’s look at a sample application that contains a voila.py configuration file and an app.ipynb app file. We define a prelaunch-hook function in the voila.py file that reads the auth0 username X-Auth-Name from the request headers. Additionally, this function also injects a notebook cell in the app file for displaying the username:
import nbformat


def hook_function(req, notebook, cwd):
   headers = req.request.headers
   user = headers.get('X-Auth-Name', 'Anonymous')
   set_user_cell = f"user = '{user}'\n"
   print_user_cell = f"print(f\"Welcome {user}\")"
   user_cell = nbformat.v4.new_code_cell(source=f"{set_user_cell}{print_user_cell}")
   notebook.cells.insert(0, user_cell)
   return notebook


c.Voila.prelaunch_hook = hook_function
Here is the notebook for displaying a simple bar chart.
To deploy this application on Ploomber Cloud, you first need to install the CLI:
pip install ploomber-cloud
Then, you can run the below command to download the sample application that demonstrates auth0 integration:
ploomber-cloud examples voila/app-with-auth0
cd into the app-with-auth0 directory and initialize the project. This should create a ploomber-cloud.json file with the project id information.
ploomber-cloud init
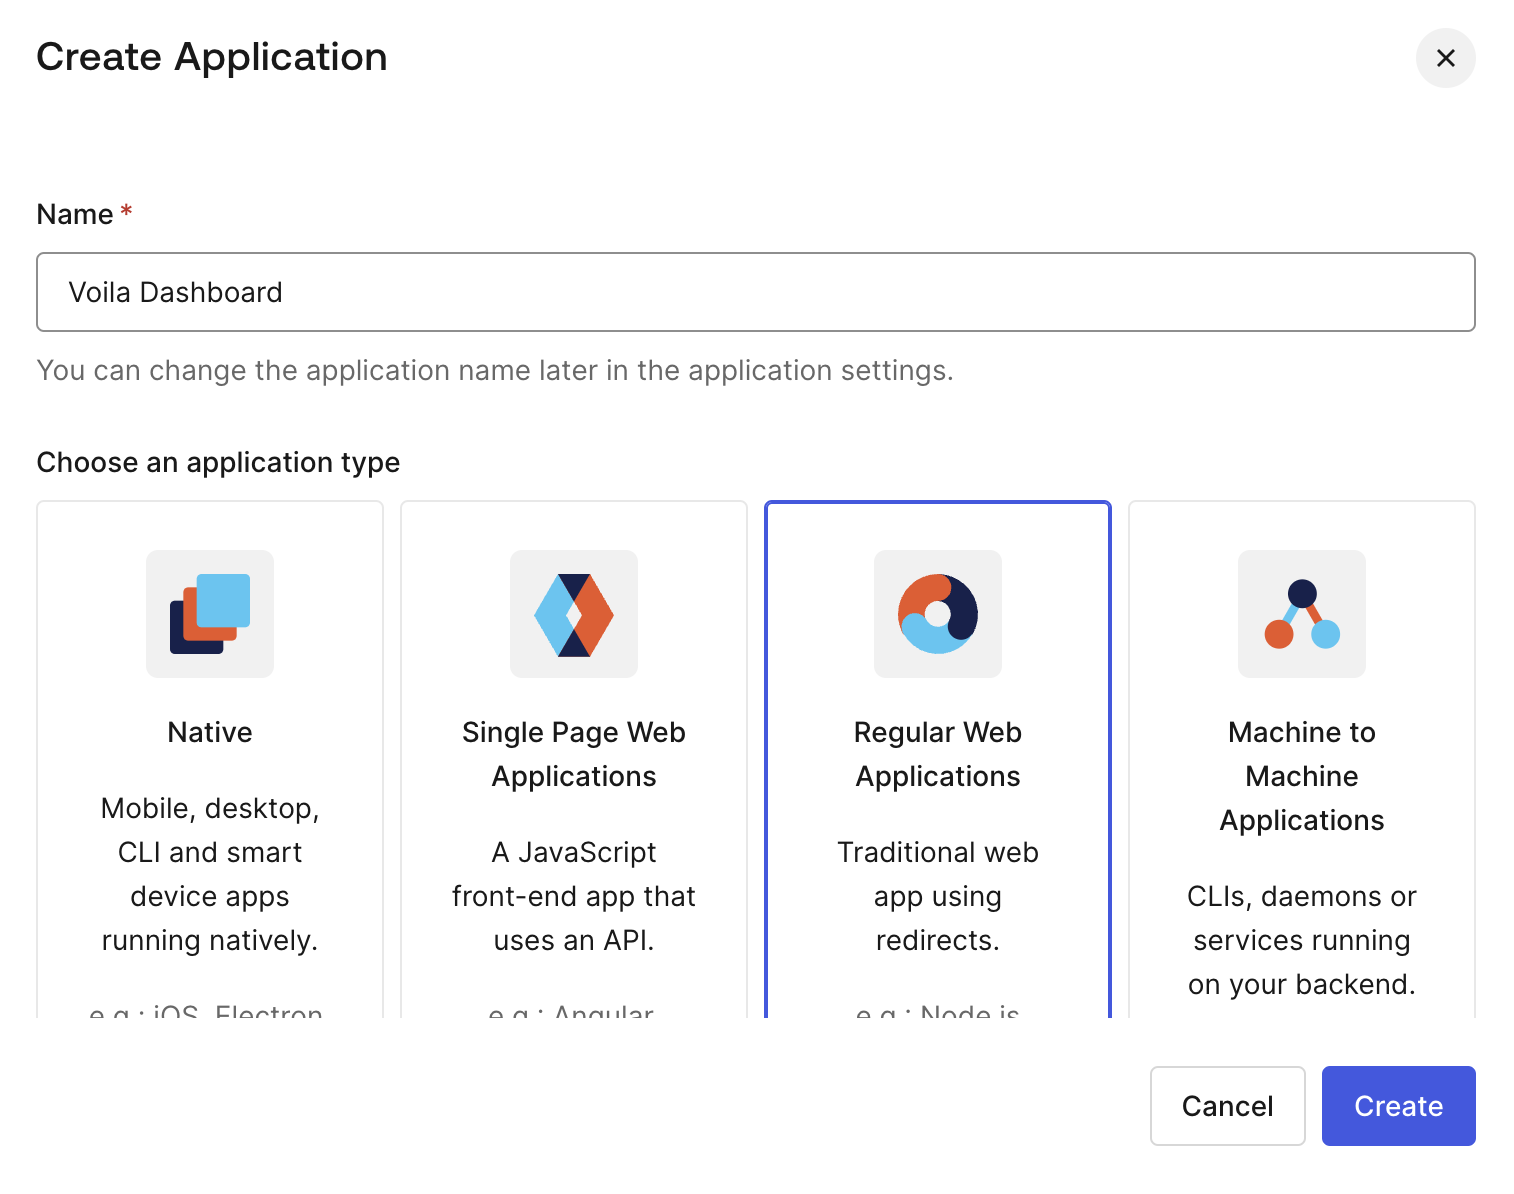
To set up auth0 authentication for the project we need to create a new application in the Auth0 account:
Once done, note down the values of Client ID and Domain in the application Settings page.
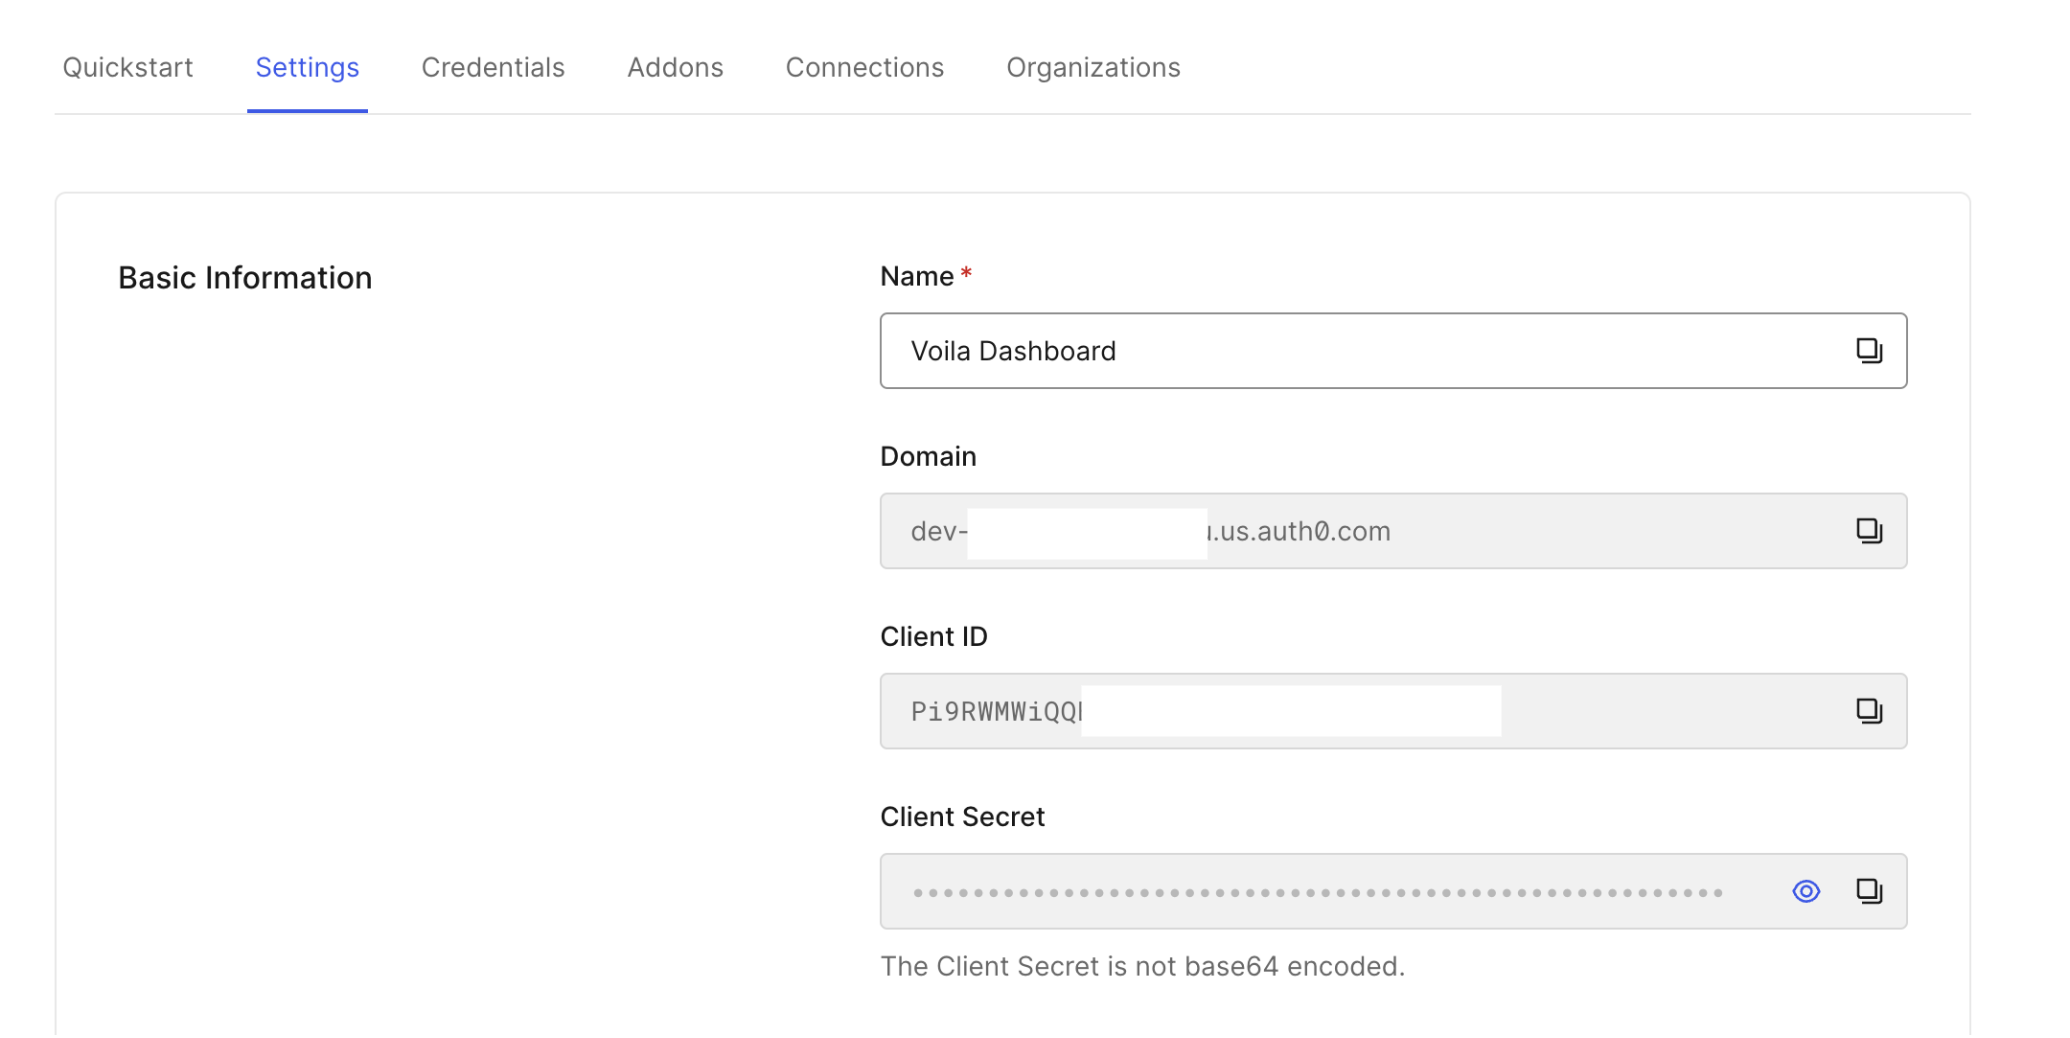
Next, run ploomber-cloud templates auth0 in the project root folder. You need to set Client ID and Domain as the AUTH_CLIENT_ID and AUTH_ISSUER_BASE_URL respectively:
ploomber-cloud templates auth0
Enter the value for AUTH_CLIENT_ID: Pi9RW***********************MQAy
Enter the value for AUTH_ISSUER_BASE_URL: dev-****************.us.auth0.com
Successfully configured auth0. To deploy, run 'ploomber-cloud deploy'
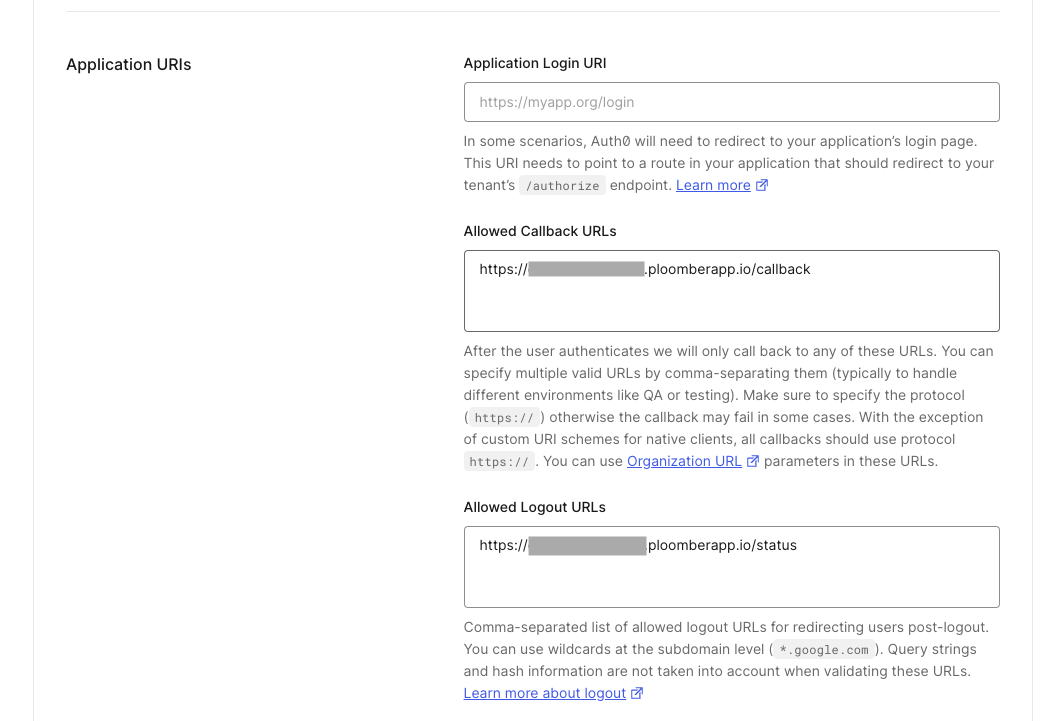
Once the auth0 setup is done you should find a .env file with the credentials entered in the previous step. To deploy the project run ploomber-cloud deploy. The application ID will be of the format https://application-name-1999.ploomber.app. Copy this URL and set callback URLs as follows:
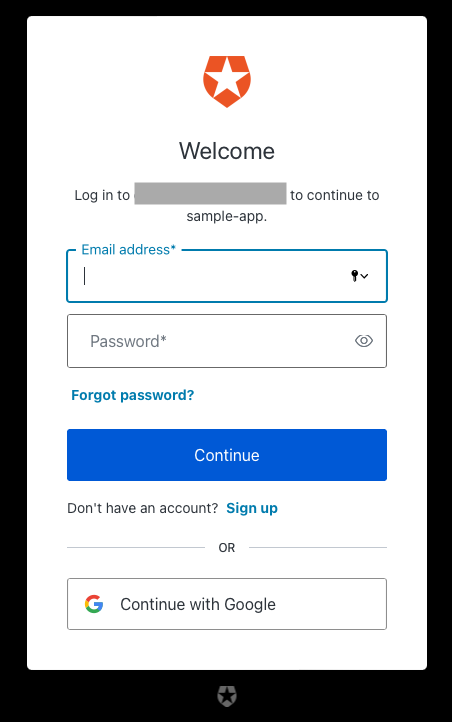
Once the application deployment is complete you can click on the VIEW APPLICATION button and you should see the login page:
To learn more about auth0 integration check out the documentation.
Token Authentication
Voilà supports token authentication by using jupyter server 2. To enable token authentication, generate a random token using the secrets module:
python -c 'from secrets import token_hex; print(token_hex(16))'
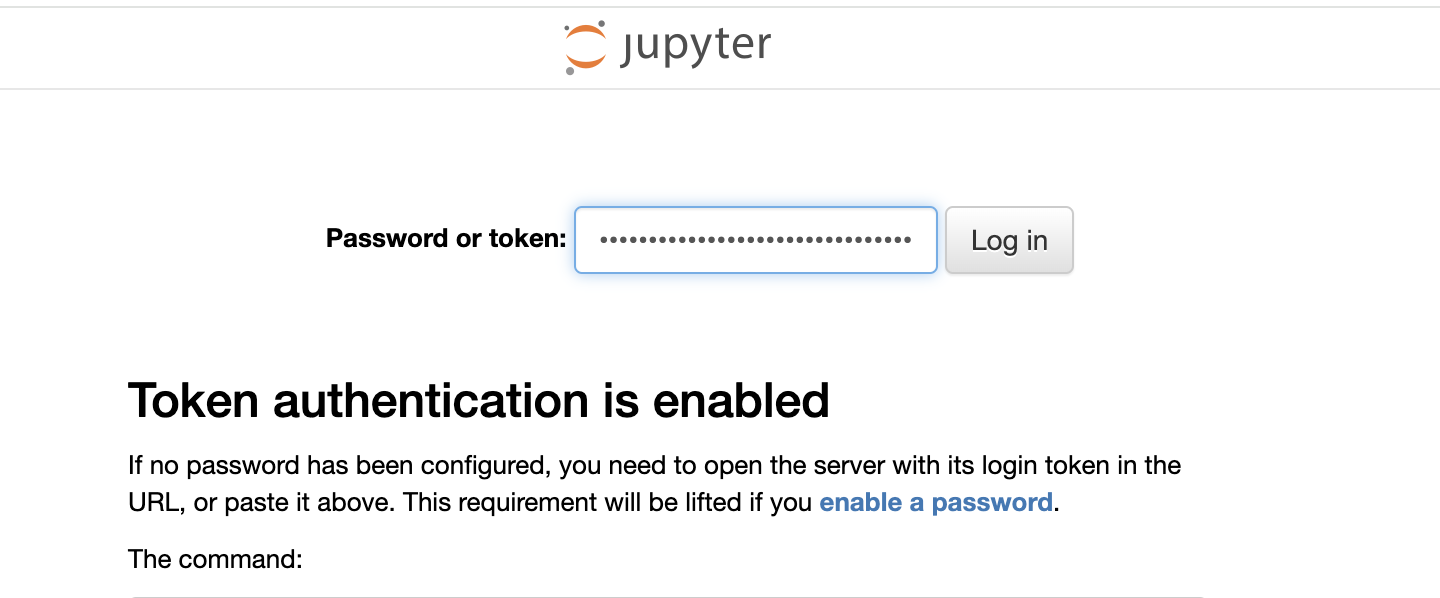
Now run the Voilà app using this token. It should display a login page:
voila --token=my-secret-token notebook.ipynb
Enter my-secret-token to login:
Note that you can also use any password of your choice to set up token authentication.
Click here to learn more about token authentication.


